Including a webhook
Last updated:
Use webhooks to send the data from your submissions seamlessly and in real time to third-party systems, and to trigger actions.
This lets you automate processes, and ensure quick and easy communication between your applications.
One example of how to use this is to automatically remove subscribers from your email list when they unsubscribe from your newsletter. You can also set up a webhook so that an invoice is sent out automatically when someone uses your website to book their slot in a seminar.
How to include a webhook
- In the Forms area, click the name of the form for which you want to set up a webhook action.
The form is opened in the Editor. - In the top menu, go to Settings and then Actions in the left-hand navigation area.
- Click New webhook action and then set up the action as follows:
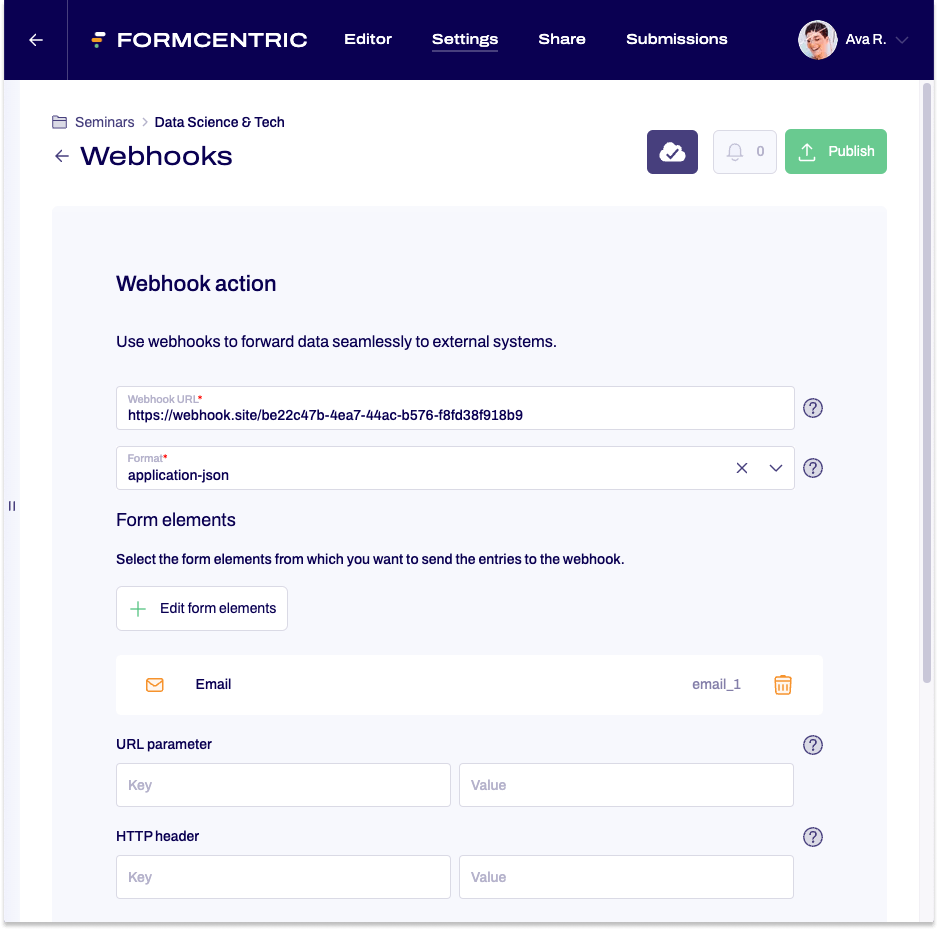
Property |
Description |
||
| Webhook URL | Enter the endpoint URL for the application to which the data should be sent. | ||
| Format | Select the format in which the data should be sent to the application. | ||
| Select form elements | Select the form elements whose input should be sent to the webhook. | ||
| URL parameter | Add query parameters in order to send additional information to the webhook URL. URL parameters consist of a key-value pair. If you enter parameters, these will be added to the end of the webhook URL, after the question mark ‘?’. |
||
| HTTP header | Fügen Sie HTTP-Header hinzu, um zusätzliche Informationen an die Webhook zu senden. HTTP-Header bestehen aus einem Schlüssel-Wert-Paar. Im Gegensatz zu URL-Parametern, die direkt in der URL enthalten sind, werden Header innerhalb der HTTP-Anfrage gesendet. Dies ermöglicht eine flexiblere und umfassendere Kommunikation mit dem Webhook-Server. |
||
Linking a webhook action to conditions
You can specify conditions that prevent the execution of the webhook action.
- To do this, go to the If... section and select the relevant form elements, using Operator and Value to specify the rule that must be fulfilled to prevent the execution of the action.
- In the Then... section, select the Do not execute webhook action option to specify that the action will not be executed when the defined conditions are met.
You can use the same approach to specify conditions that will trigger the execution of the webhook action.
To do this, go to the Then... section and pick the Execute webhook action.


