Specifying permissions for submissions
You can use access rights to prevent certain users from accessing or working with submissions in various ways. To do this, you first set up a group in the admin centre. You then edit this group and add the users whose access you want to restrict. As a last step, you modify the rights for this group. All of the members of this group are then automatically affected by the restriction.
The following sections explain how to complete the steps given above.
Creating groups and adding members
The first step is to create your group and add group members. These members will be the users whose access to submissions you want to restrict. You can add more members to this group whenever you want to.
- Click your profile icon at the top right of the screen and then click Admin centre.
- Click Groups in the left-hand navigation area and then New group at the top right.
A popup window is displayed. - Enter a name for the group and click Create group.
The newly created group opens. - Now select members for your group by clicking the names of the user accounts in the drop-down list that is shown.
Specifying permissions for submissions
In the last step, you created a group and added members to it. The next step is to specify the permissions for your submissions. You have various options here.
For example, you could specify that this group is not allowed to view any submissions. Or you could set up your group so that its members can view submissions but cannot export or delete them. You can also set these restrictions individually for the submissions from all your forms or only for the submissions from specific forms.
- Open the group for which you want to specify access to submissions.
- Click Assign permissions.
A popup window is displayed. - In the Assign permissions section, specify whether or not the group should have permissions for the form submissions.
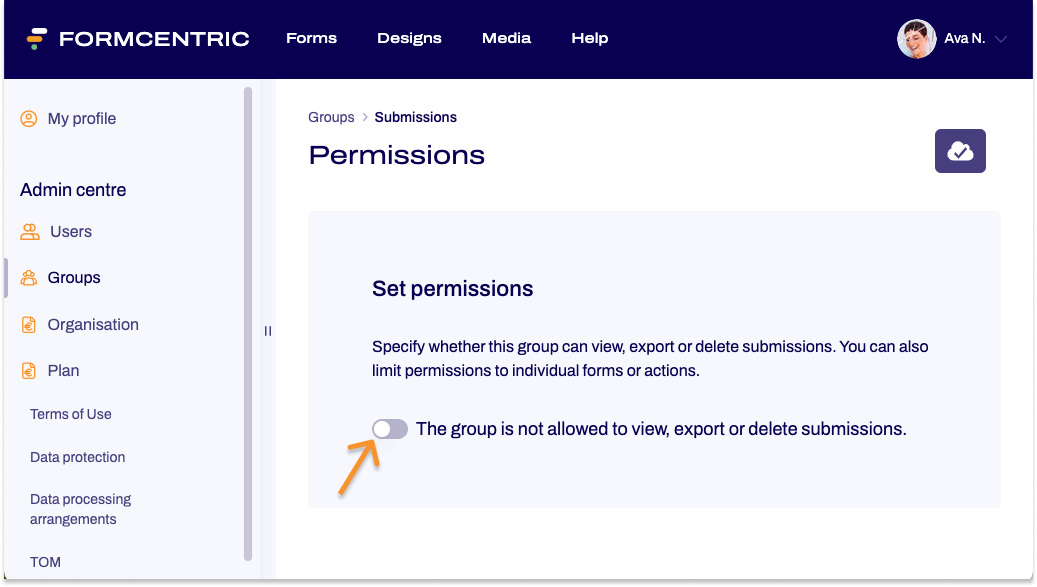
No permissions
Move this slider to the left if your group should not have any permissions for submissions. No further steps are then necessary. The group has no access to submissions.
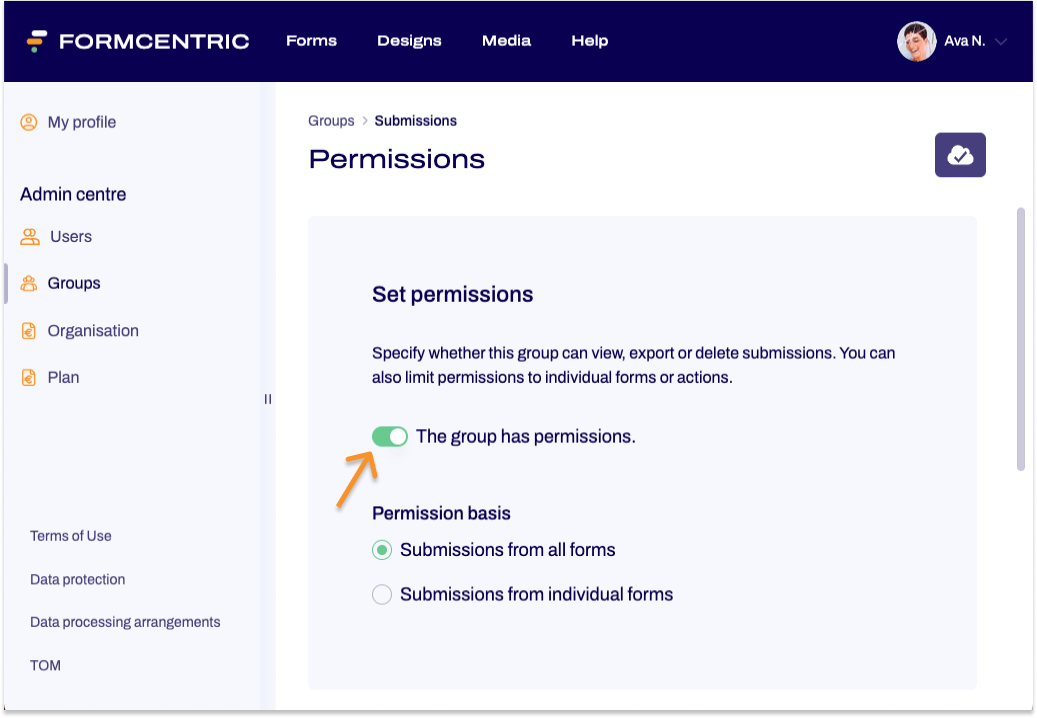
Set permissions
Move this slider to the right if your group should have permissions for submissions. You now set the basis for the permissions, i.e. whether the group has permissions for all submissions or only submissions from individual forms. Read on to find out how to do this.
Setting permissions for submissions from all forms
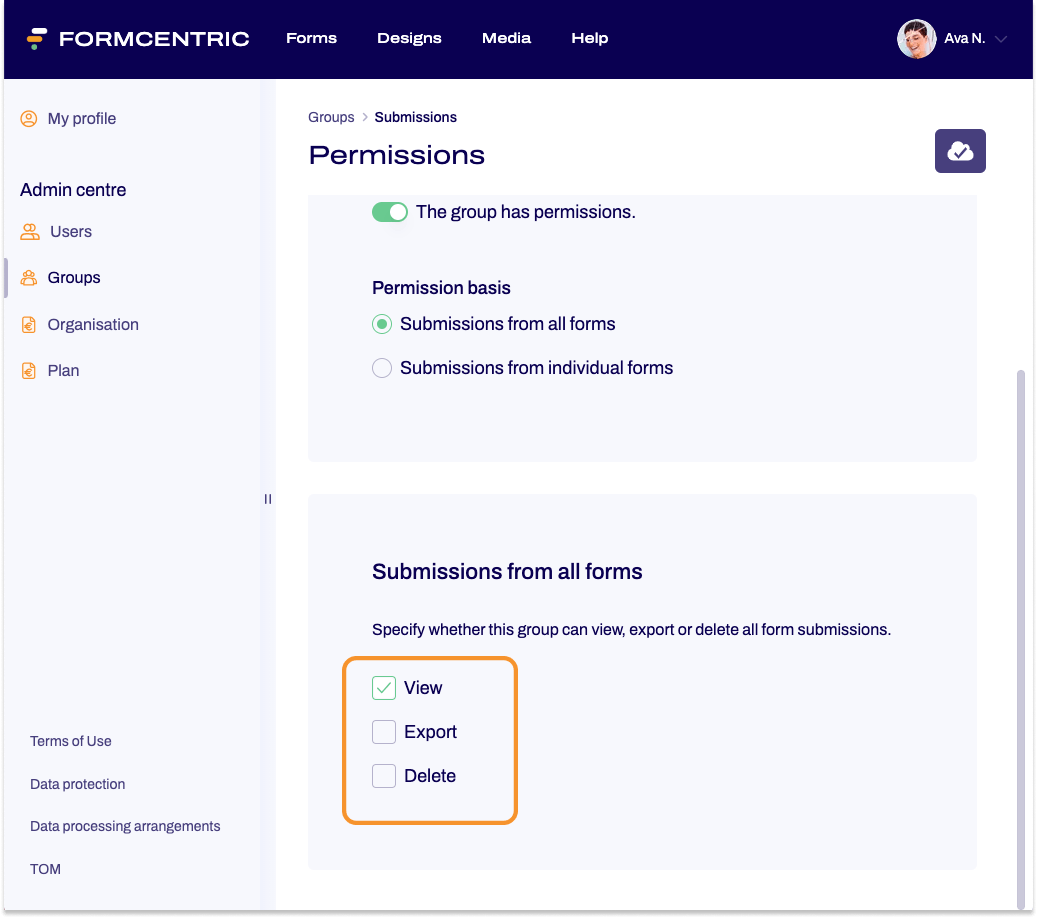
If you pick Submissions from all forms, then the permissions that you specify for the form submissions apply to all of your forms.
- In the Submissions from all forms area, you specify whether group members can only view submissions or can also export and delete them. Check the corresponding boxes next to ‘View’, ‘Export’ or ‘Delete’.

Setting permissions for submissions from individual forms
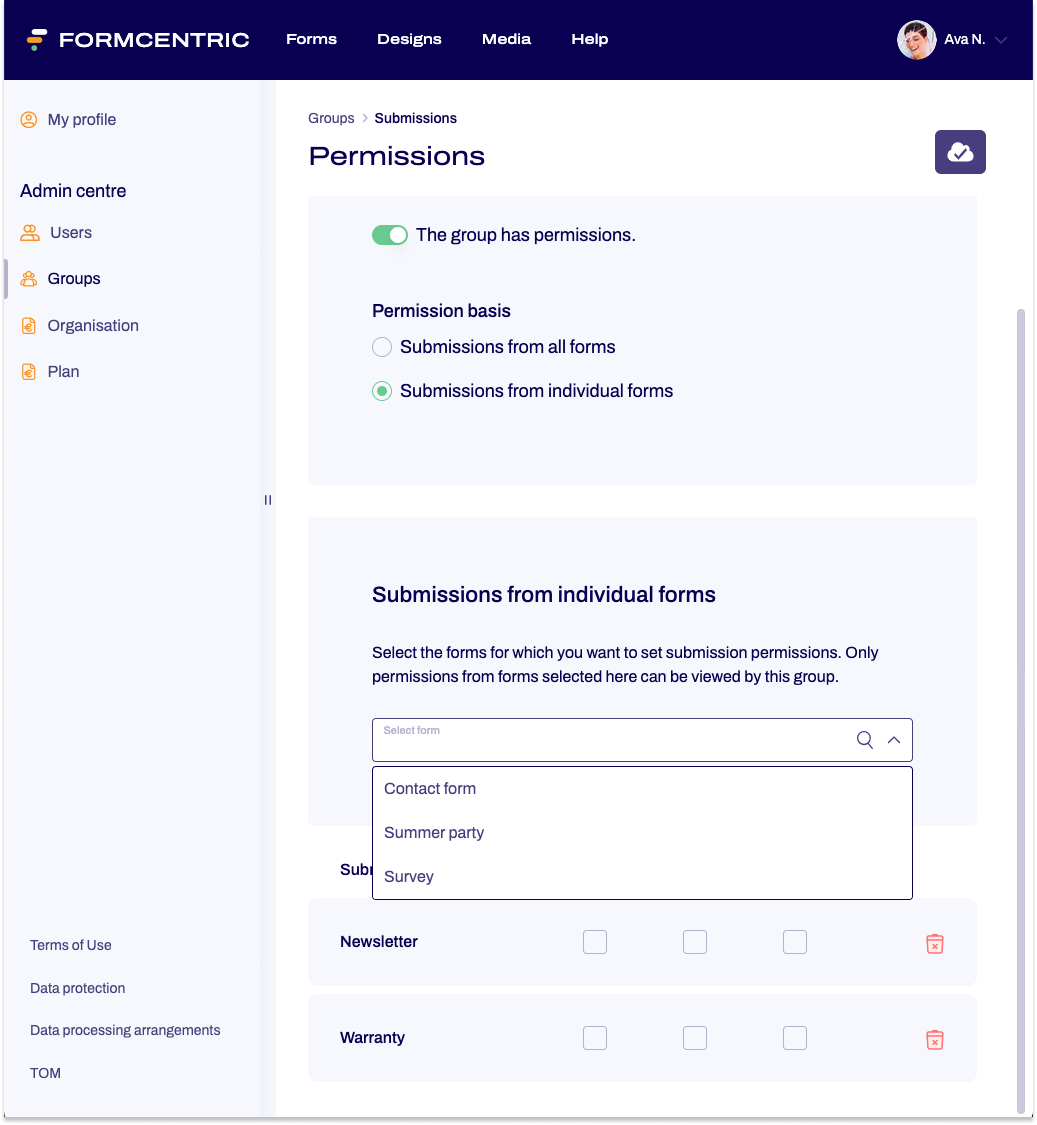
If you pick Submissions from individual forms, you have the option of granting separate permissions for your individual forms. 
- In the Submissions from individual forms area, select the forms for which you want to grant permissions for their submissions.
The forms that you select are listed underneath the drop-down list. - For each form that you select, set the permissions by checking the corresponding checkboxes.
You have now set permissions for submissions from individual forms.


