Using statuses to organise submissions
Last updated:
Sometimes, you may find it hard to keep track of all of your form submissions. Which ones have already been processed – and which haven’t? Are my team members up-to-date? Maybe one submission is especially urgent?
In these cases – such as flagging up a submission as especially important or urgent – you can use statuses to mark your forms accordingly.
You can also use statuses to map out a workflow and create a structure that highlights submissions with different statuses.
As one example, you can create the statuses New, In progress and Completed, and then specify that new submissions are automatically given the New status. When you or someone from your team starts working on a submission, you can give this submission the In progress status and then the Completed status once you are finished.
In this way, statuses let you track your work on individual submissions.
How you work with statuses is entirely up to you. Read on to find out more.
Creating a status
To create a new status, proceed as follows:
- Click Forms on the top menu bar.
- Locate the form for whose submissions you want to create a status. In the Submissions column, click the submissions number.
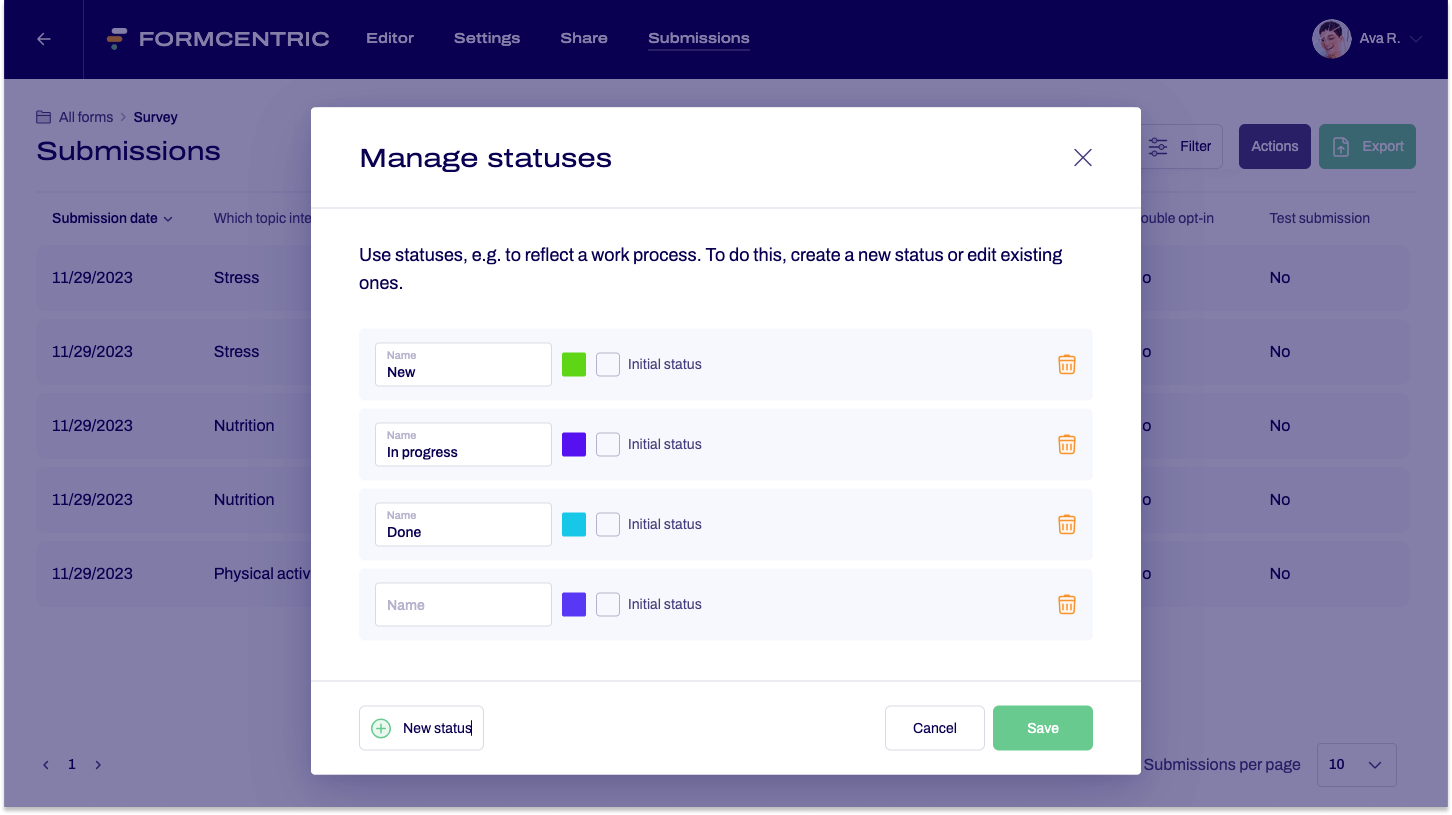
This takes you to the Submissions page for the selected form. - Click Actions ➞ Manage statuses at the top right of the screen.
The Manage statuses dialog window appears. - Click New status and enter a name for the status in the input field.
- Use the colour selection box to select a colour for the status.
- Check the Initial status checkbox if this status should be assigned automatically to new submissions.
- Create more statuses, as required. To do so, proceed from step 4 as described.
- You can sort the statuses using drag and drop, so as to specify their order.
If you are mapping out work steps, for example, then you can sort the statuses into the order your work steps use.
- Click Save.
You have now created one or more statuses.
Assigning a new status
To assign a new status to a submission, proceed as follows.
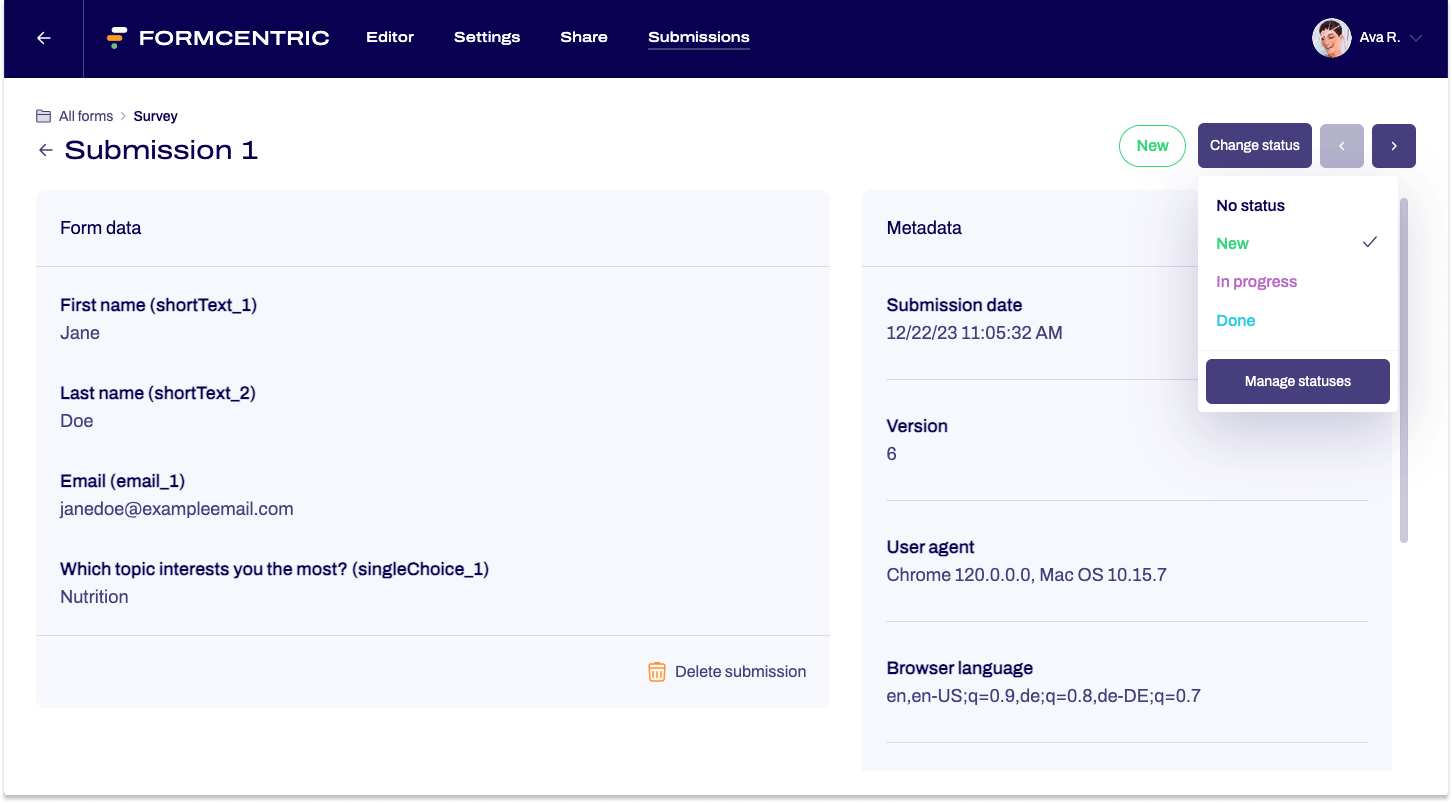
- Go to the Submissions area.
- Click the submission that you want to assign a new status to.
The data record for this submission is shown. - Click Edit status at the top right of the screen.
A drop-down list is shown with the statuses you created. - Click the new status.
You have now assigned a new status to the submission.
Editing or deleting a status
If you decide that the statuses you created are no longer useful, read on to find out how to edit or delete your statuses.
- Go to the Submissions area.
- Click Actions ➞ Manage statuses at the top right of the screen.
The Manage statuses dialog window appears. - Find the status that you want to edit or delete.
Edit: Change the name of the status in the input field.
If you want to change the initial status, then set the tick mark as appropriate.
Delete: Click the bin icon to delete the status. - Click Save to confirm your changes.
You have now edited or deleted one or more statuses.


