Linking confirmation messages to conditions
Last updated:
This article shows you how to set up conditions so that you can have different confirmation messages displayed after a form has been submitted.
Let’s imagine that you have a contact form that your users can use to enter various kinds of details. When they get to the end, users can decide whether or not they want to download their data as a PDF document after submitting the form. They make this decision by making a simple choice between ‘Yes’ or ‘No’. An important point here is that the answer to this question must be a required field.
The download link should be displayed in the confirmation message directly after the form is submitted.
To find out how you can present your users with their input formatted into a PDF document, please see the article Providing PDF documents.
Step 1: Creating confirmation messages
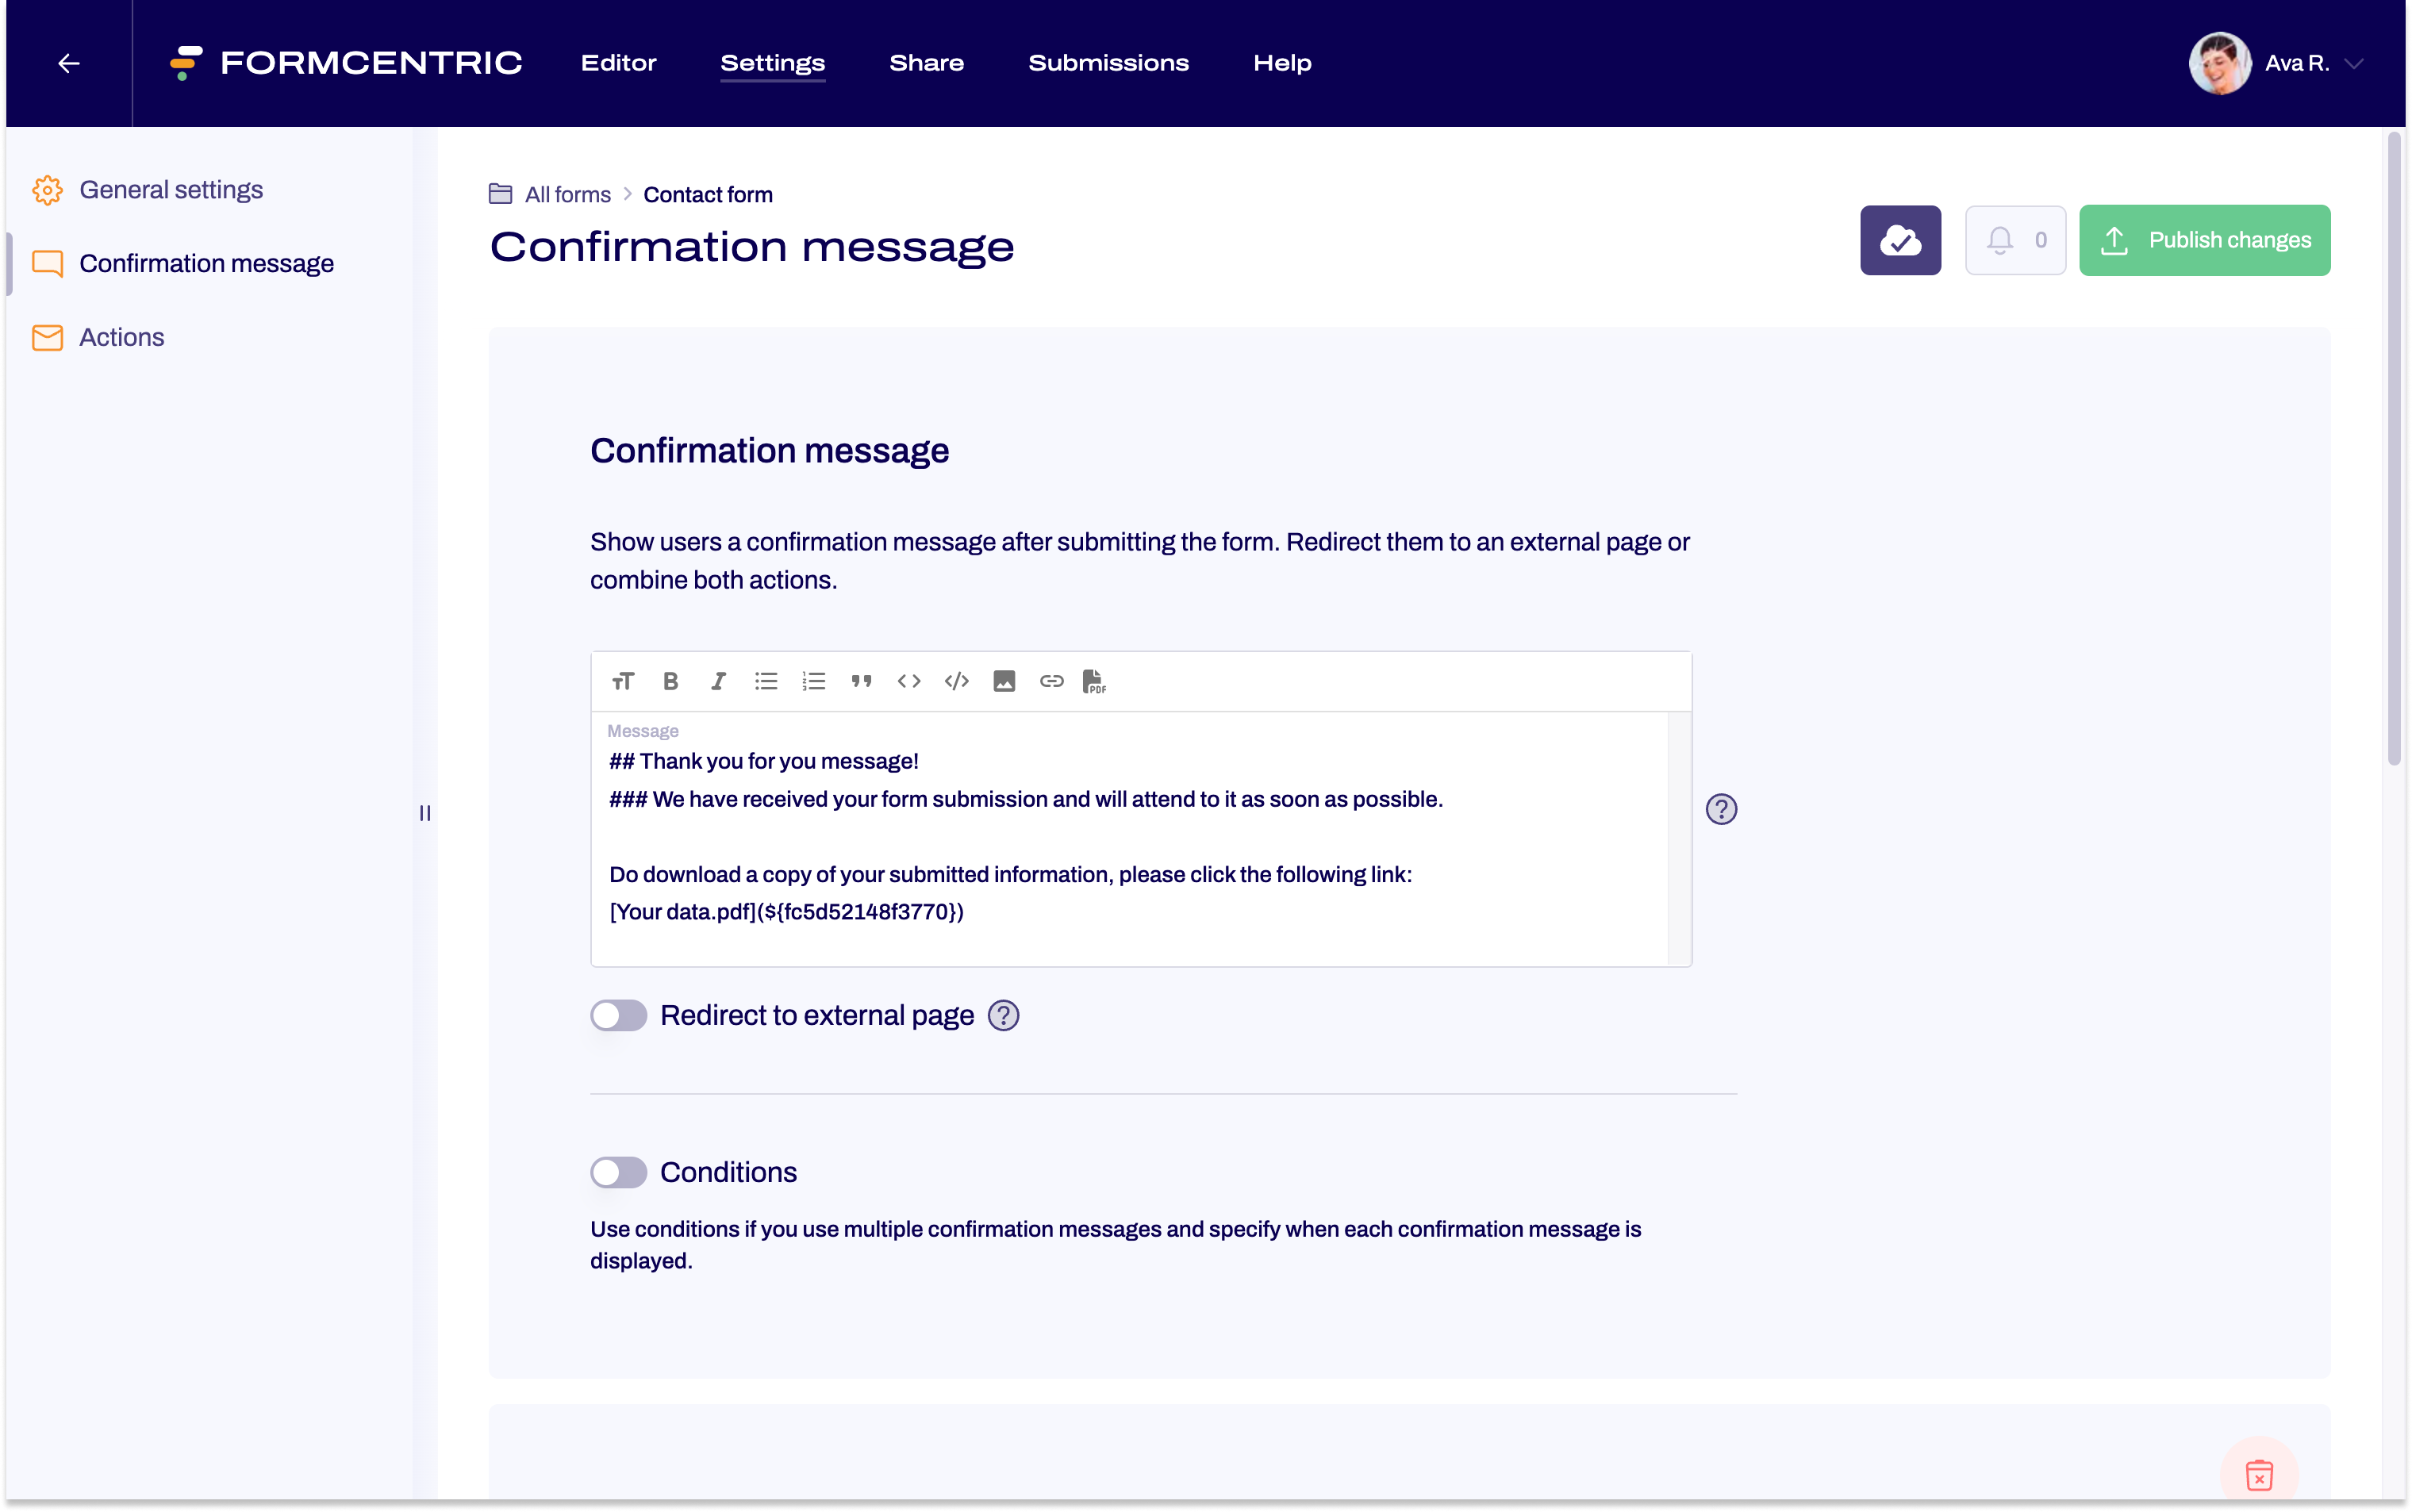
Confirmation message with PDF download link
Create a confirmation message for the users who want to download their data after submitting the form. For details, see the article Setting up confirmation messages.
Place the mouse cursor at the required position in the text and click the PDF icon above the text field to insert the download link for the PDF document.

Confirmation message without PDF download link
Create another confirmation message without the download link. This will be shown to users who do not want to download their data.
Step 2: Set up a condition
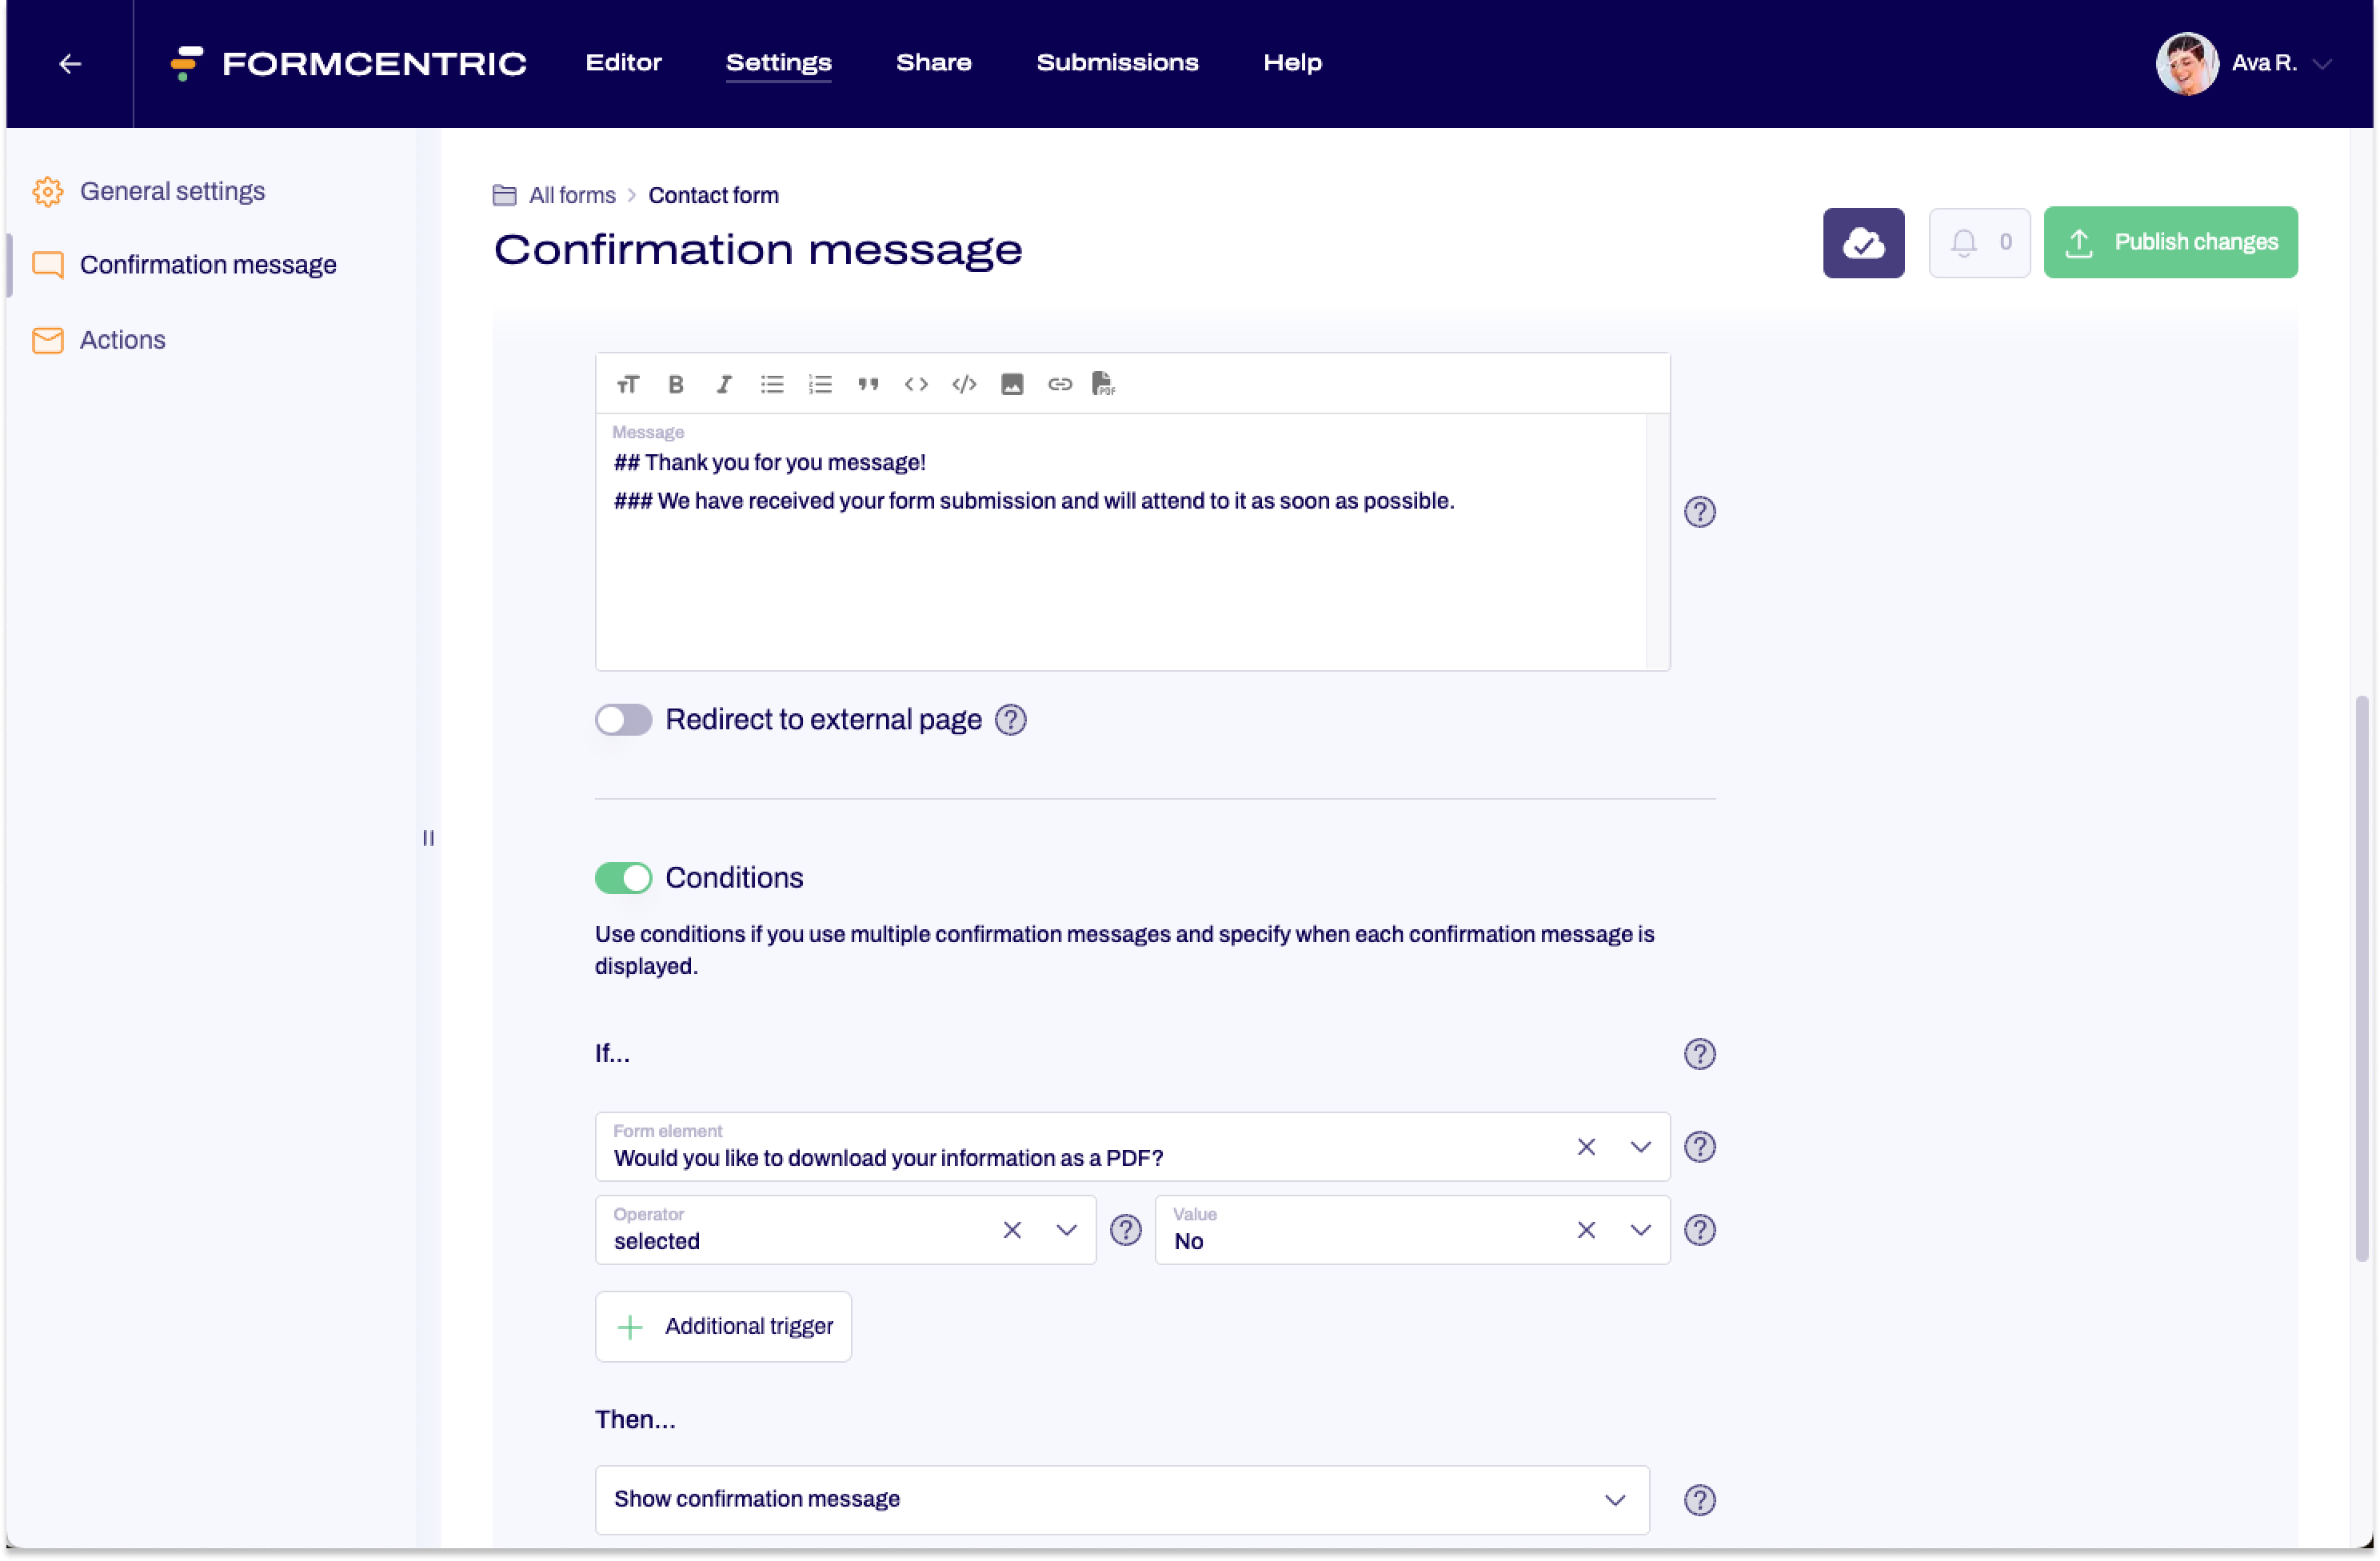
Once you have created both of the confirmation messages, you then use a condition to specify that the confirmation message without the download link will be shown when the question in the form is answered with ‘No’.
Since this means that the confirmation message with the download link will be shown automatically if ‘Yes’ is chosen as the answer, you do not need a second condition.
- Underneath the second confirmation message – the one without the download link – move the Condition slider to the right.
- In the If section, you specify the condition that must be met so that the confirmation message can be displayed:
• Select the single choice field with the corresponding question.
• For the Operator, pick selected and for the Value, pick No. This sets up the condition that users have to select ‘No’ as the answer to the download link question. - In the Then section, you specify that, in this case, this confirmation message should be shown. Accordingly, pick Show confirmation message.

If your users pick No, then this confirmation message will be shown to them after form submission. Otherwise, the confirmation message with the download link will be shown.


