Saving form input in a PDF
Last updated:
Do you want to present your users with their form input in a PDF document – perhaps in the corporate design used by your company? Or should the data be forwarded automatically to your team for internal purposes or further processing? You can use a PDF link in both of these cases.
Alongside the form itself, you will also need a fillable PDF document for linking to your form. Once the PDF document and the online form are linked together, user input is copied to the PDF document automatically.
You can provide your users with the PDF document either by using a download link in the confirmation message after submitting the form or by including the PDF as an attachment to an email notification.
Step 1: Create the form
As a first step, create the online form in Formcentric that you want to link to a fillable PDF document.
Step 2: Prepare the PDF document
- Create the form
Use a third-party tool – like OpenOffice , LibreOffice or Adobe Acrobat Pro DC , for example – to create a fillable, interactive PDF form. Design the form using the fields that will be needed to hold the form data that you want to provide to your users. - Name the form fields
To be able to link the fields in the PDF form with the Formcentric form, you need to give the fields unique names in the third-party tool. These names relate to the field properties and not to the labels that are used for the fields. You can think of these names as ‘technical names’ or ‘internal labels’ that are used to identify the form fields. These unique names are not visible, but they are essential for the internal mapping of the form fields. Typically, you will find the corresponding settings under ‘Properties’, or in a ‘Field options’ dialog or page within the tool. These unique names are essential for ensuring that the data is copied across later into the correct fields in the PDF document. - Embed fonts
Embed the fonts used in your PDF document. You can configure font embedding in most PDF creation programs. - Create the PDF document
Export or save the form you have prepared as a PDF file. - Test the PDF document
Use Acrobat Reader or a similar program to test the fillable PDF document, so as to ensure that all fields are working properly and can store the required items of information.
Once the document is working as it should, you can upload it to Formcentric, where you can then link it to your online form.
Step 3: Upload the PDF document
Upload your prepared PDF document to Formcentric.
- In the Editor, open the form whose input you want to copy across to the PDF document.
- Click Settings on the top menu bar and then Actions in the left-hand navigation area.
- Scroll to the PDF link section and click New PDF link.
- Under General, enter a name for the PDF link. This is especially helpful for distinguishing between multiple PDF links.
- Click Choose PDF.
The media library opens. - Select the PDF document, if it is already in the media library, or upload the document if not.
The PDF document has now been uploaded. You can now map the form fields to the fields in the PDF document.
Step 4: Map the form fields
To copy across the input from your users to the right places in the PDF document, you need to map the form elements in the form to the corresponding fields in the PDF document.
After you have uploaded the PDF document, the Mapping area appears. This is where you complete the form field ‘mapping’ – i.e. the assignment of the form fields to one another.
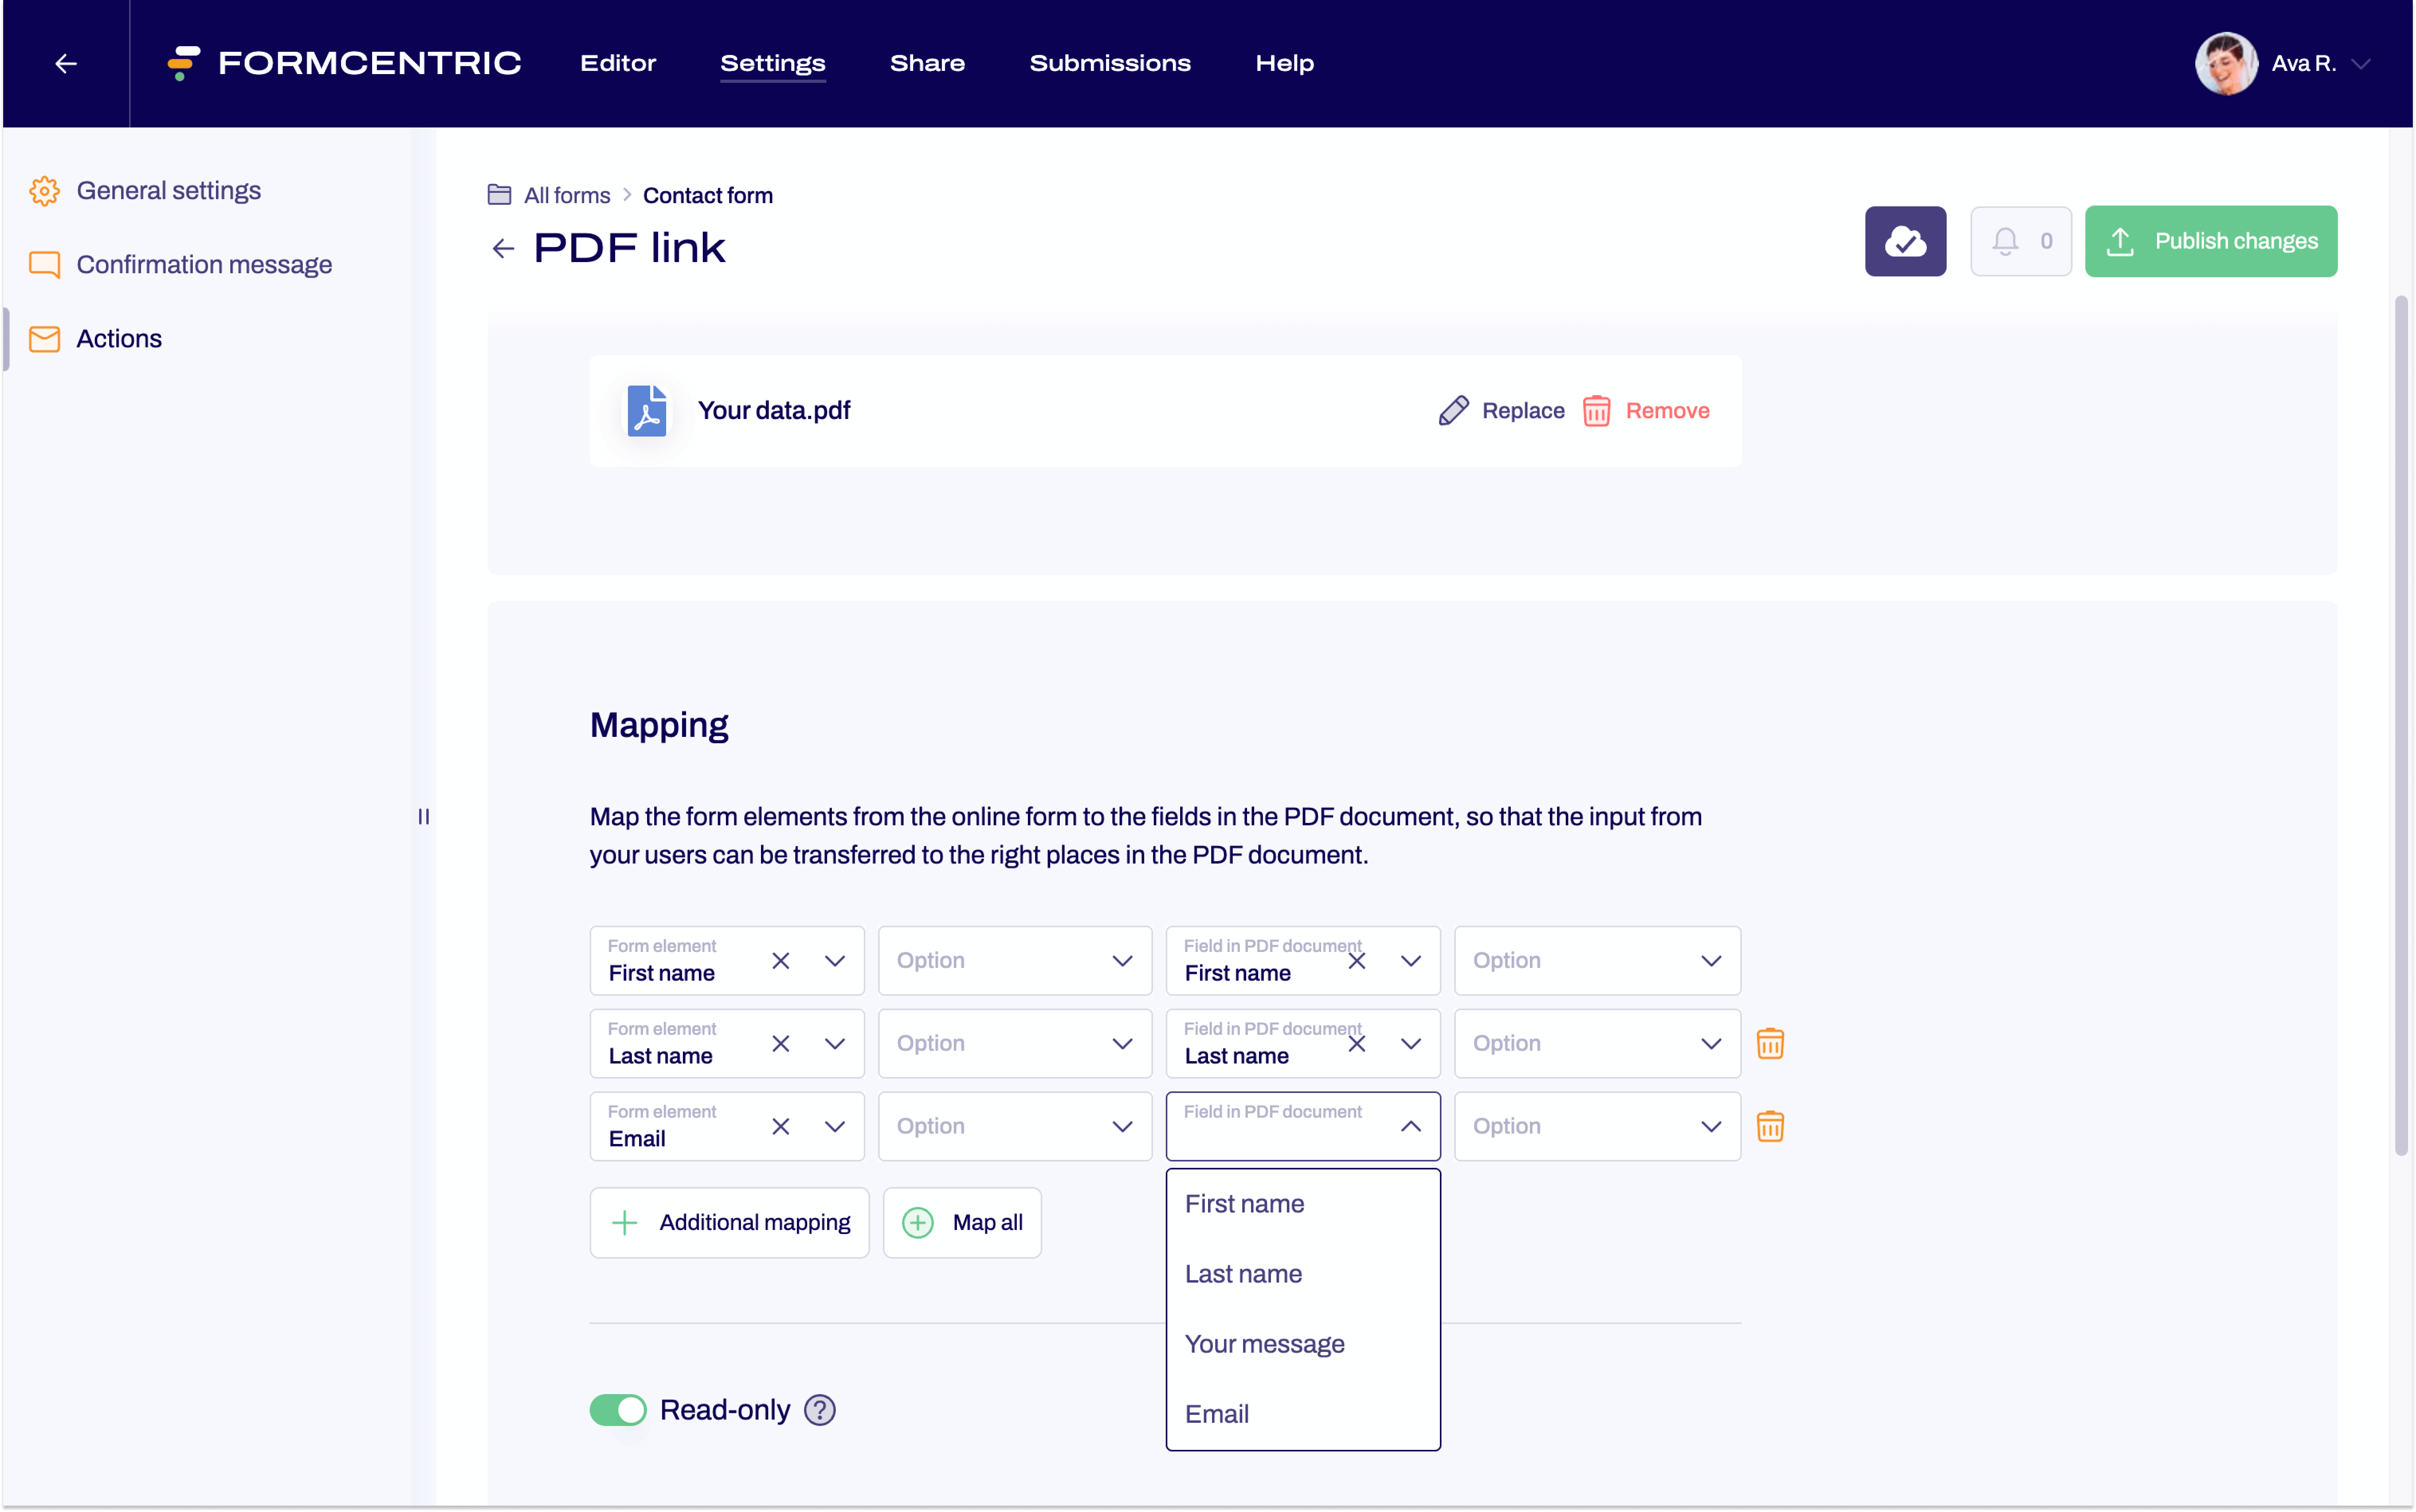
Add individual mappings
- From the Form field dropdown menu, select a form field from the Formcentric online form that you want to assign to a field in the PDF template.
- If the selected form field contains options, select the corresponding option under Field option.
- Under Field in PDF template, select the field to which the input from the previously selected form field should be transferred.
- If required, also select the corresponding option under Template option.
- Click Add mapping to create another mapping.
- Repeat these steps until all form fields have been mapped.
Select multiple mappings at once
Alternatively, you can add multiple form fields to the mapping in a single step.
- Click Select mappings. A dialog window opens displaying all form fields of the Formcentric online form.
- Select the form fields you want to add to the mapping by clicking the corresponding entries.
The selected fields are then automatically added to the mapping.
You can also deselect already selected form fields in the same way. They will then be removed from the mapping.
Read-only
The next section under the mappings is the read-only slider, which lets you specify whether or not the input in the PDF document can be edited.
Deleting mappings
To delete a mapping, click the trash icon to the right of the respective mapping. This removes the mapping and prevents the input from being transferred from the form to the PDF document.
Alternatively, you can remove multiple mappings in a single step. To do so, open the dialog via Select mappings and deselect the corresponding form fields. The existing mappings will then be removed from the mapping.
Duplicate a PDF link
You can duplicate an existing PDF link to create a new one based on the current settings. This is especially useful if you are working with similar PDF documents and only need to adjust a few settings.
- To do so, go to the Actions section and click the duplicate icon next to the relevant PDF link.
A copy of the PDF link is created and opened.
You can then edit the duplicated PDF link and make the necessary changes.
Step 5: Providing the finished PDF document to your users
You have now linked the PDF document to your form. When users complete the form and submit it, the data from the form elements that you have mapped to the PDF document will now be copied to the PDF document.
To provide your users with the PDF document containing their form input, you now have two options: you can either use a download link in the confirmation message that is shown directly after submitting the form or you can include the PDF as an attachment to an email notification.
If you want to send the PDF to yourself or to someone from your team, you should use the email notification option.
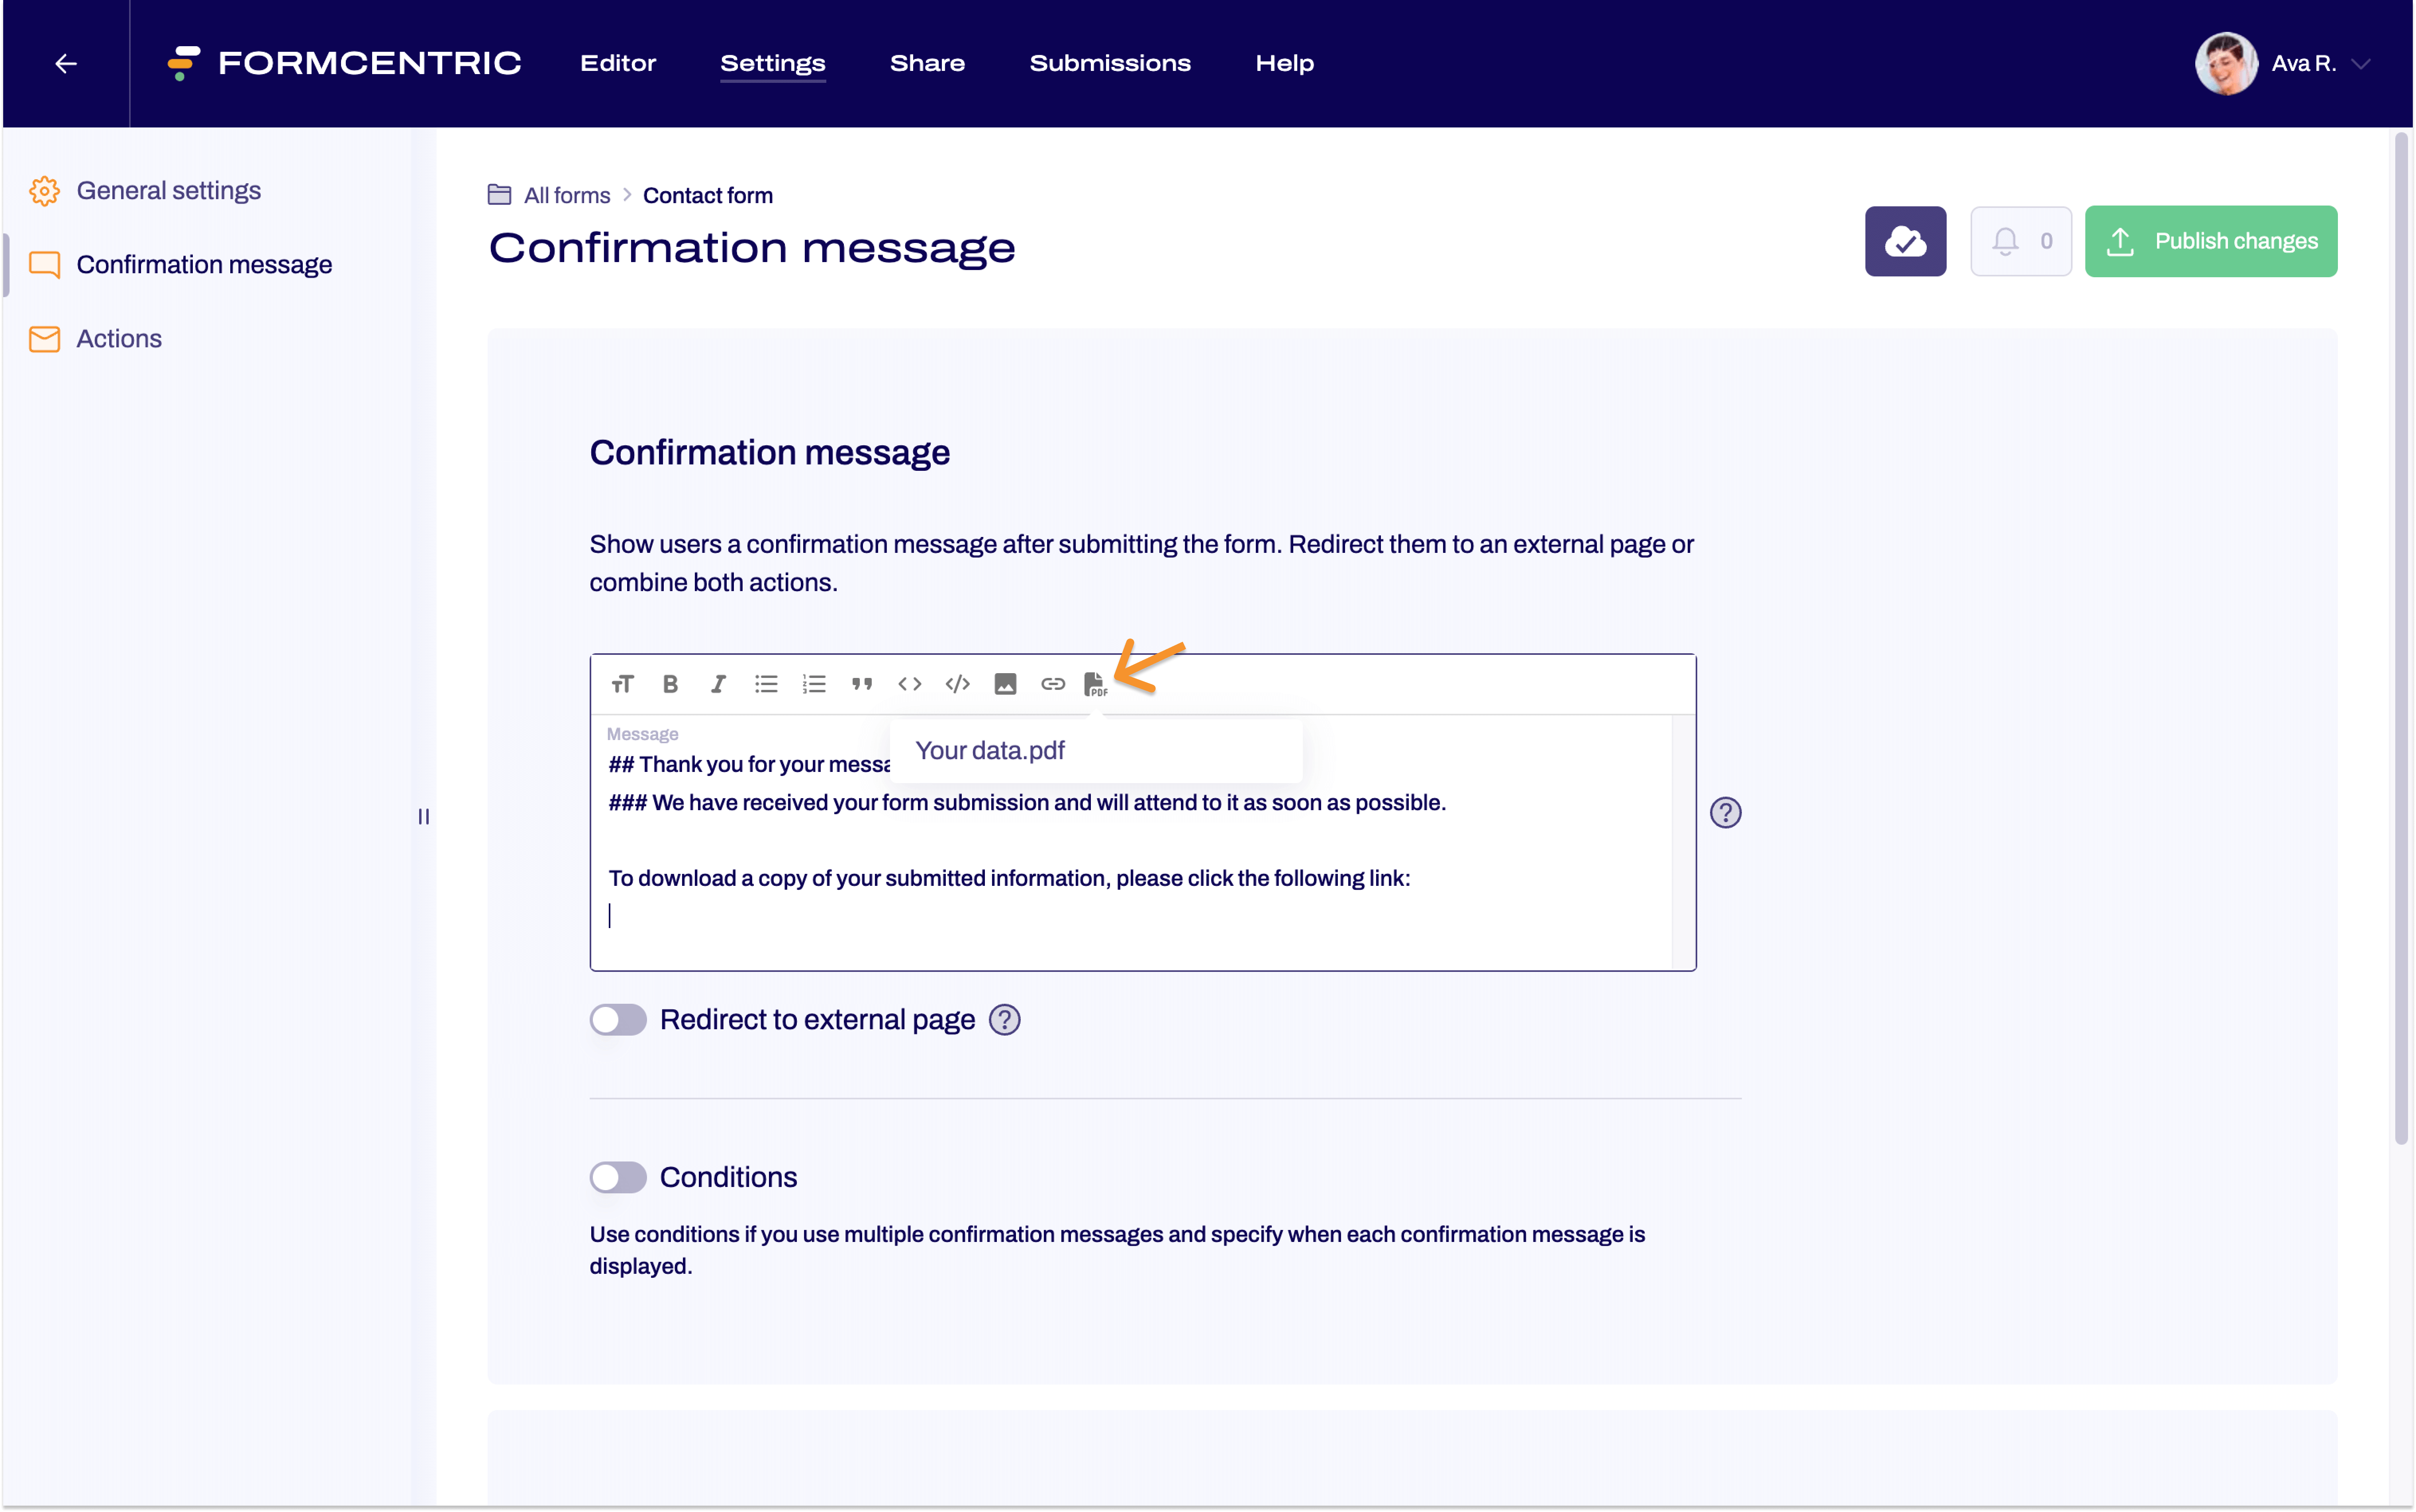
PDF in confirmation message
To make the PDF document available in the confirmation message directly after form submission, proceed as follows:
- Go to the PDF link section. Click Confirmation message on the left.
- The text field displays the confirmation message currently shown to your form users. Edit the text as required for your specific needs.
- In this text field, move the mouse cursor to the place where you want to show the link to the PDF download in the confirmation message.
- Click the PDF icon above this text field area. All of the PDF documents linked to the form are shown. Click the document that you want to show in the confirmation message.
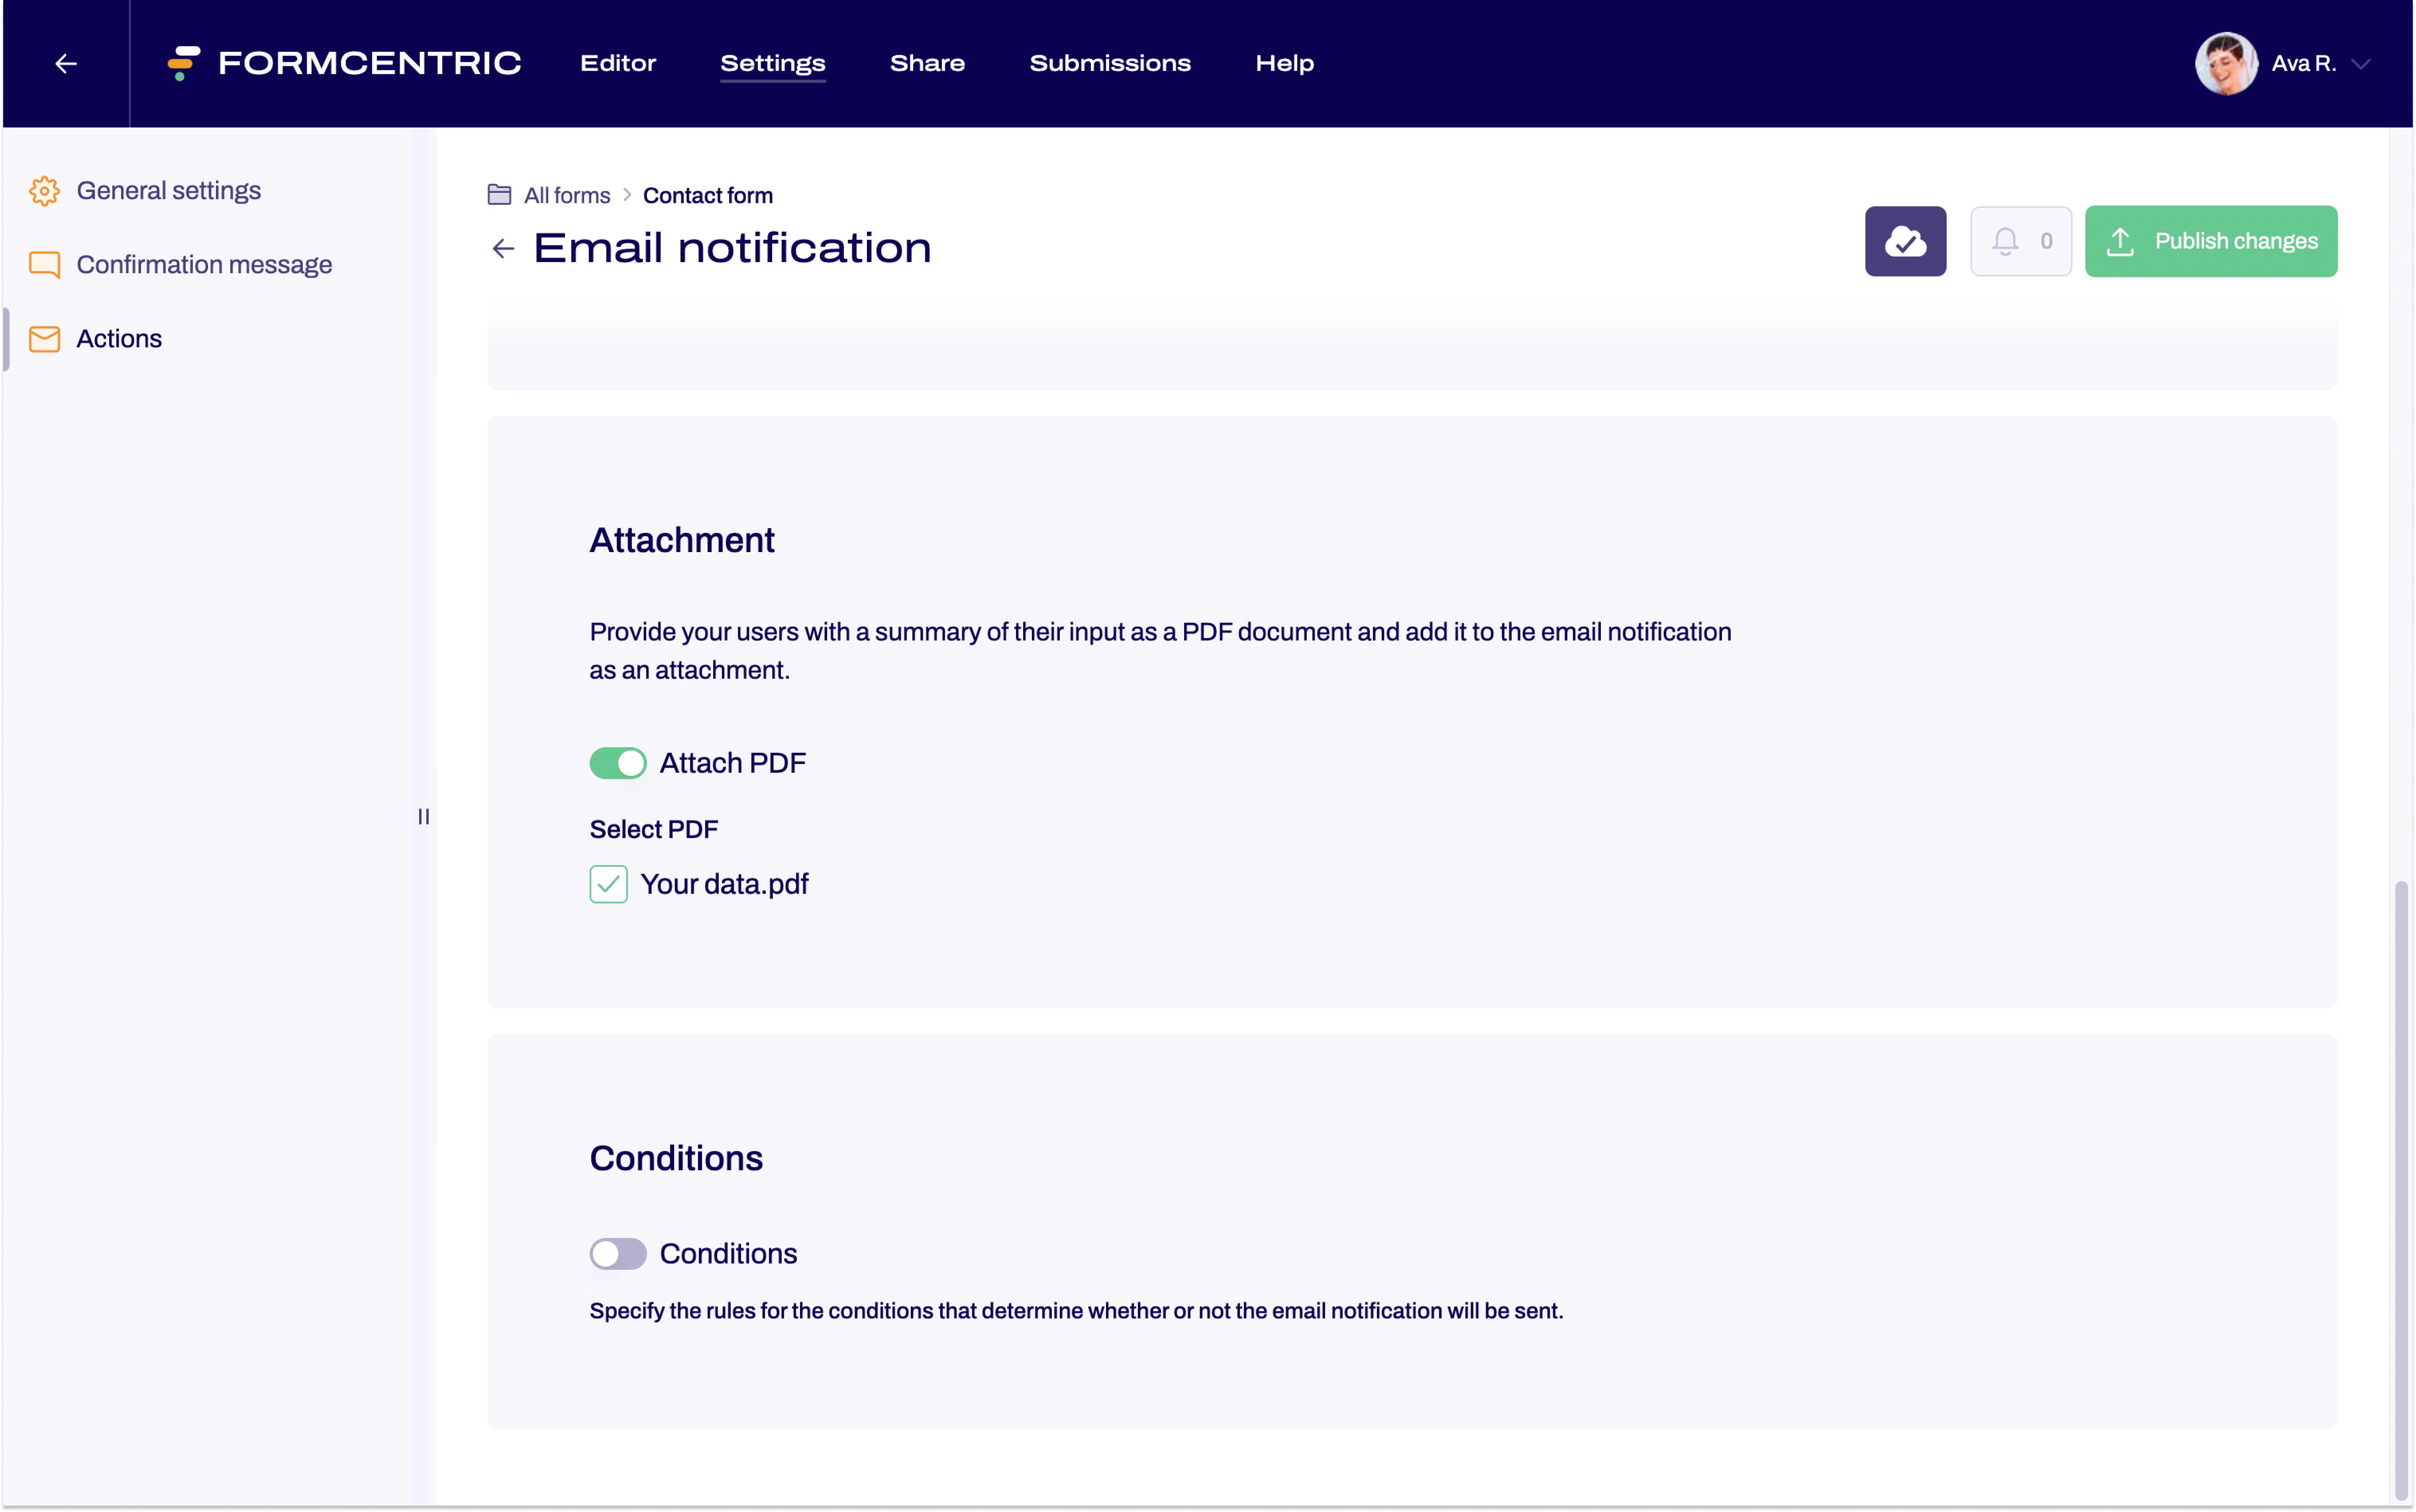
PDF as an attachment to an email notification
To provide your users with the PDF document containing their input as an attachment to an email, proceed as follows:
- Go to the PDF link section. Click Action on the left.
- Click New email notification and then set up the email notification. For more information, see the article Setting up an email notification.
- Scroll down to the Attachment section and activate the slider next to Attach PDF. You can now select the PDF document that you want to include with the email notification as an attachment.