Display form entries elsewhere in the form
Last updated:
Here you can find out how to display information that users enter into a form at another place in the same form.
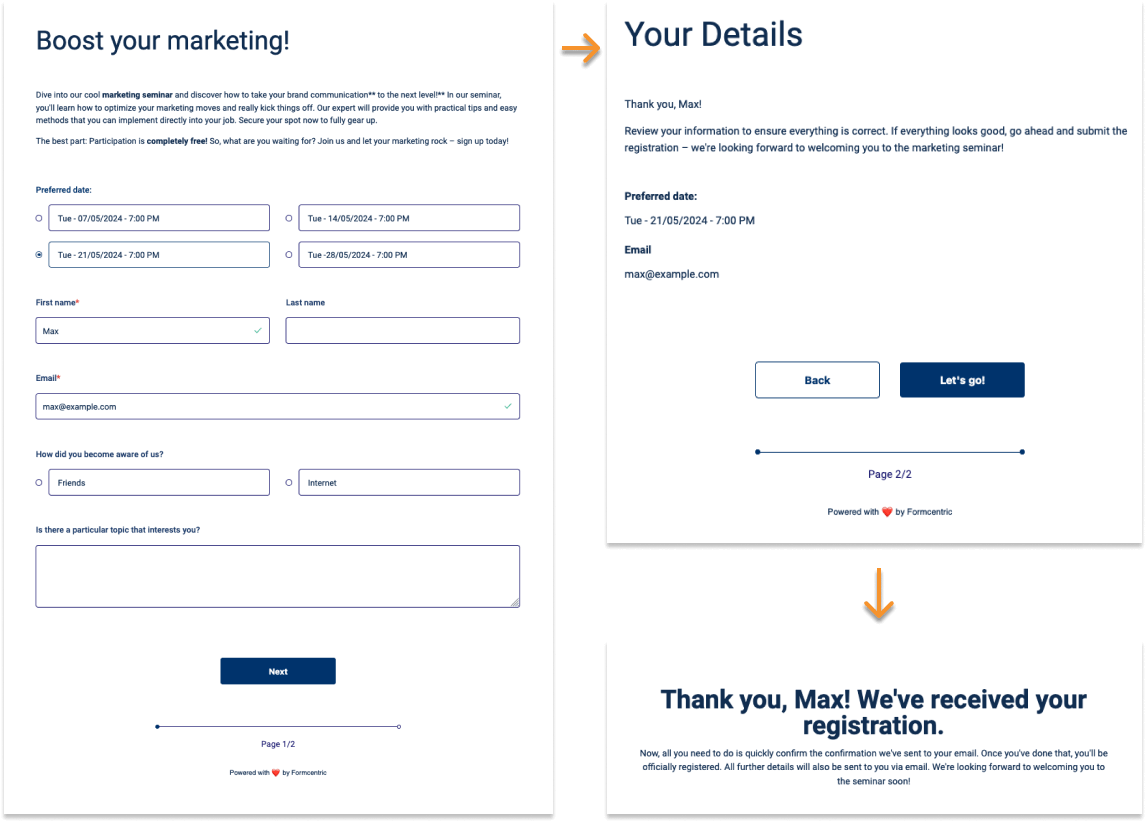
As our example, let’s take a registration form for a marketing seminar, which asks the user to input various kinds of information, such as their email address, preferred seminar date and name.
On the last page of the form, all of the data entered in summarised, accompanied by a short introductory piece of text.
So, the idea here is to have the person who has just filled out the form mentioned by name in the introductory text as well as in the subsequent confirmation message.
Step 1: Creating the form
The first step is to create a form for the marketing seminar.
On the first page of the form, we ask the user to enter their first and last name, and their email address. We need the first name for our introductory text and confirmation message, so this field is a required field – as is the field for the email address.
The user is also given a date selection box with various options and a comment field, where they can enter topics that they would like to see discussed in the seminar.
Step 2: Data check with personalised greeting
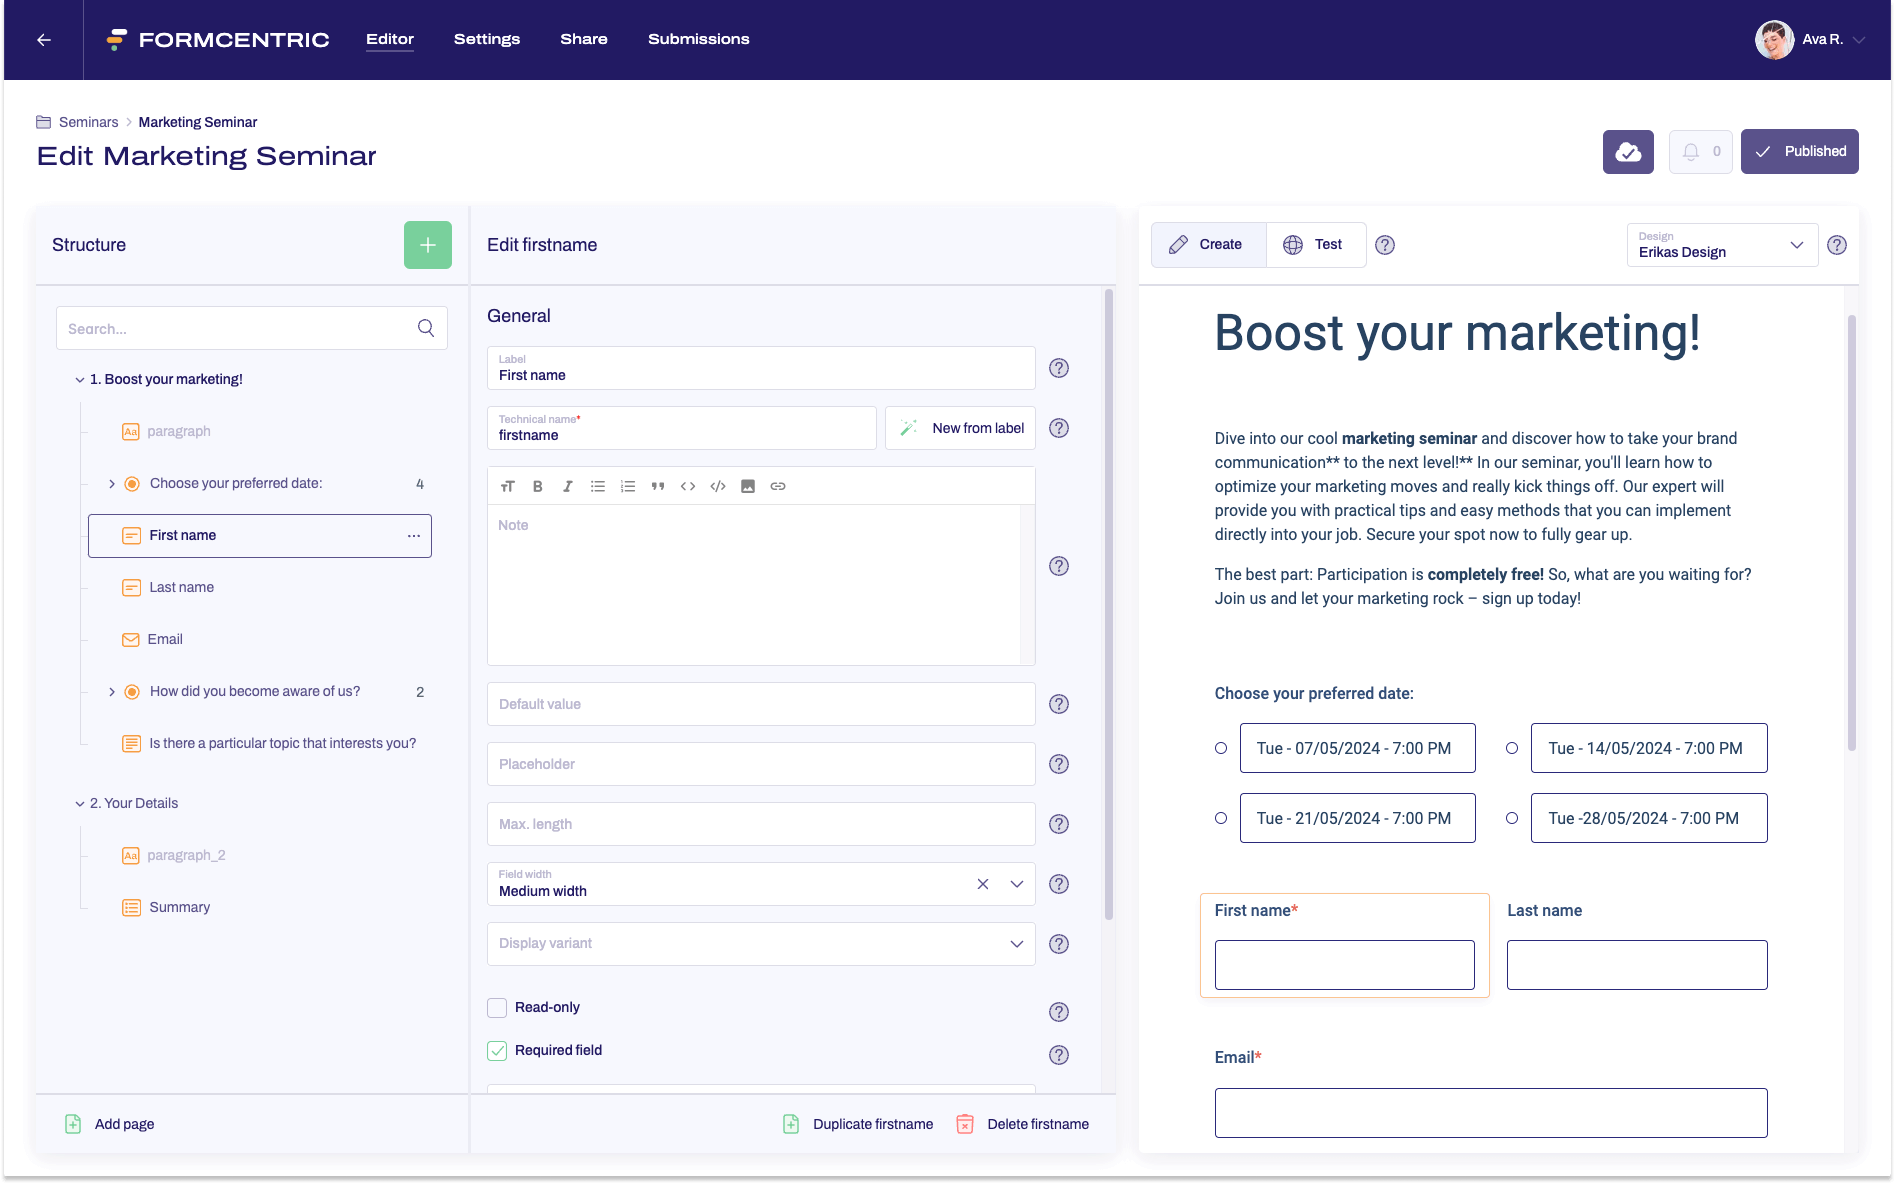
The second page presents a summary of the details entered, which we can do by using the Summary form element.
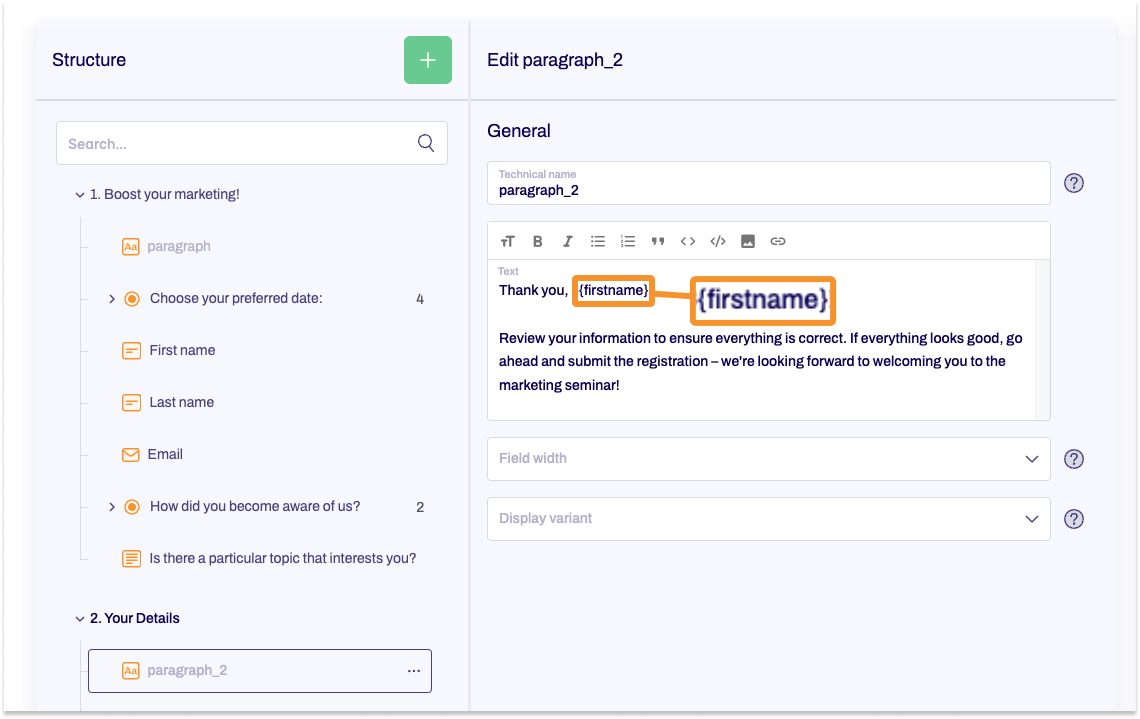
Above this summary, we add a Paragraph field, where the user is asked to check their input before submitting the form.
To make this request more personal, we address the user by using their first name.
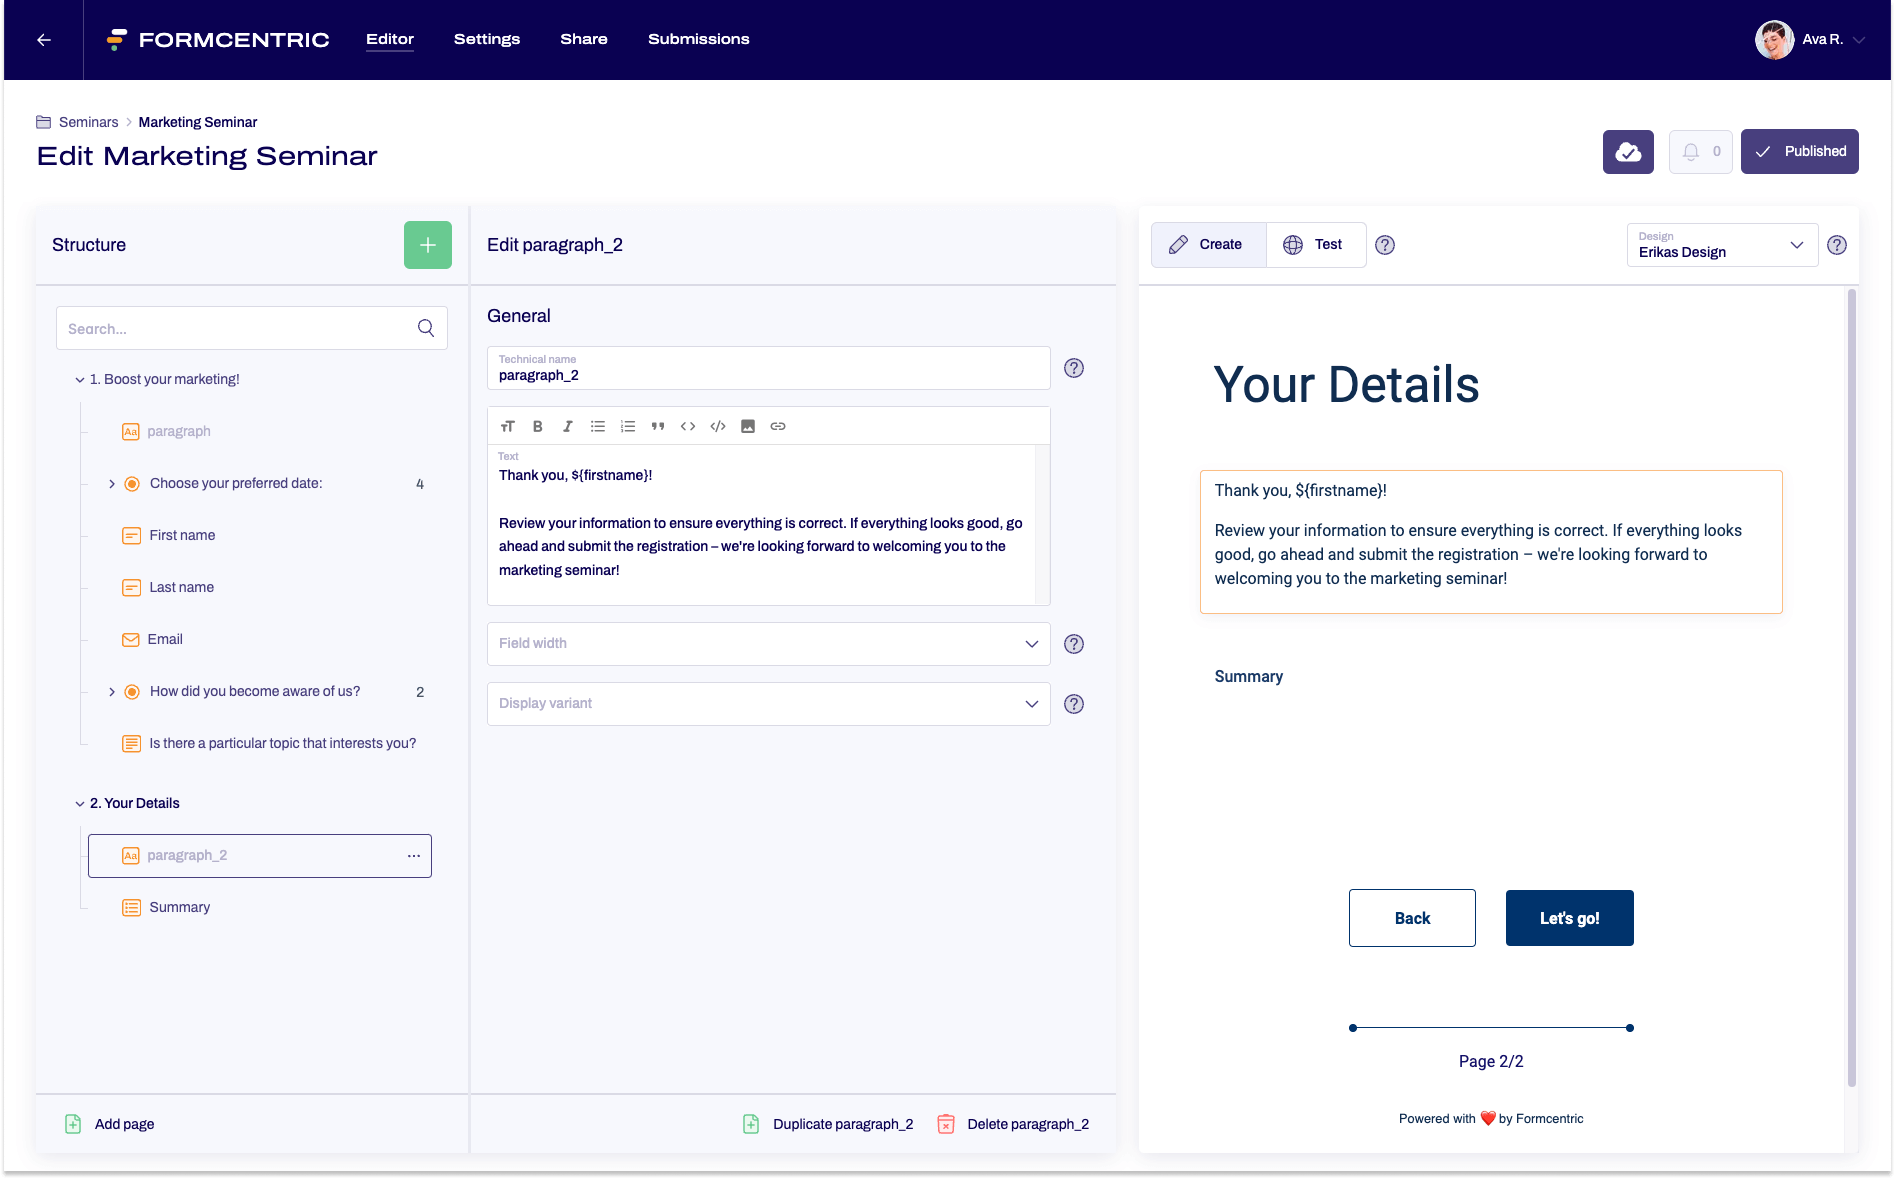
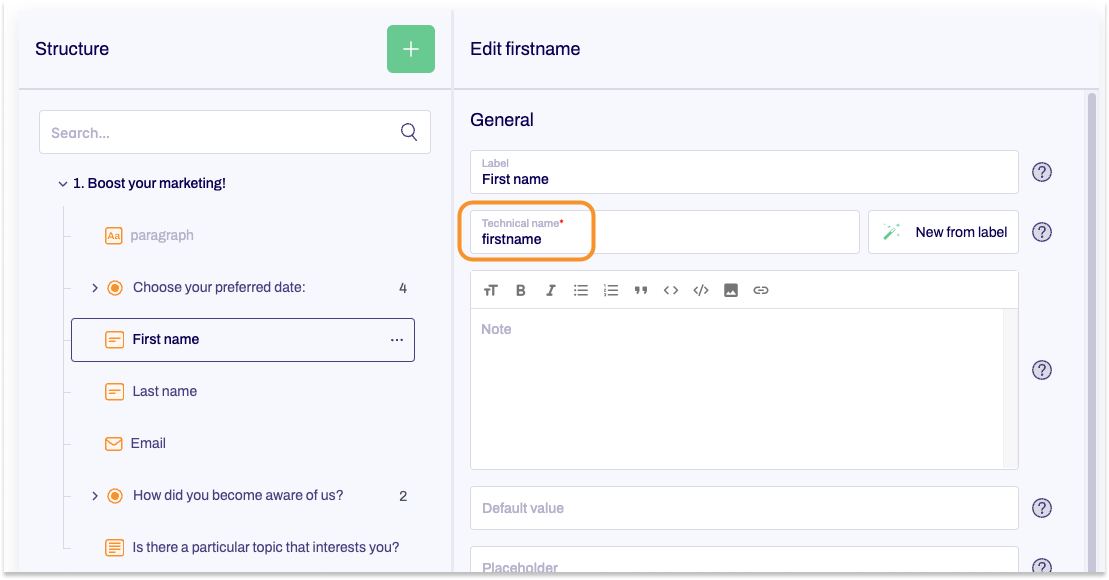
To add this first name to the text – which the user entered on the first page of the form – we need the technical name from the corresponding form field.
The technical name can be found in the associated editing area:
In the place where the first name needs to be displayed in the paragraph, we enter a dollar sign, followed by curly brackets around the technical name for the first name.
Step 3: Confirmation message with personalised greeting
We use the same method for the confirmation message.
At the place in the message text where the first name should appear, we use a dollar sign followed by the technical name for the first name, which we enclose in curly brackets.
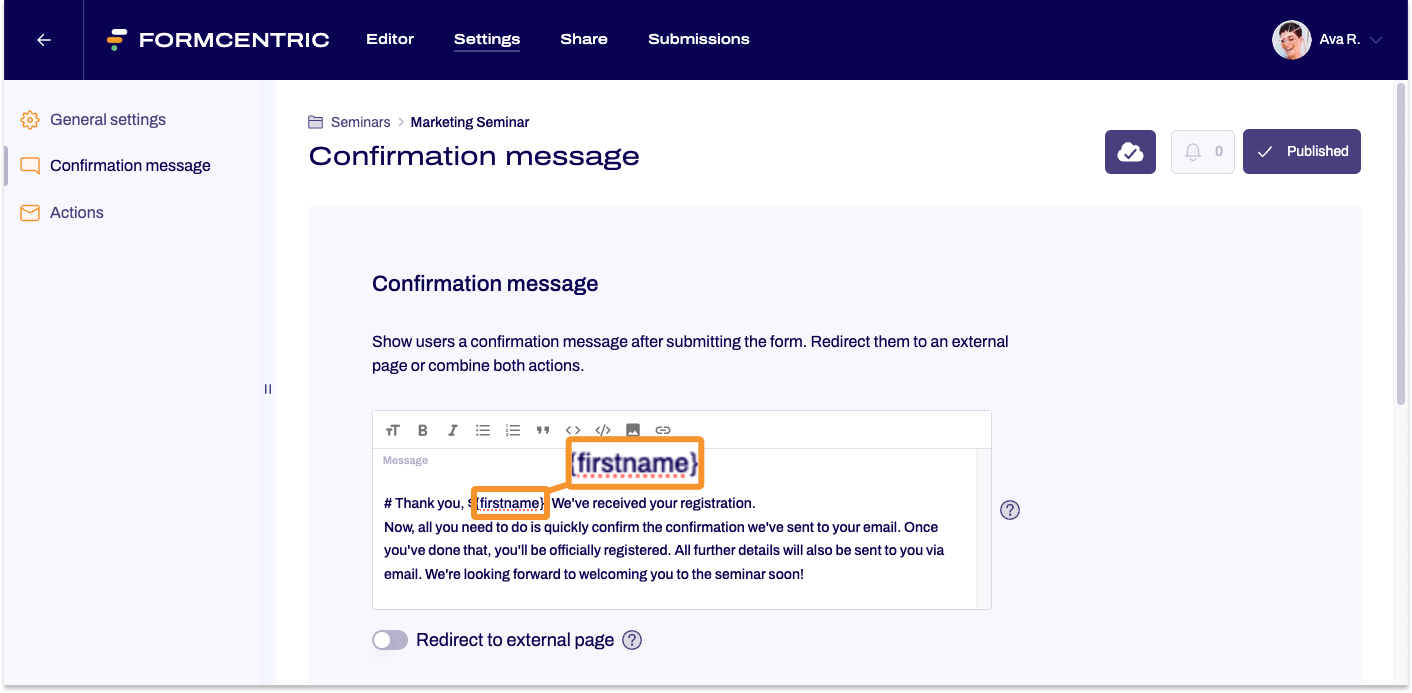
When users now complete the form, they are addressed personally in both the text on the second form page and in the confirmation message after submitting the form.