Creating digital invitations
Last updated:
When you are organising an event, you know how important it is that everything goes smoothly. A carefully designed registration form can also save you a lot of work here. The form lets you estimate the number of attendees expected, ask them about people accompanying them to the event, note any dietary requirements, and also contact them as and when necessary.
In this article, we give you a step-by-step guide to using Formcentric to create a registration form for a summer party. Form users will also only be shown the details that are relevant to them, based on their own input.
Step 1: Creating an invitation message
Let’s start by creating an invitation message that announces your upcoming summer party and asks people to reply.
Use the Paragraph form element for this message.
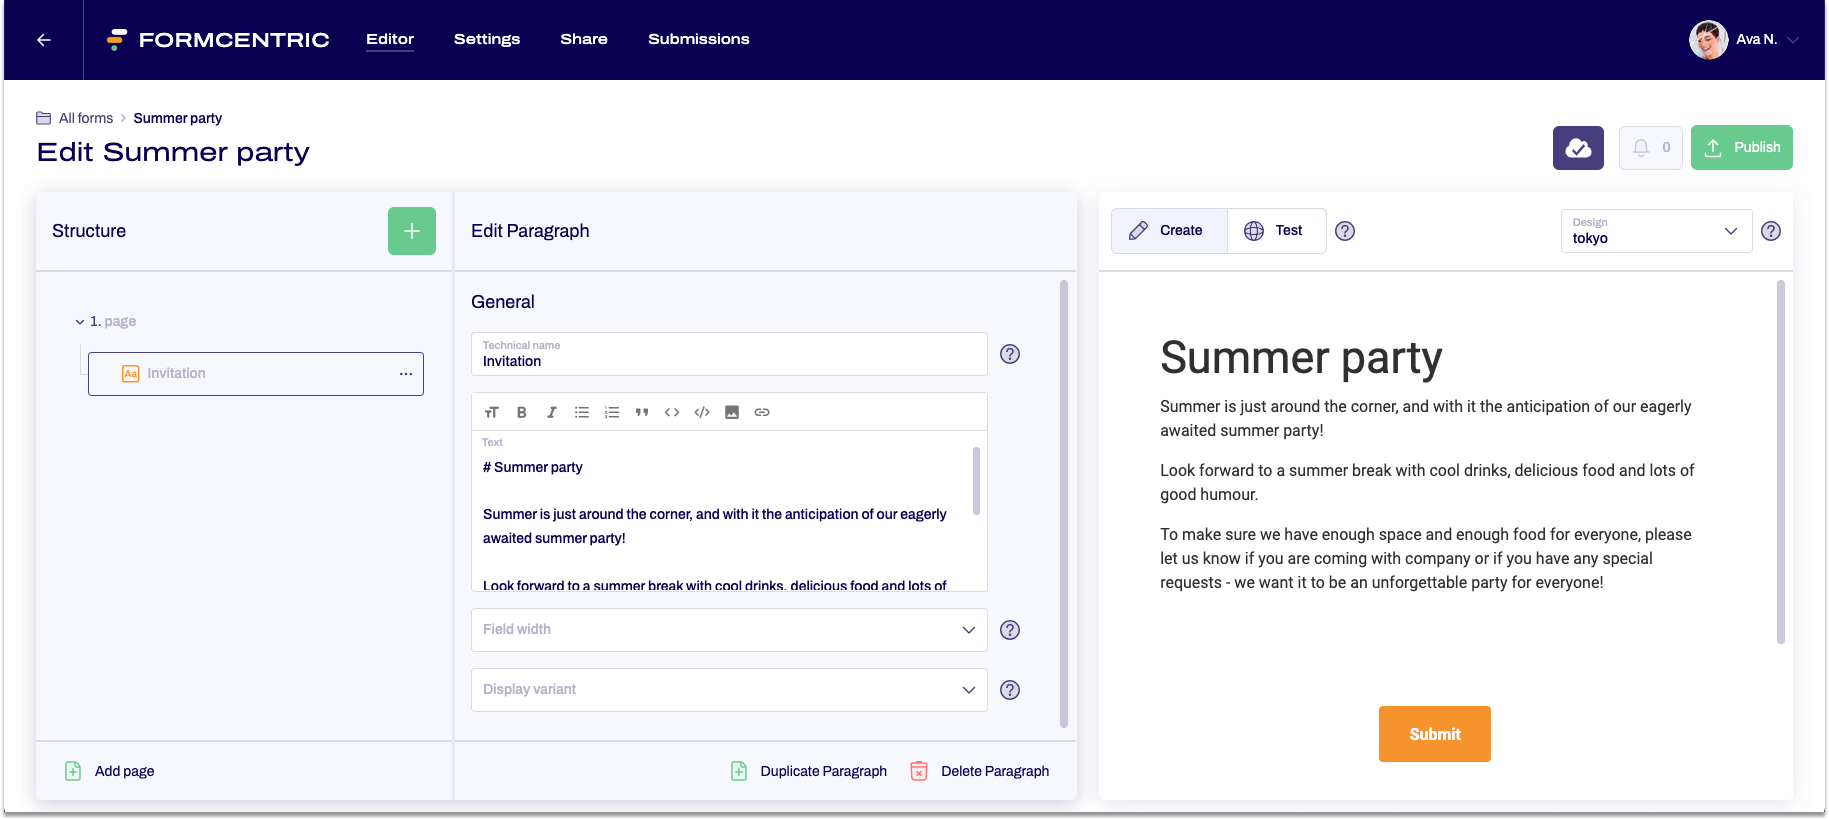
Create a second page for your form. On the first form page, you can now go to the page properties and change the Label for the Next button to Reply.
Step 2: Asking about attendance
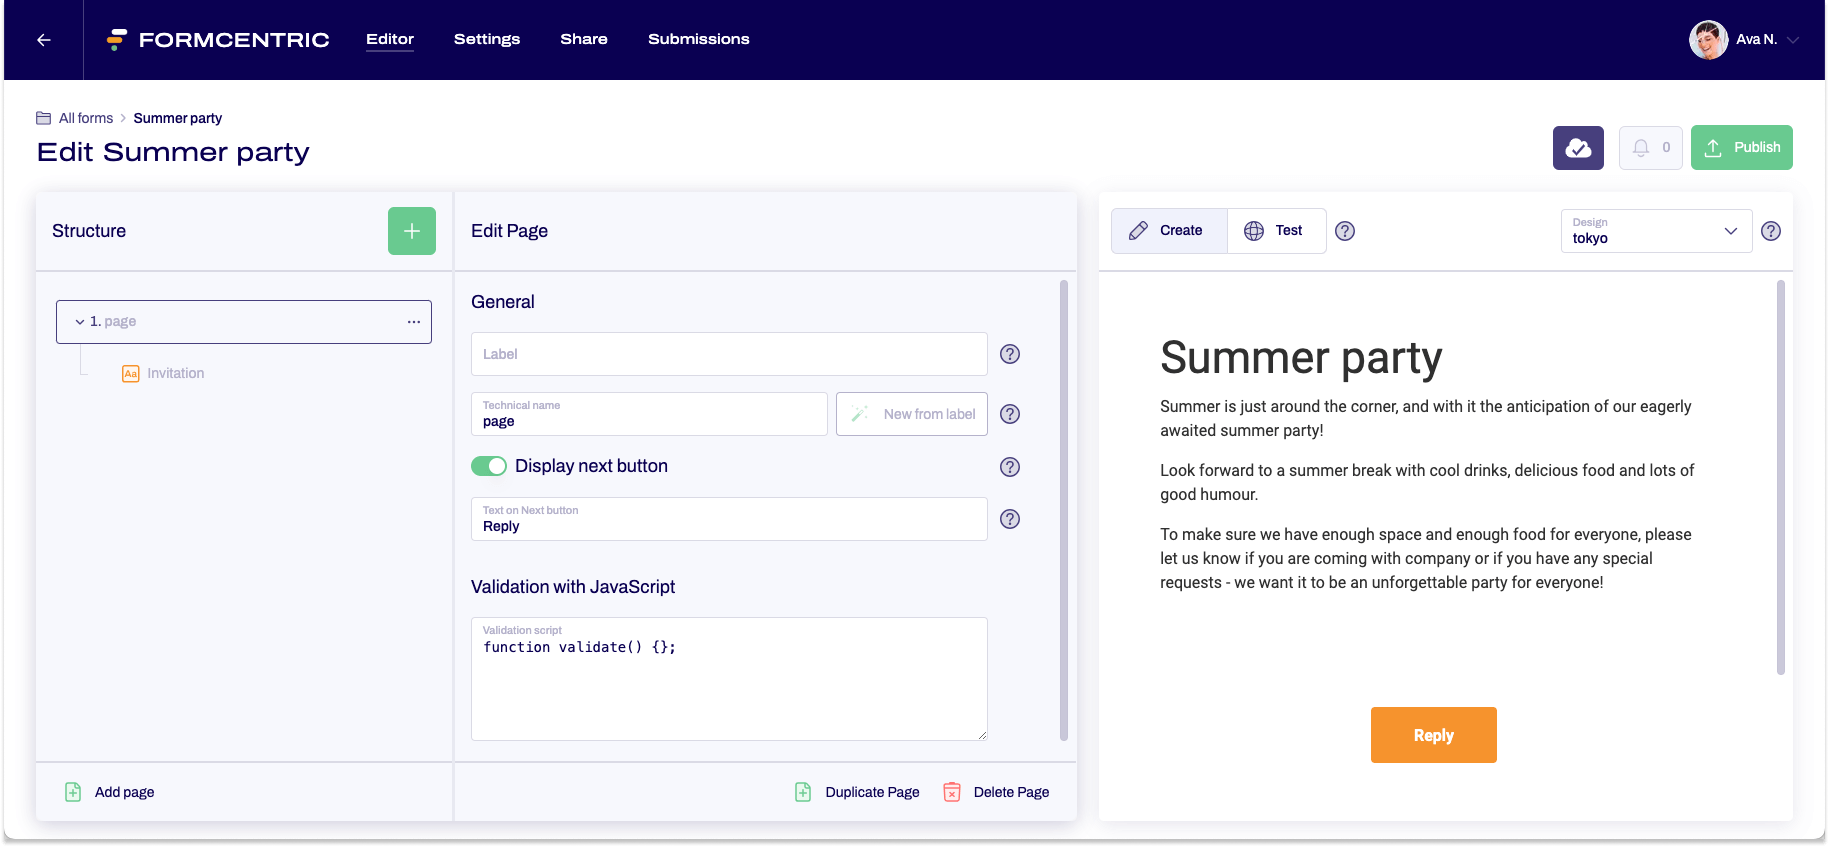
Now switch to the second page of the form.
Here, you will add the attendee’s name and their attendance details for the summer party. Use an input field for the name entry and for attendance, use a single choice field.
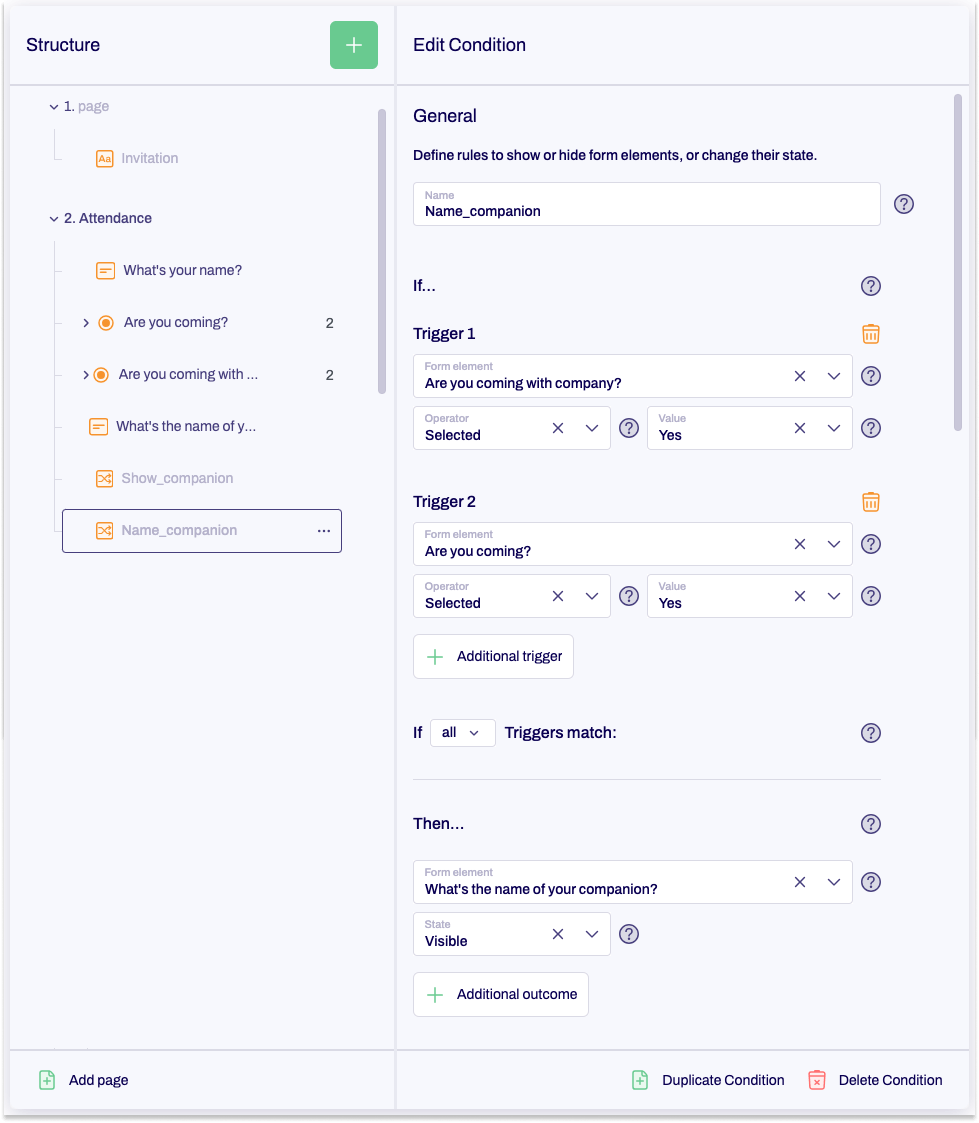
After confirming attendance, you should also ask whether the attendee is bringing someone with them. If another person is attending, the name of this companion should also be requested. Use another single choice field to confirm attendance and another input field for the name.
To ensure that the question about a companion is shown only if the person has confirmed attendance at the summer party, you will create a condition.
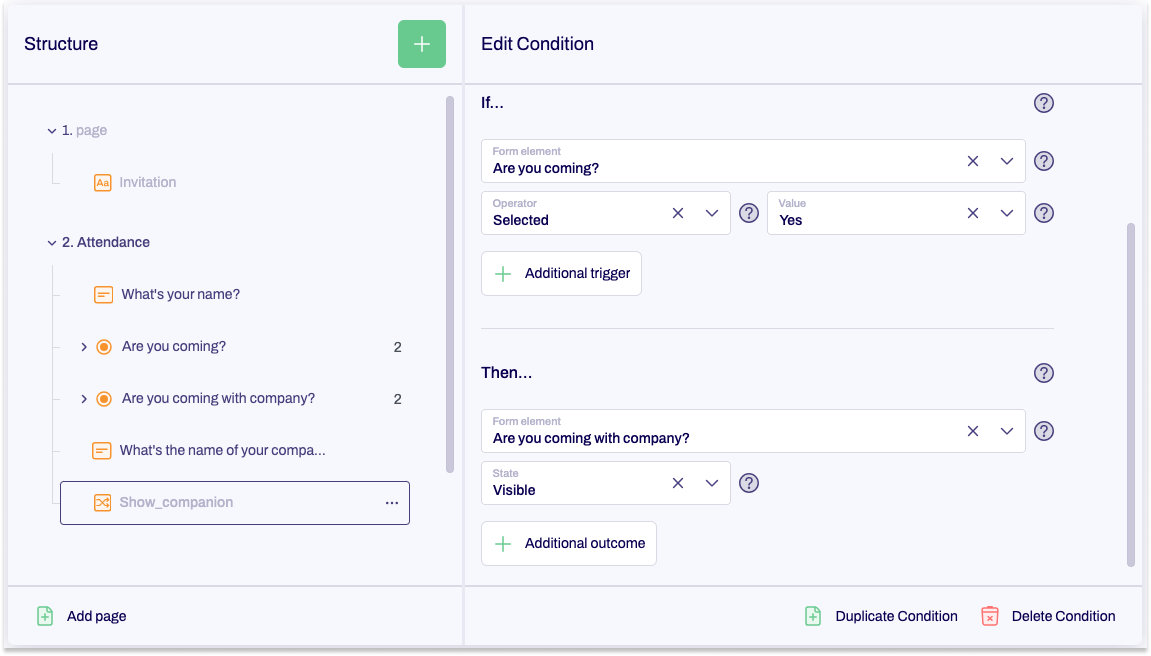
Add this condition to your form. In the condition, specify that the input field for the name of the companion is shown only if attendance at the summer party and the question about a companion have both been answered with “Yes”.
Step 3: Meal selection
On the next page, you ask attendees about meal choices.
To do this, create a drop-down list with the meal selections. Also include another drop-down list for the person’s companion.
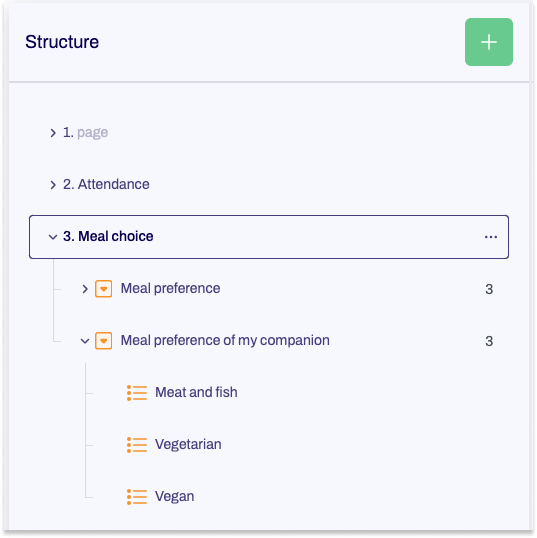
This second drop-down list should of course only be visible if a companion is attending. To check this, add another condition.

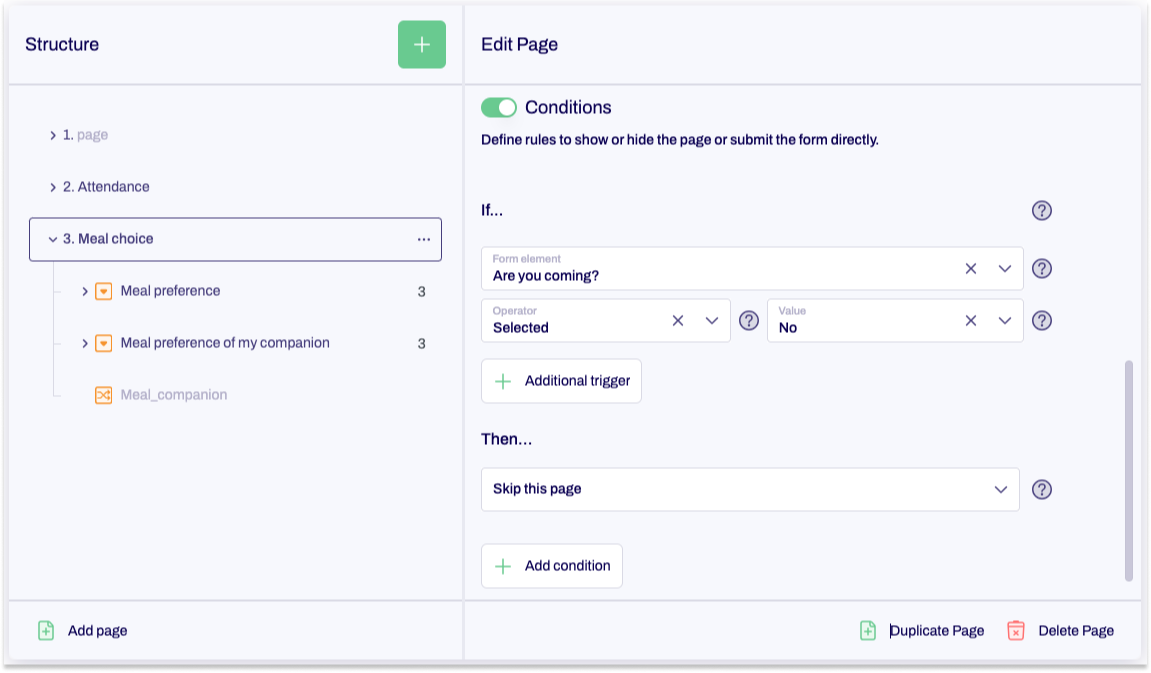
The page with the meal selection should only be displayed if attendance at the summer party has been confirmed with “Yes”. The page should instead be skipped if that question was answered with “No”.
To check for this, add a condition to the page properties.
Step 4: Contact details
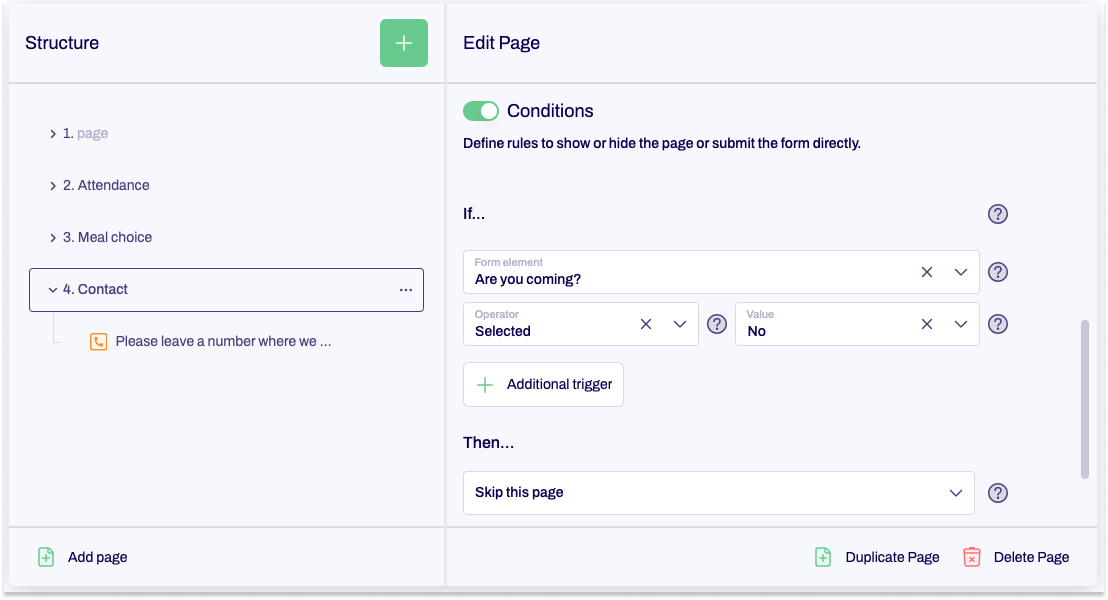
To ensure that you can get in touch with your guests at short notice, ask them for a phone number on the next page. To do this, use the phone number form element.

As with meal selection, this page should only be displayed if attendance at the summer party has been confirmed. To check for this, add another condition to the page properties.
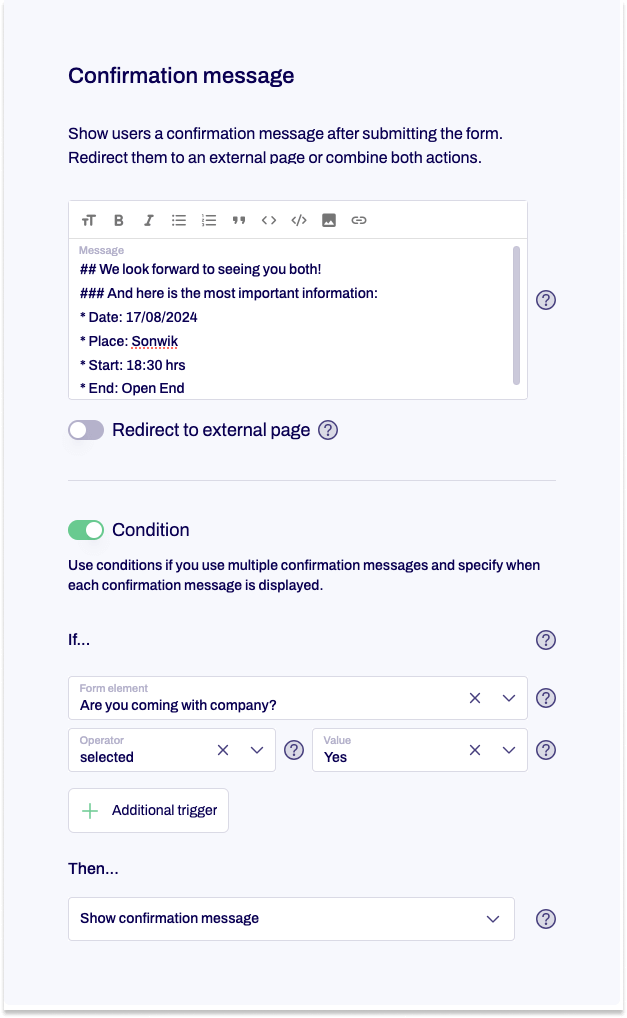
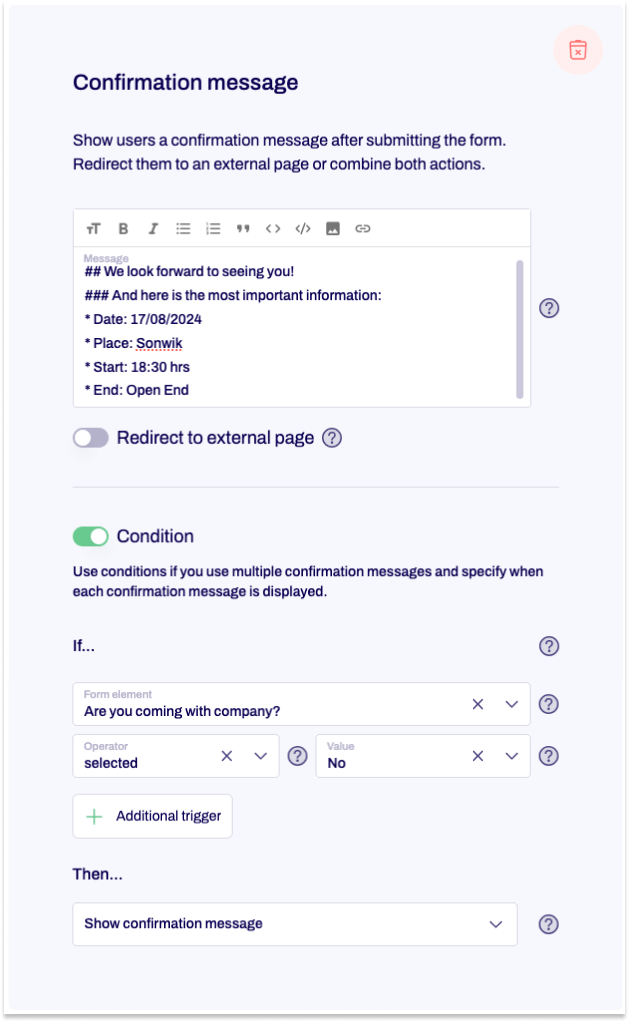
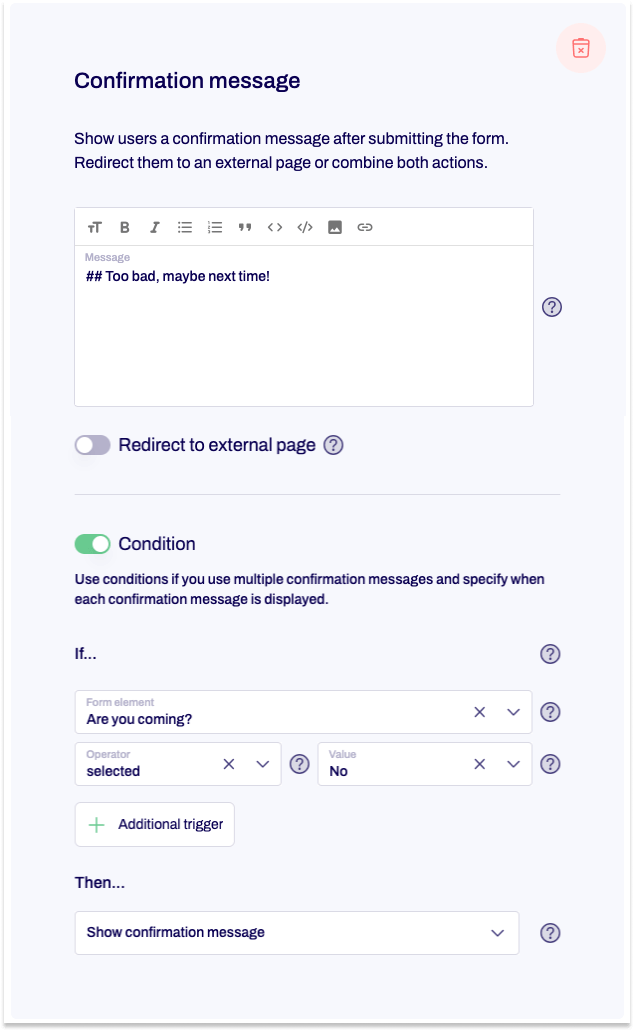
Step 5: Create confirmation messages
As a final step, you need to create various confirmation messages, which are shown, based on the reply given, when the form is submitted.
You create these in the Settings area, under Confirmation message.
We have three separate scenarios here, which each require their own confirmation.
You use conditions to specify the scenario for which the respective message should be shown:
Scenario 1:
The person has confirmed attendance at the summer party and is bringing a companion.
Scenario 2:
Attendance at the summer party is confirmed, but the person is coming alone.
Scenario 3:
The person will not be attending the summer party.
Step 6: Testing and publication
Once you have created the form, we recommend testing it thoroughly before sharing it with other people.
To do this, go back to the Editor. In the Test view, you can try out your form and check to confirm that all of the settings are working as intended.
Make sure that all the questions have been asked correctly, that the conditions are triggered properly and that the form logic is OK.
If everything is as it should be, you can publish and then share the form.
Step 7: Organising your summer party
You can find the replies to your invitation in the Submissions area.
You can see who has said they will or won’t be coming, who is bringing a companion, which meal selections need to be catered for and how you can get in touch with your guests at short notice.
Thanks to this wealth of information, the stage is now set for a well-organised summer event. You have all of the information you need to plan things effectively.


