How does the logic for conditions work?
Last updated:
03 February, 2025
Conditions let you control the states of your form elements on the fly. You define rules that specify when a certain state (e.g. ‘Required field’ or ‘Visible’) is activated. Knowing how condition logic works is essential to ensure that your form works as you want it to.
State pairs
Each form element is always found in one state of each of the following four pairs of opposing states:
Visible ↔ Hidden Optional ↔ Required field Activated ↔ Deactivated Editable ↔ Read-only
An input field that users can enter their telephone number into has the following initial states:
Visible : The input field is visible.Optional : Input into the field is optional.Activated : The input field can be worked with.Editable : The contents of the input field can be changed.
You can use a condition to change these states. The following rule also applies: if the condition is not met, then the original (opposite) state remains in place.
If you define a condition for an optional input field that turns it into a required field (state: optional ↔ required field ), then the input field behaves as follows:
Condition not fulfilled → input field remains optional Condition fulfilled → input field becomes a required field
Only create a condition for the state you want to change to. The original – and opposite – state applies automatically while the condition is not being fulfilled and is reinstated automatically once the condition is no longer fulfilled.
Example 1: Required field for phone support
Let’s imagine that users can request telephone support from your form. In this case, the phone number field should only become a required field if this service is also being requested.
Initial state : The input field for the phone number is optional.Condition : If the ‘Phone support’ option is selected, the input field for the phone number becomes a required field.
An additional condition for the case where no support is being requested is not necessary. If the option is unchecked again, the input field automatically returns to the optional state.
Example 2: Showing a piece of information
A specific piece of information is to be shown only when certain products are selected.
Initial state : The information text is hidden.Condition : When the required product is selected, the text is then shown.
Here too, no additional condition is needed to control hiding the text again: the text is automatically hidden again when another product is selected.
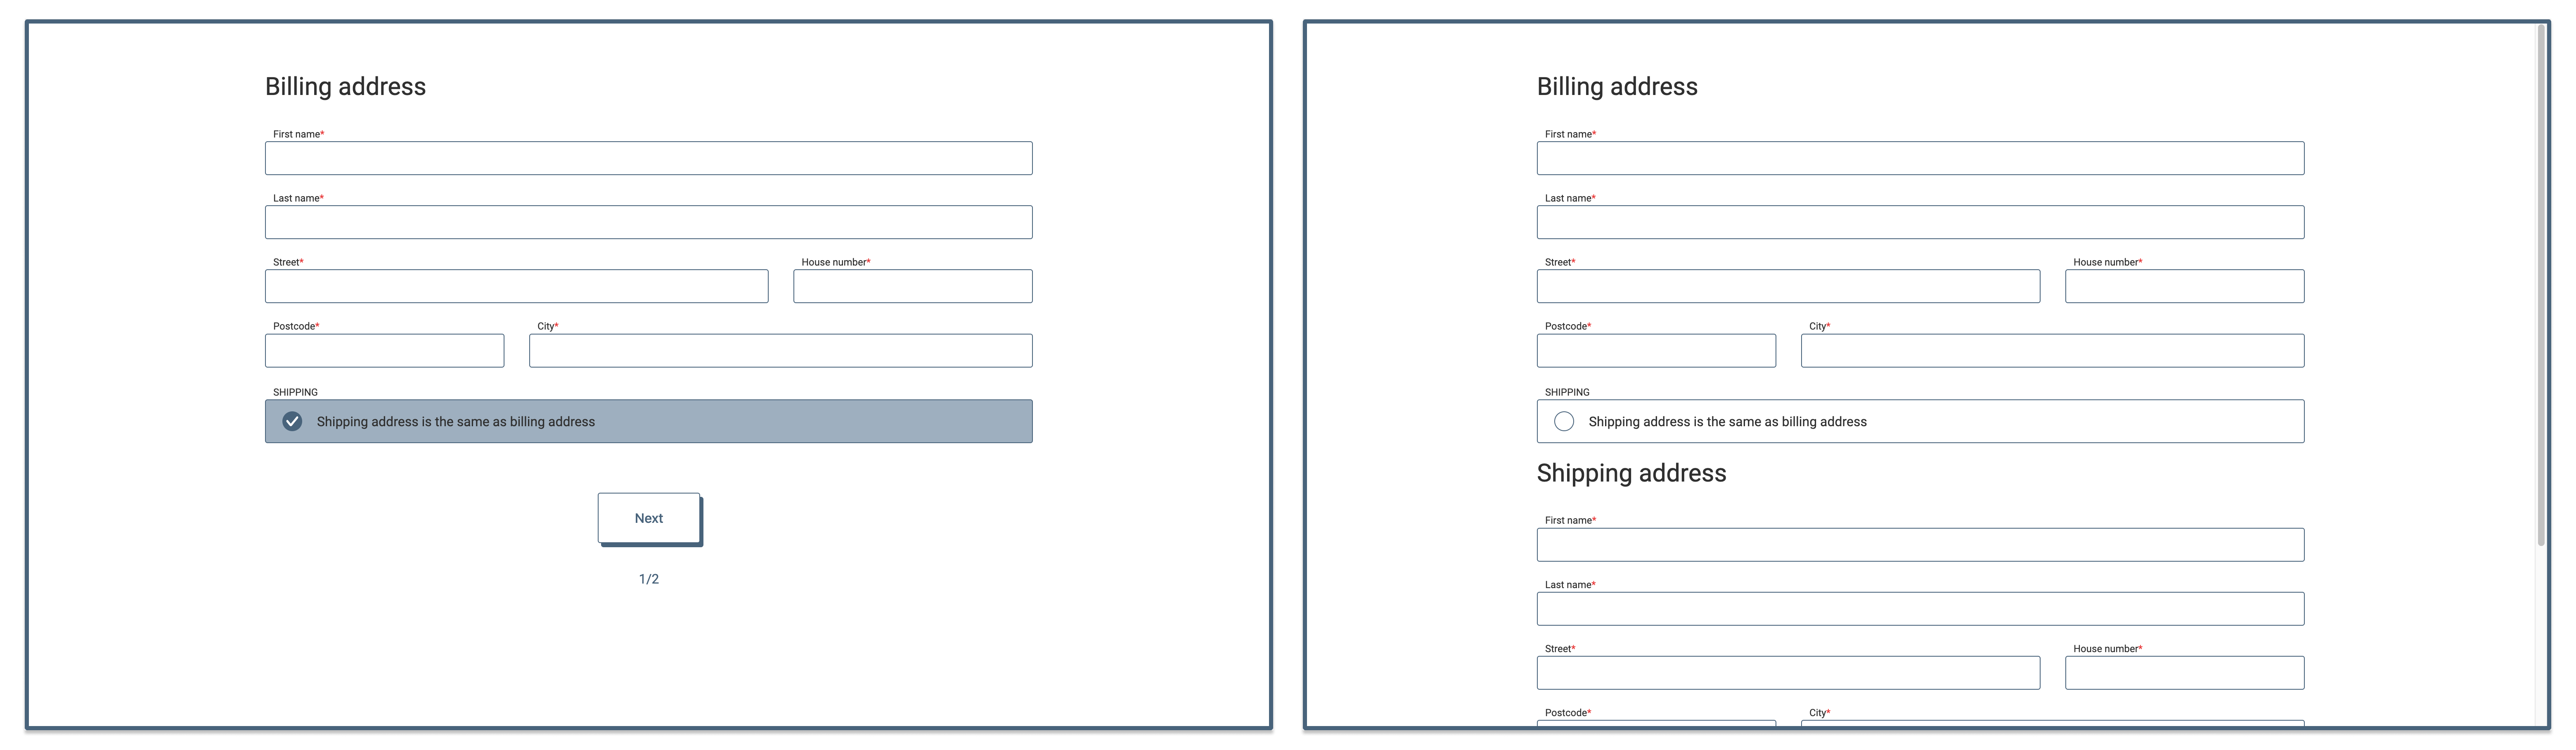
Example 3: Required fields with checkbox control – ‘indirect’ condition
An order form has input fields for the ‘Invoice address’ and ‘Delivery address’. The default assumption is that these addresses are identical. Accordingly, a checkbox is provided ‘Delivery address same as invoice address’ and this checkbox is selected.
Initial state:
The ‘Delivery address same as invoice address’ checkbox is selected. The input fields for the Delivery address are hidden. As no input is needed, the fields for the delivery address are not visible, even though they are required fields.
Condition:
If the checkbox is unchecked , the input fields for the Delivery address are shown and must be completed.
An additional condition for hiding the delivery address fields when the checkbox is checked is not required because this is true in the form’s initial state. The required field logic is controlled indirectly by visibility here: the fields are defined as required fields from the outset but are shown only when needed (when the checkbox is unchecked).