Step-by-step guide: creating an online form
Are you looking to create a form but unsure how to go about it? These step-by-step instructions are the perfect way to get started.
In this article, we guide you through the form creation process from start to finish. We show you how to create, edit and publish your form. We also show you where to find the link to share your form and then later view the responses you have received.
We have chosen a simple usage scenario to illustrate the overall process. You’re planning to give a presentation to your team about staying healthy. To help you plan your talk and ensure that people find the subject you pick interesting, you want to find out what kinds of health topics your team would most want to hear about. You’ve narrowed down the choice to three key topics: diet, stress and exercise.
Your team now has to pick one. The topic with the most votes will become the main topic for your presentation.
But let’s start right at the beginning.
Step 1: Creating a form
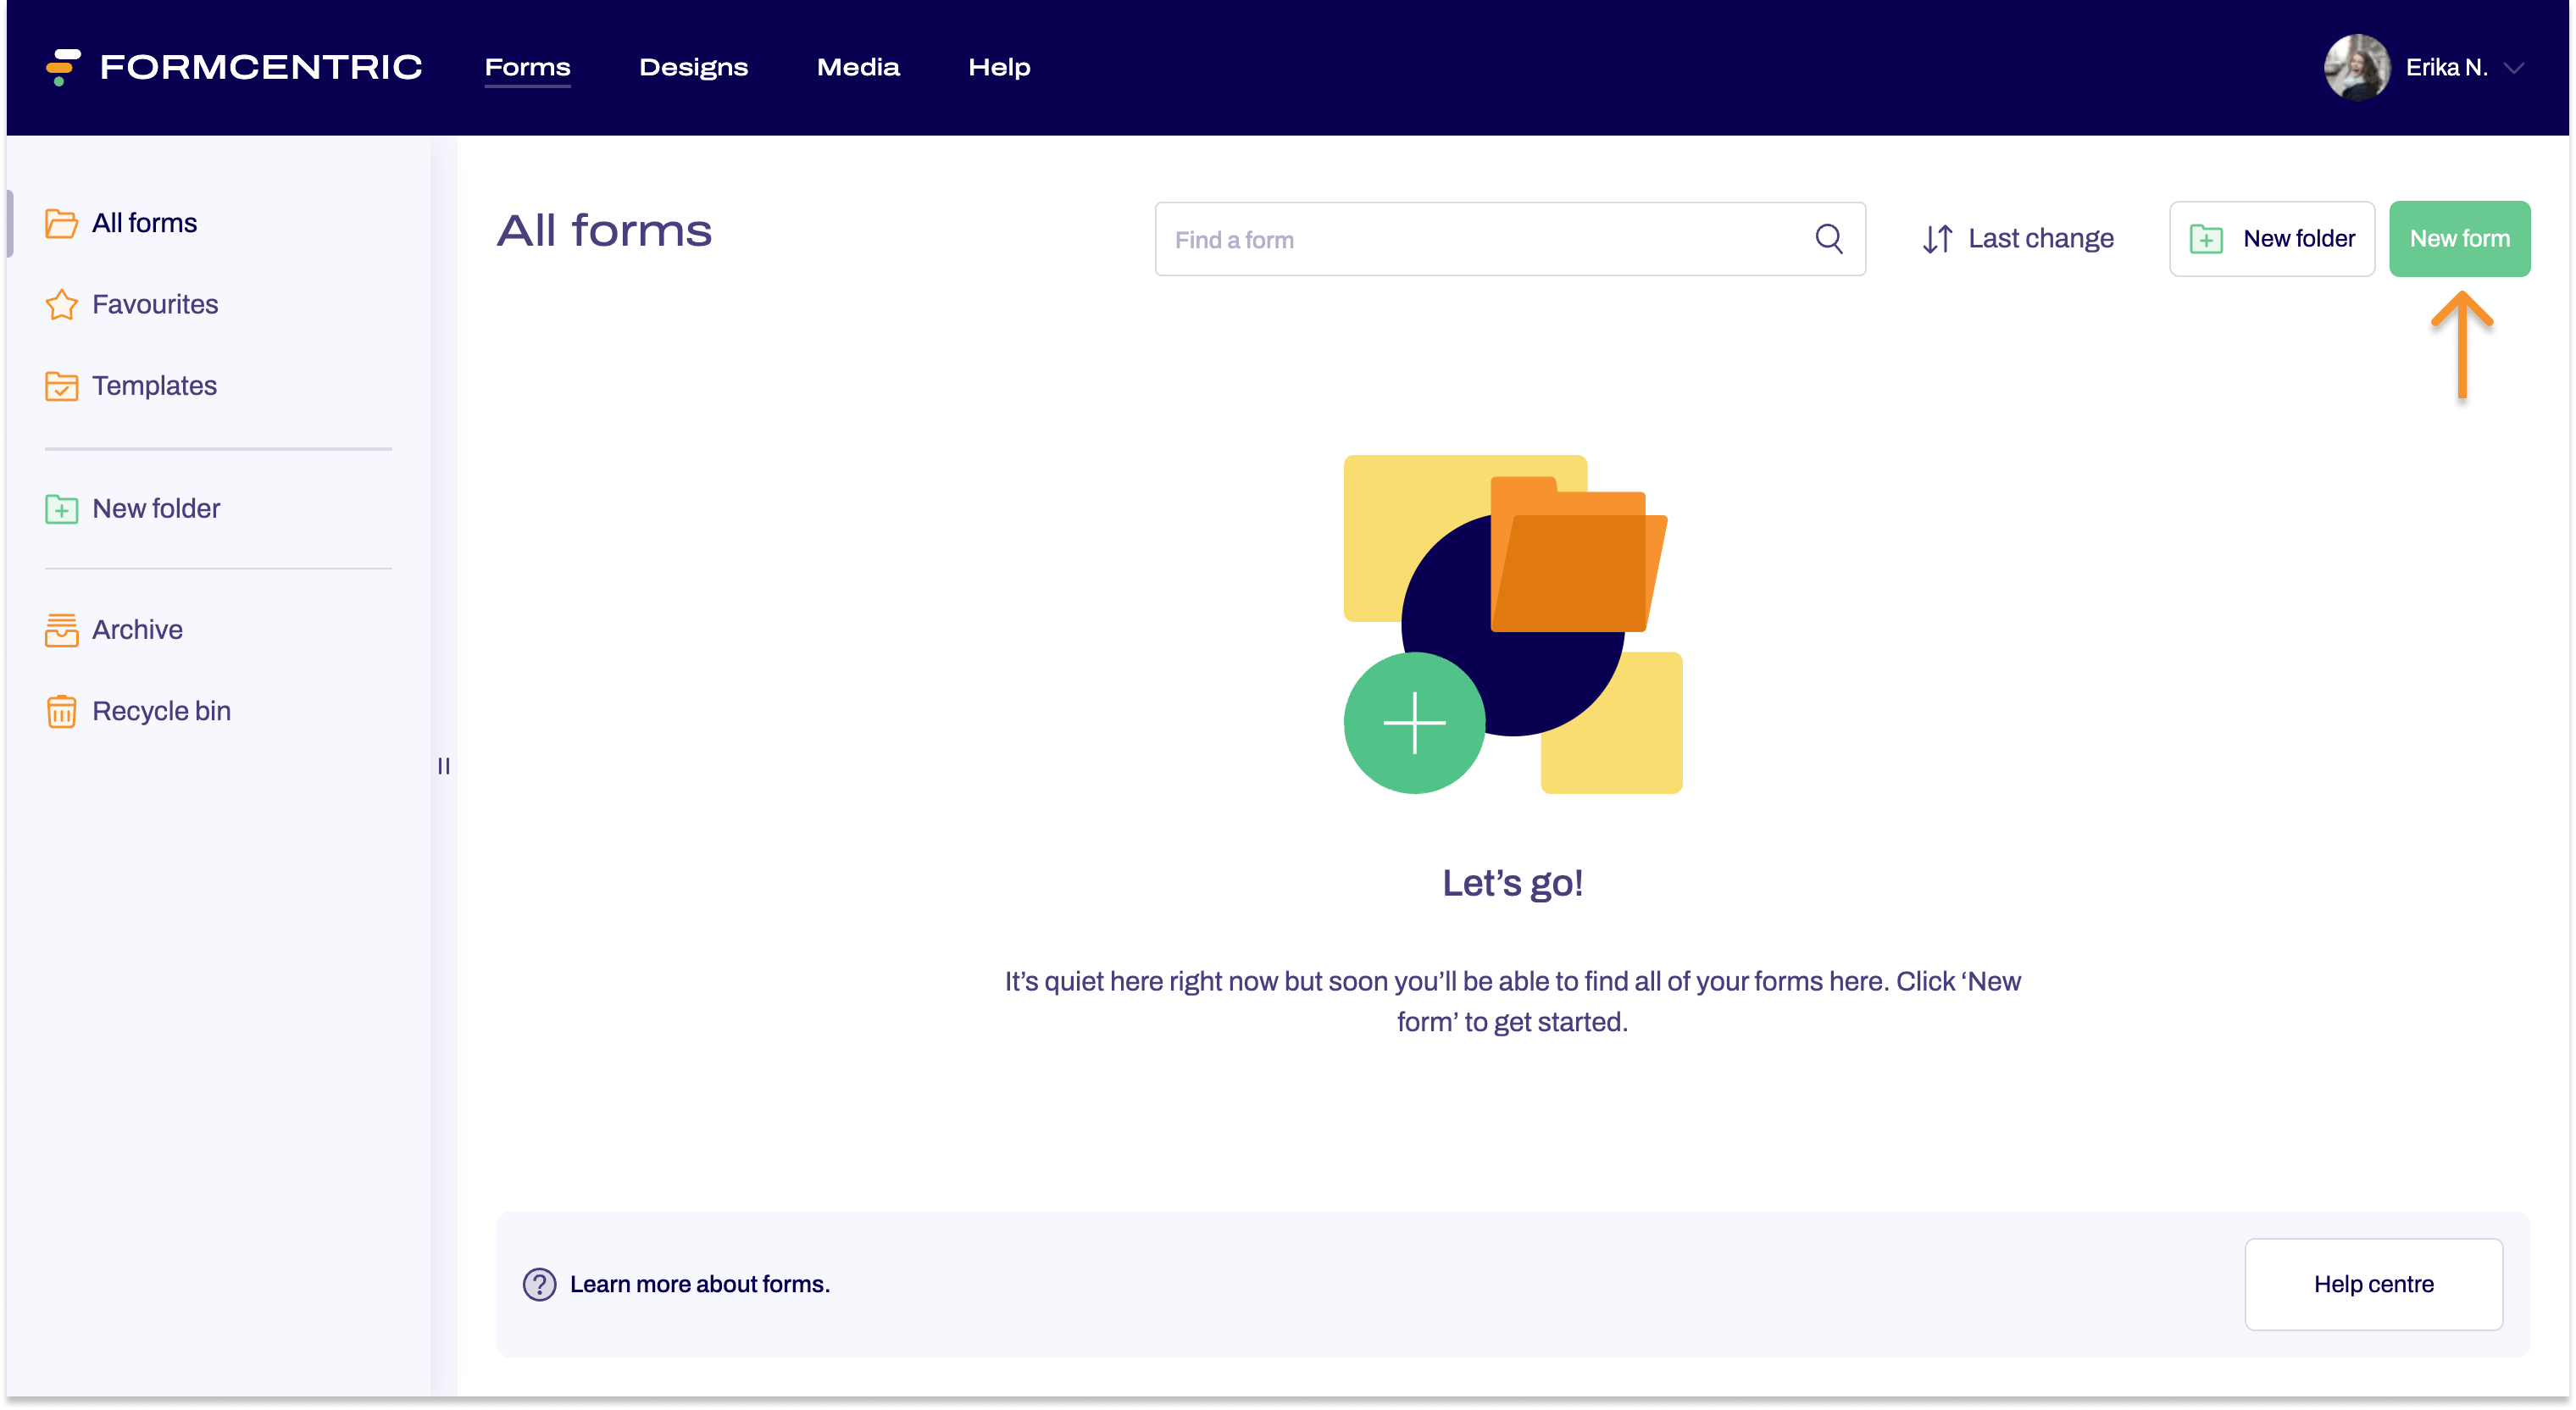
Complete the following steps to create your form:
- Click New form at the top right of the screen.
- Select Create form.
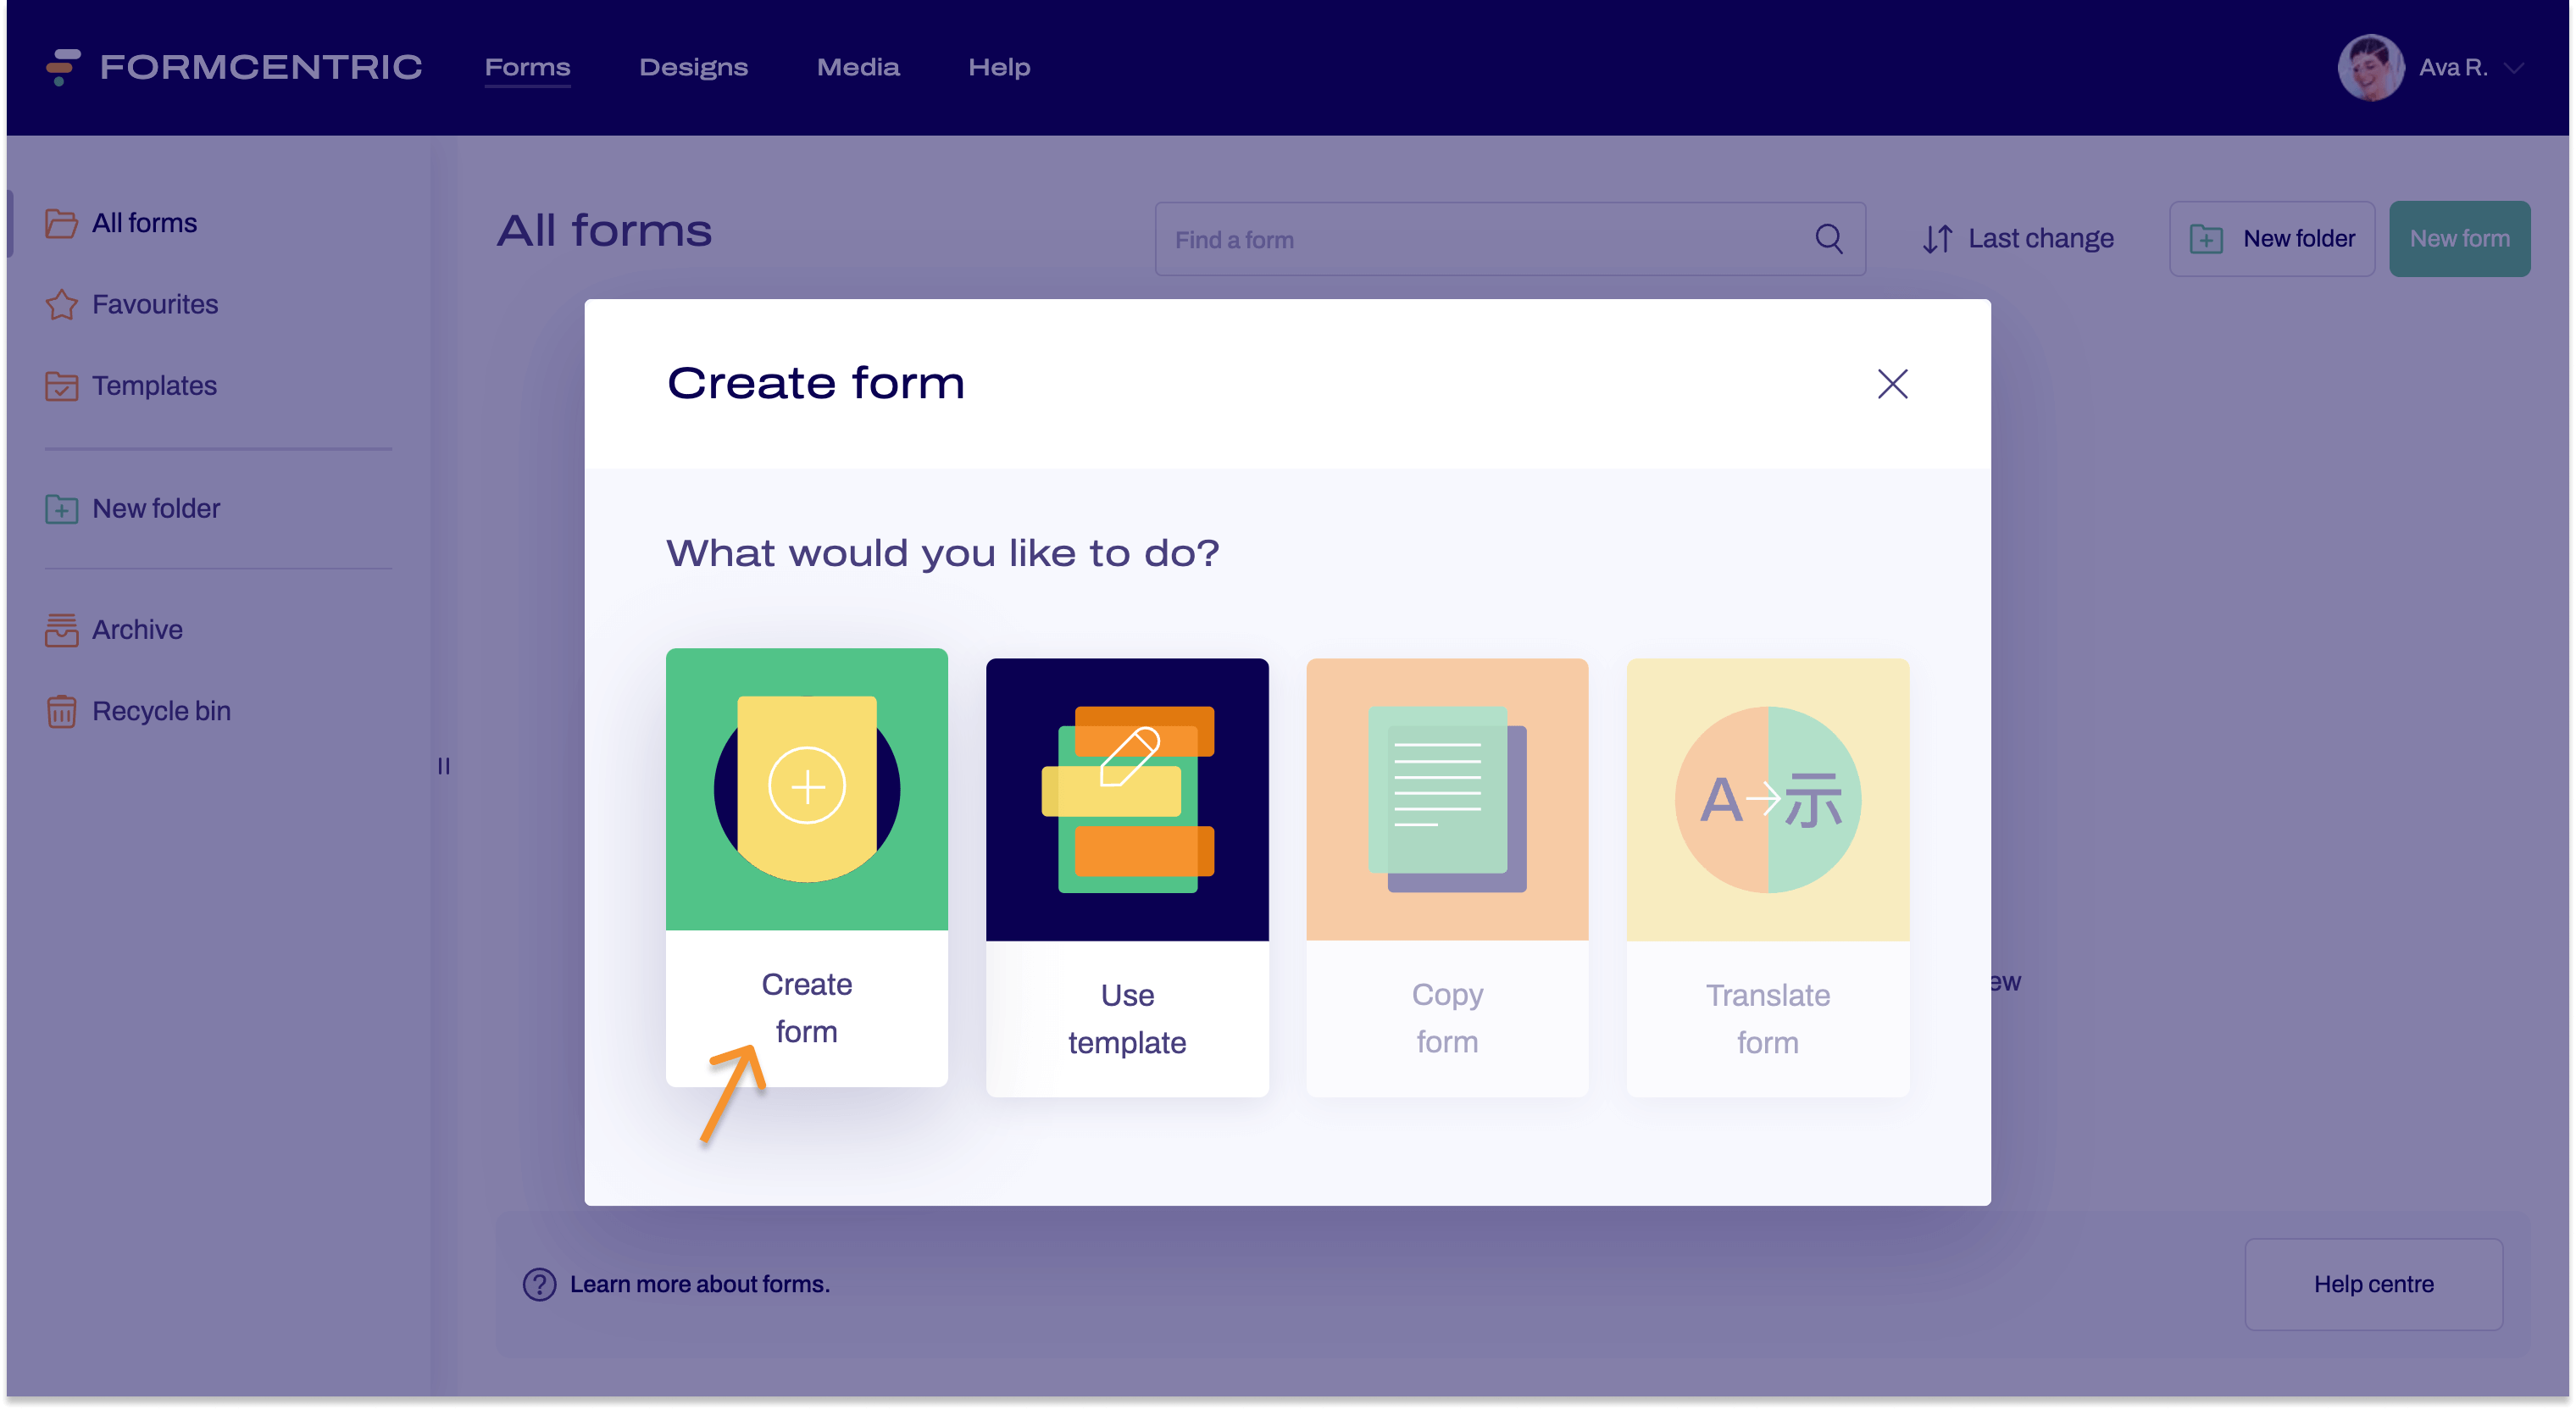
- Enter a name for the form and click Create form.

Step 2: Editing the form
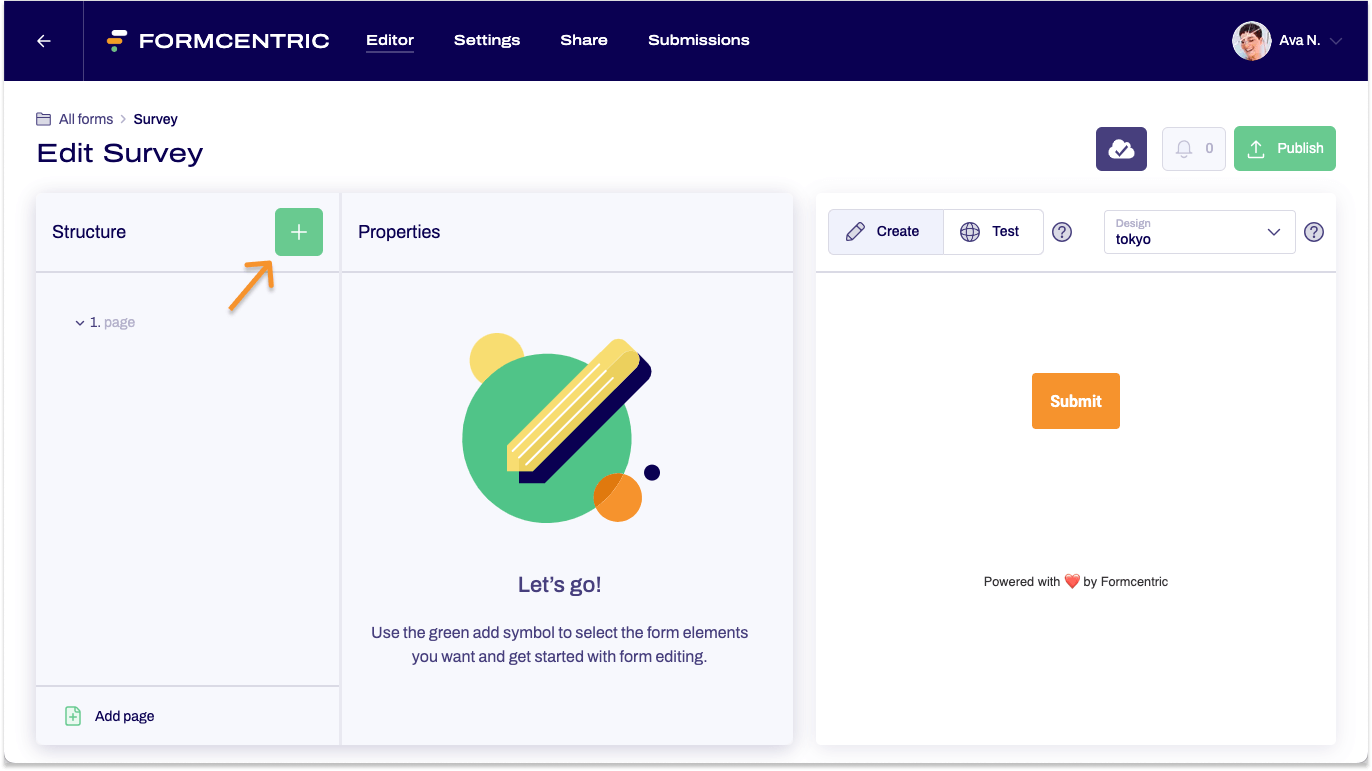
Once you have created your form, it is shown automatically in the Editor. You can now edit it here.
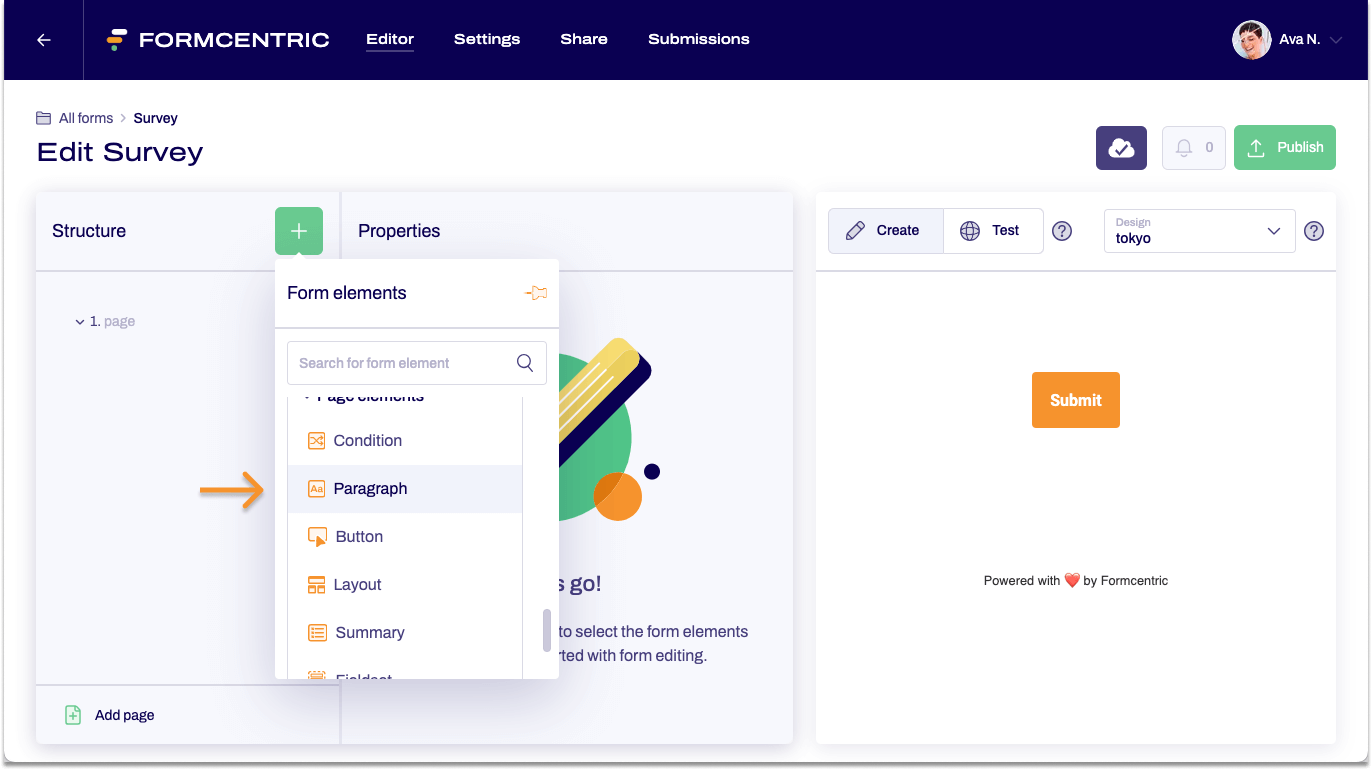
- In the Structure area, click the green plus sign.
- Select the Paragraph form element.
- In the editing area, go to Text and enter a short piece of text that describes what this survey is about.
You can use the icons shown above to format your text. Select the text that you want to format in some way and then click the appropriate icon to apply your chosen formatting, e.g. H1 for a first-level heading.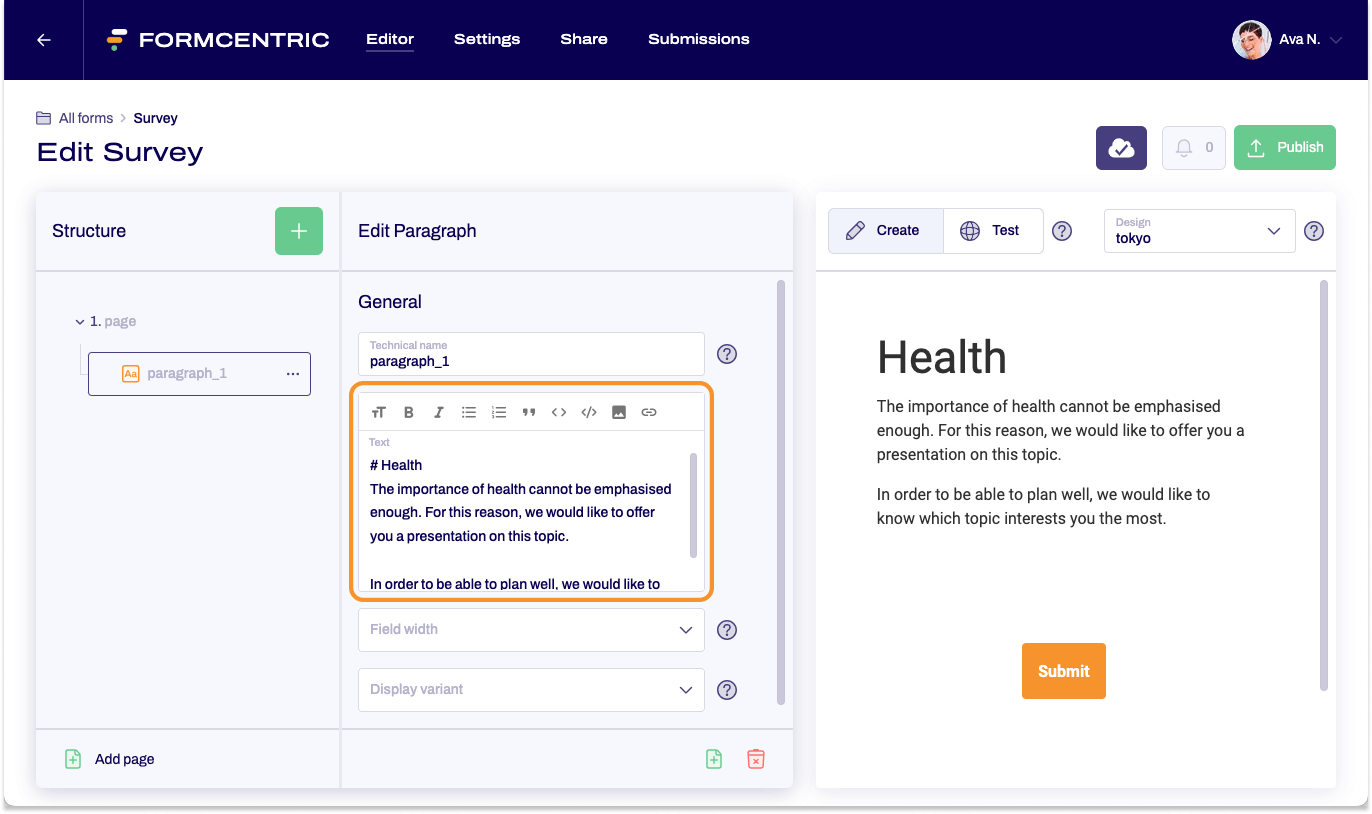
- As described above, you are offering three topics to pick from. To do this, use a single choice field.
Click the green plus sign and select Single choice.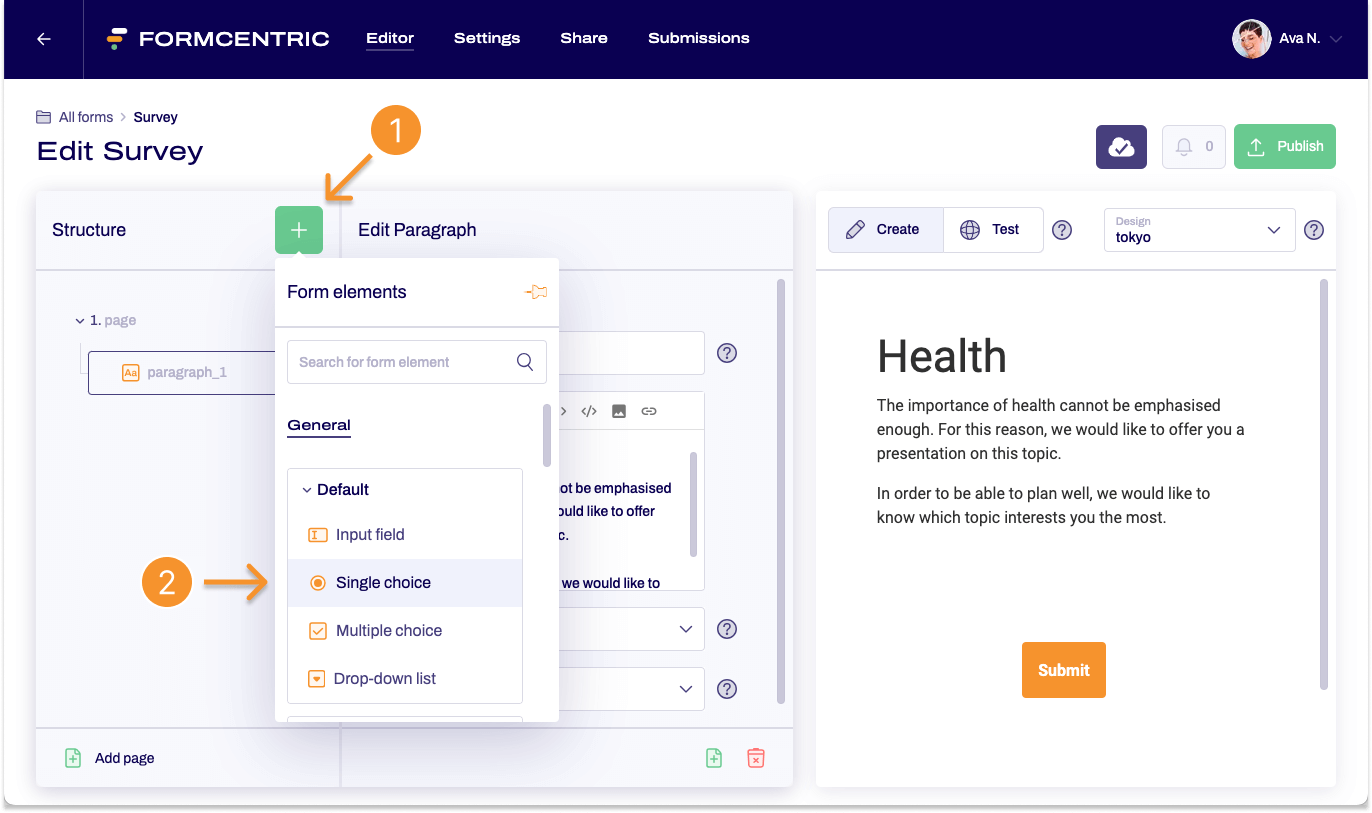
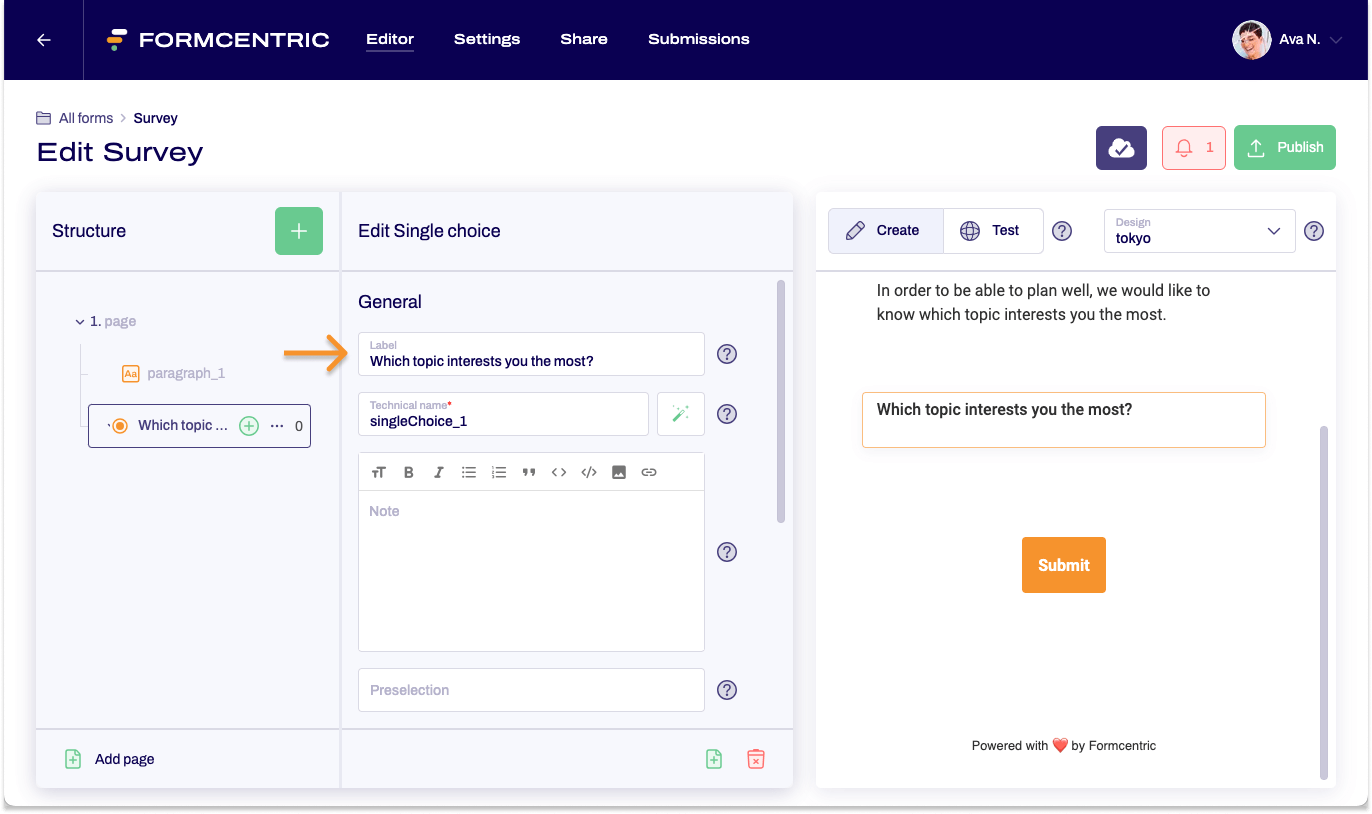
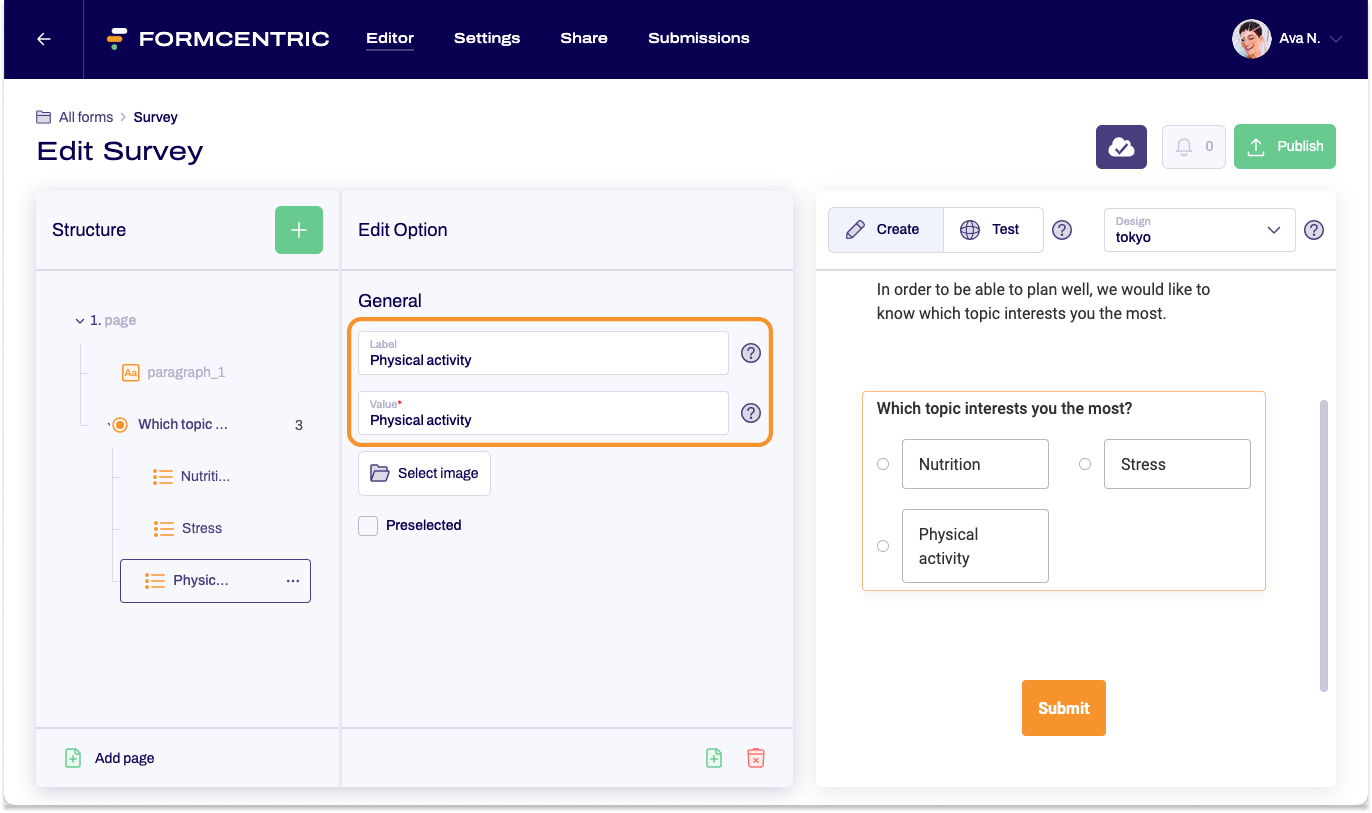
- In the editing area, go to Label and enter the text that should be shown for the selection.
- Now click the single choice on the left and then the green circled plus sign three times to add three options to the field.
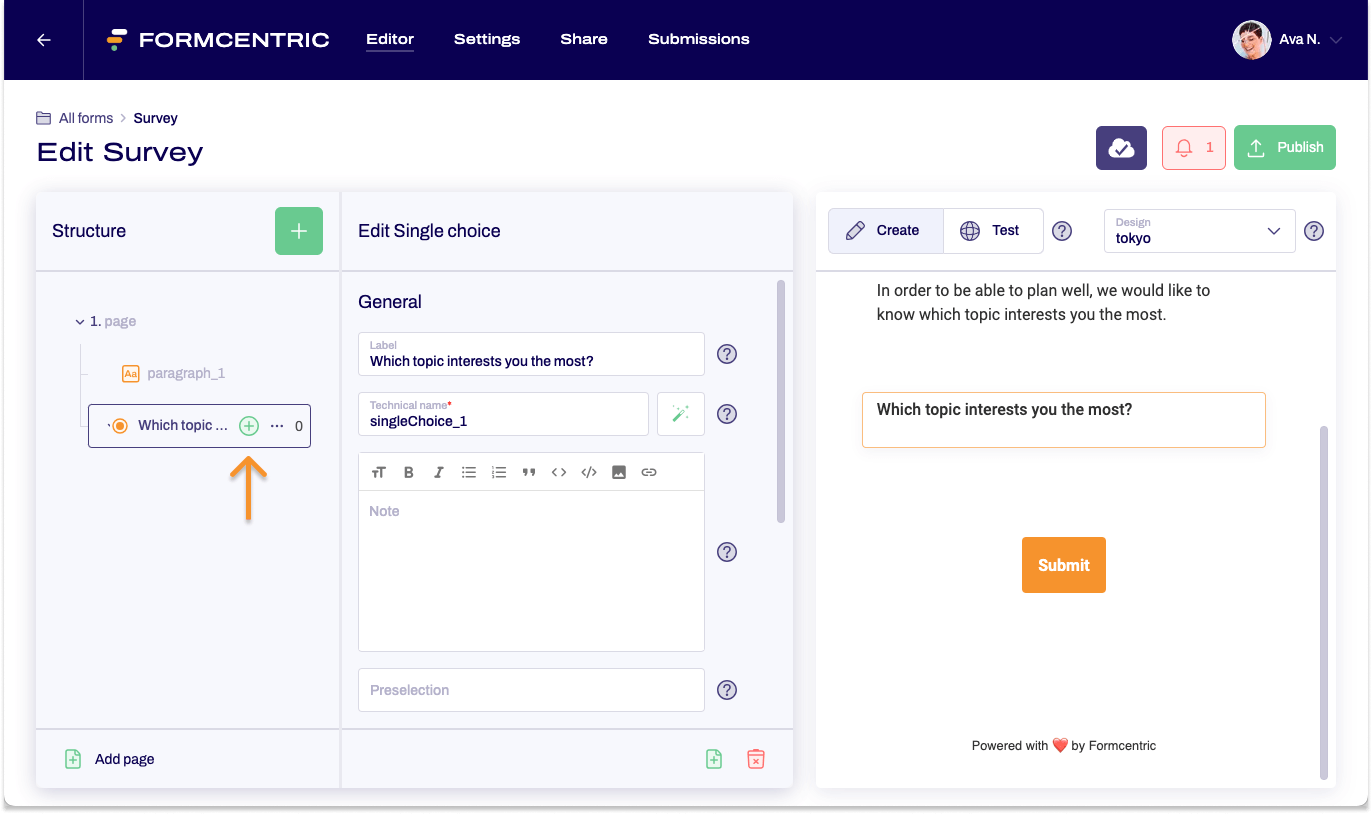
- Go through all three options one after the other: In the editing area, go to Label and enter the name for each topic. Repeat this entry for Value.
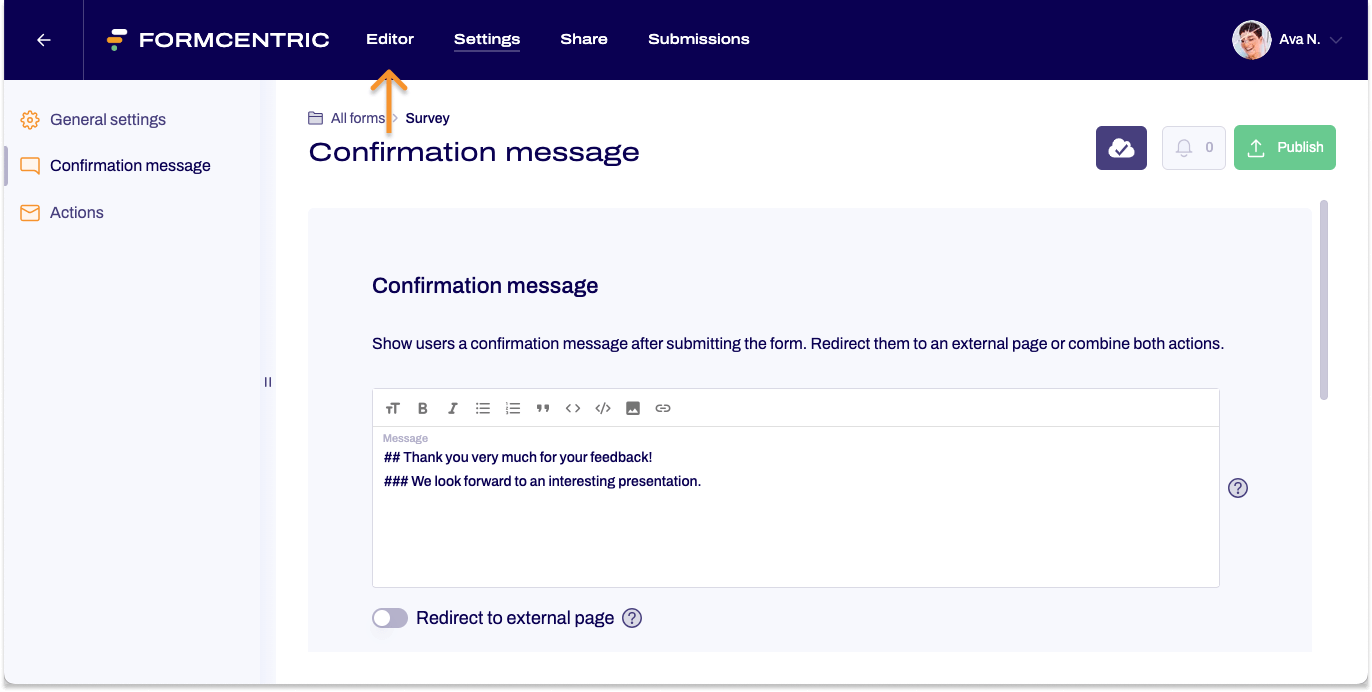
Step 3: Setting up a confirmation message
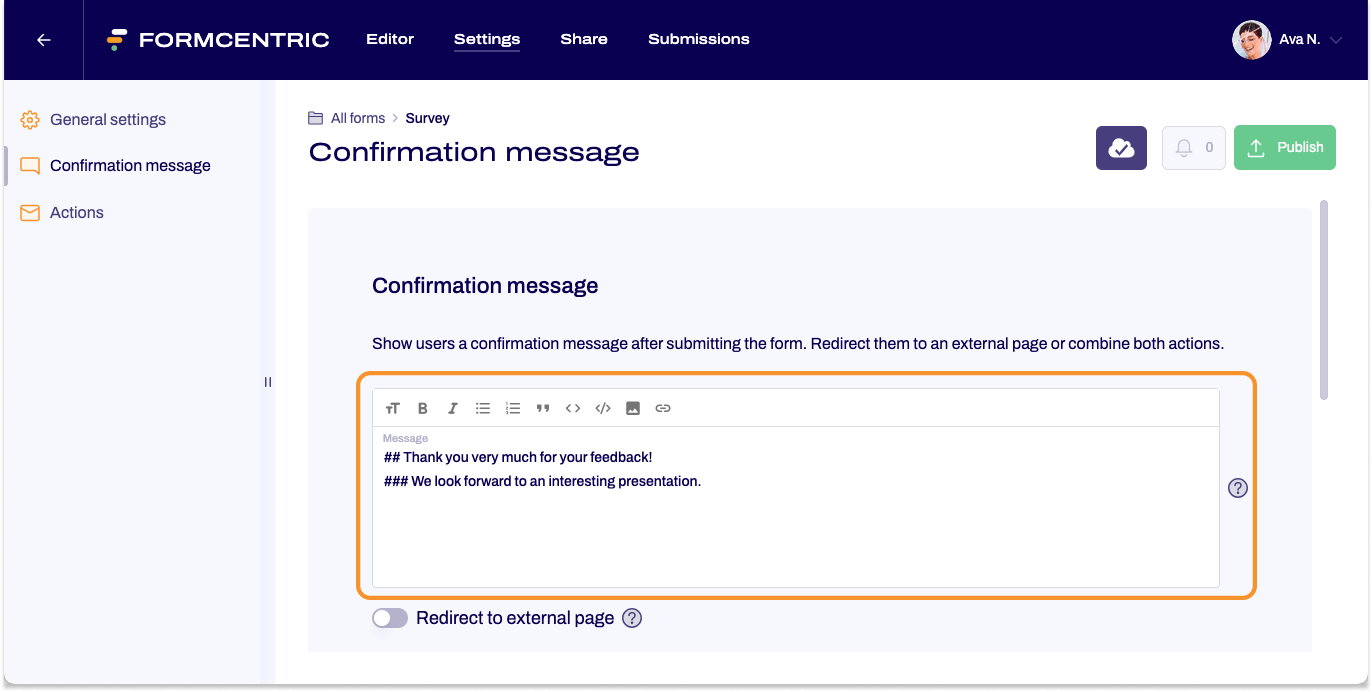
When the form is submitted, a piece of text should be displayed relating to the form just sent.
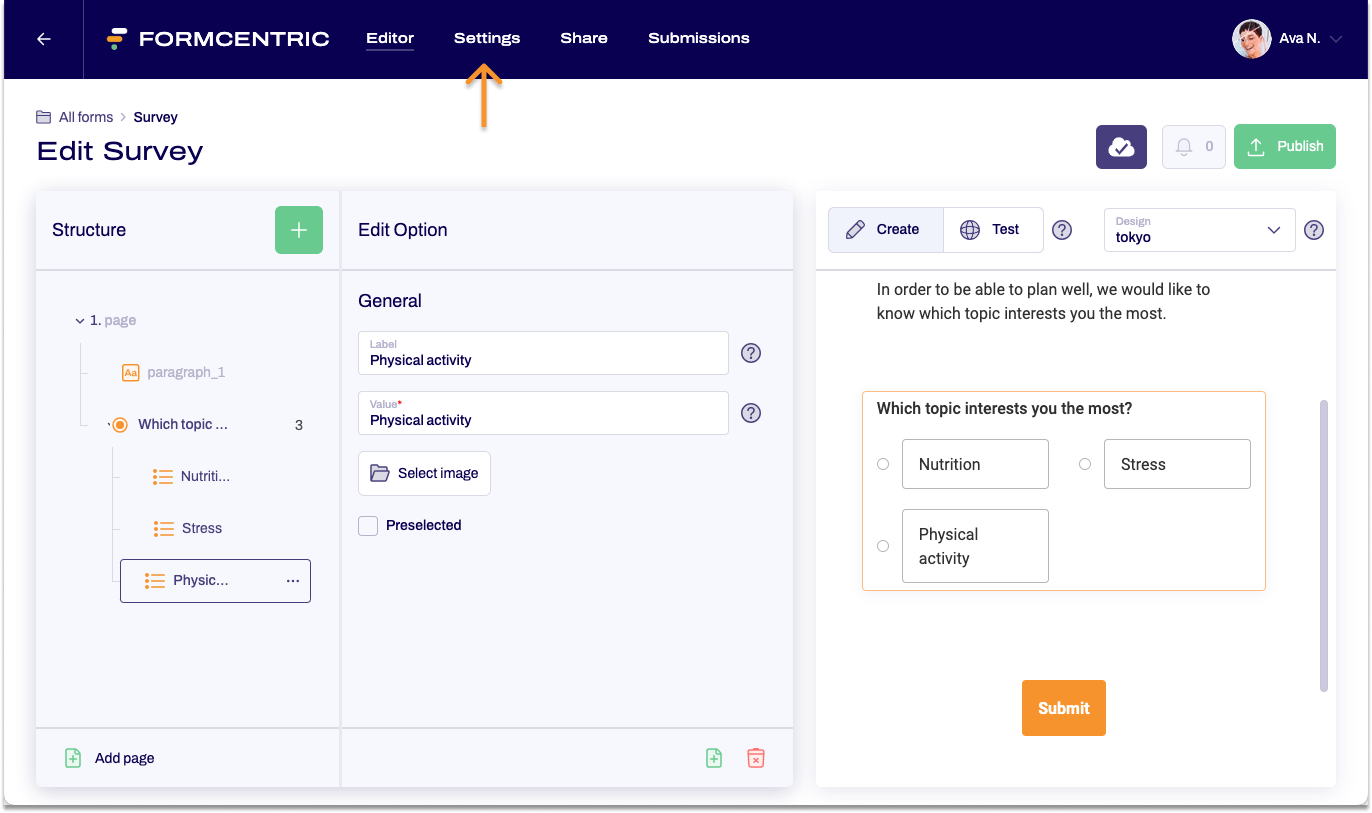
Switch to the Settings area for the form to set up the confirmation message you need.
- Click Settings at the top of the screen.
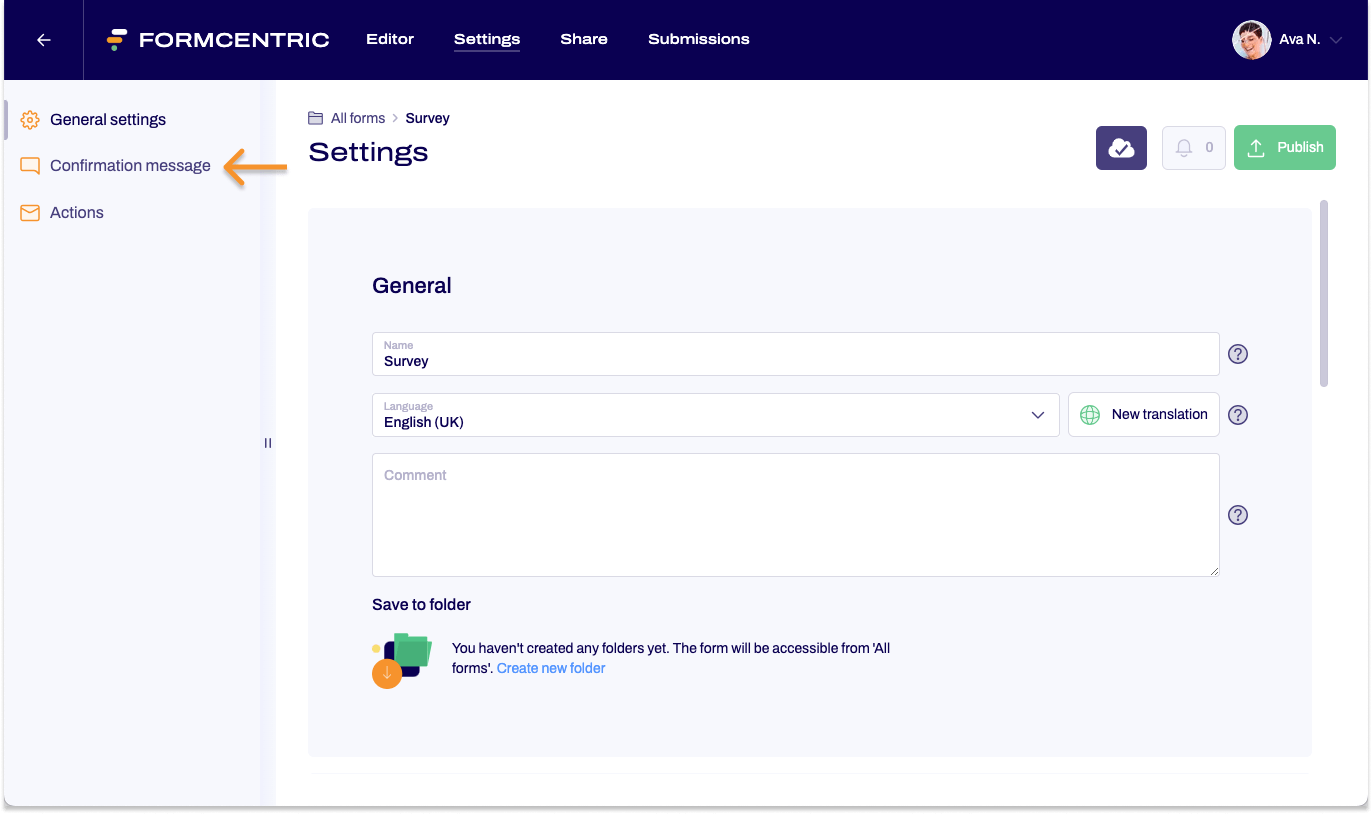
- In the Settings area, click Confirmation message.
- Delete the default text shown and enter your own confirmation message.
- Click Editor at the top of the screen to go back to the Editor.
Step 4: Testing the form
Once back in the Editor, you can now test your form.
- In the form preview, click Test to see the form as it will be shown to your team.
Make a selection, submit the form and check the confirmation message that is shown.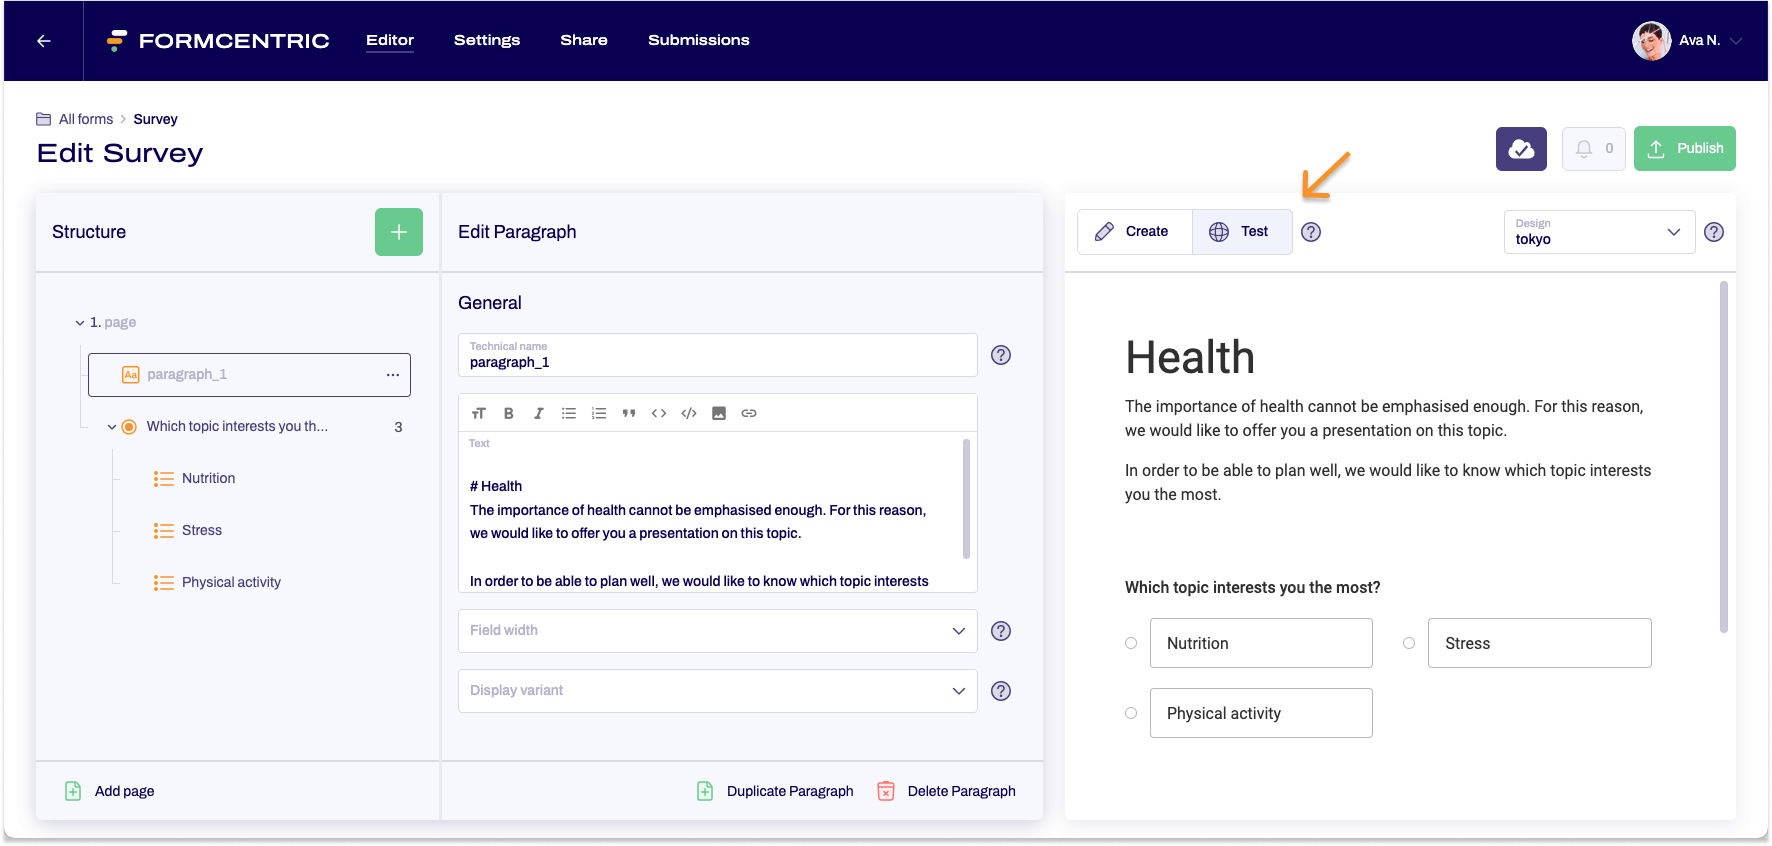
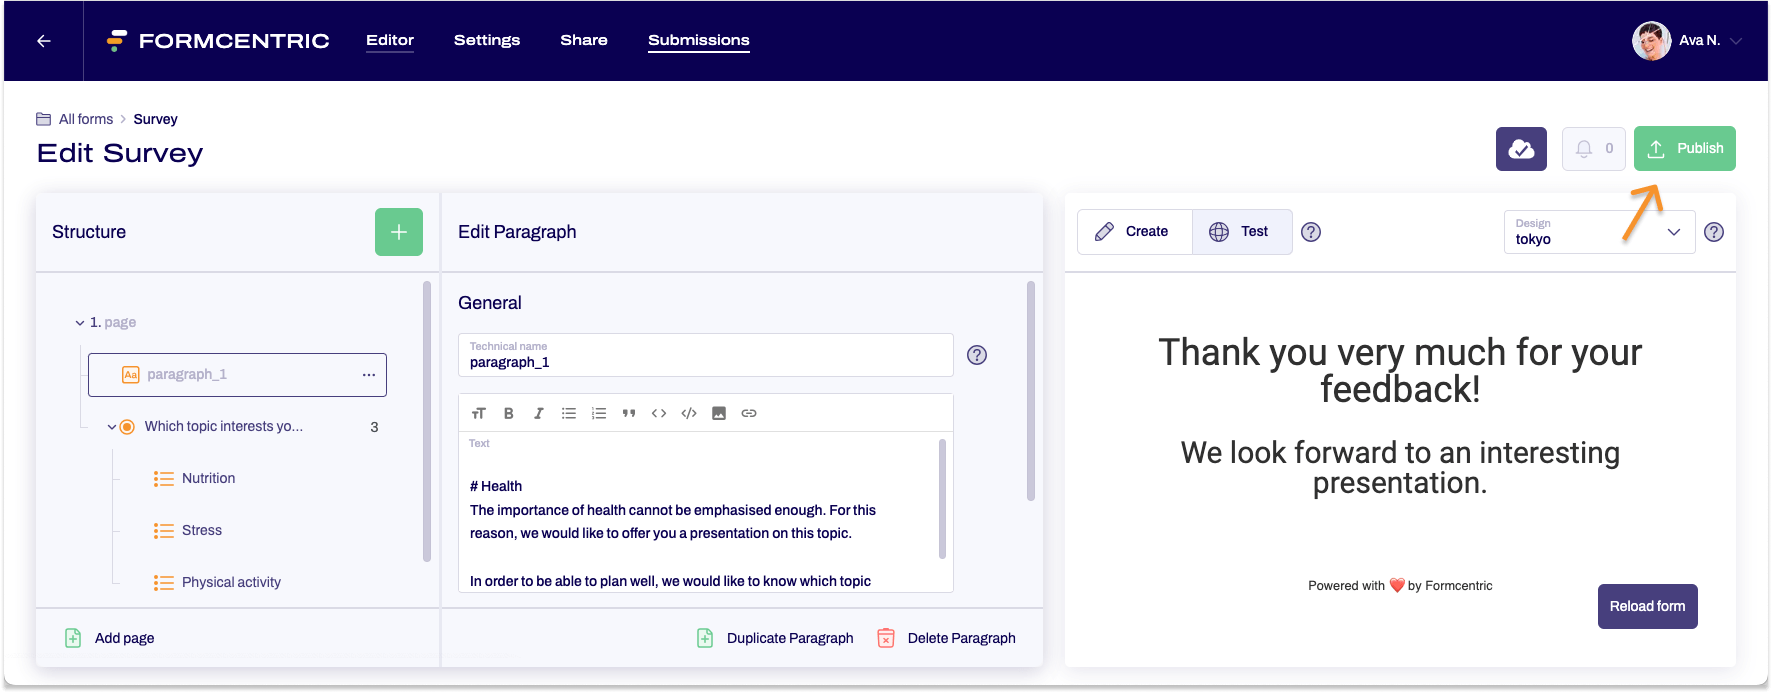
Step 5: Publishing the form
As a final step, you can now publish the form.
- Click Publish at the top right.
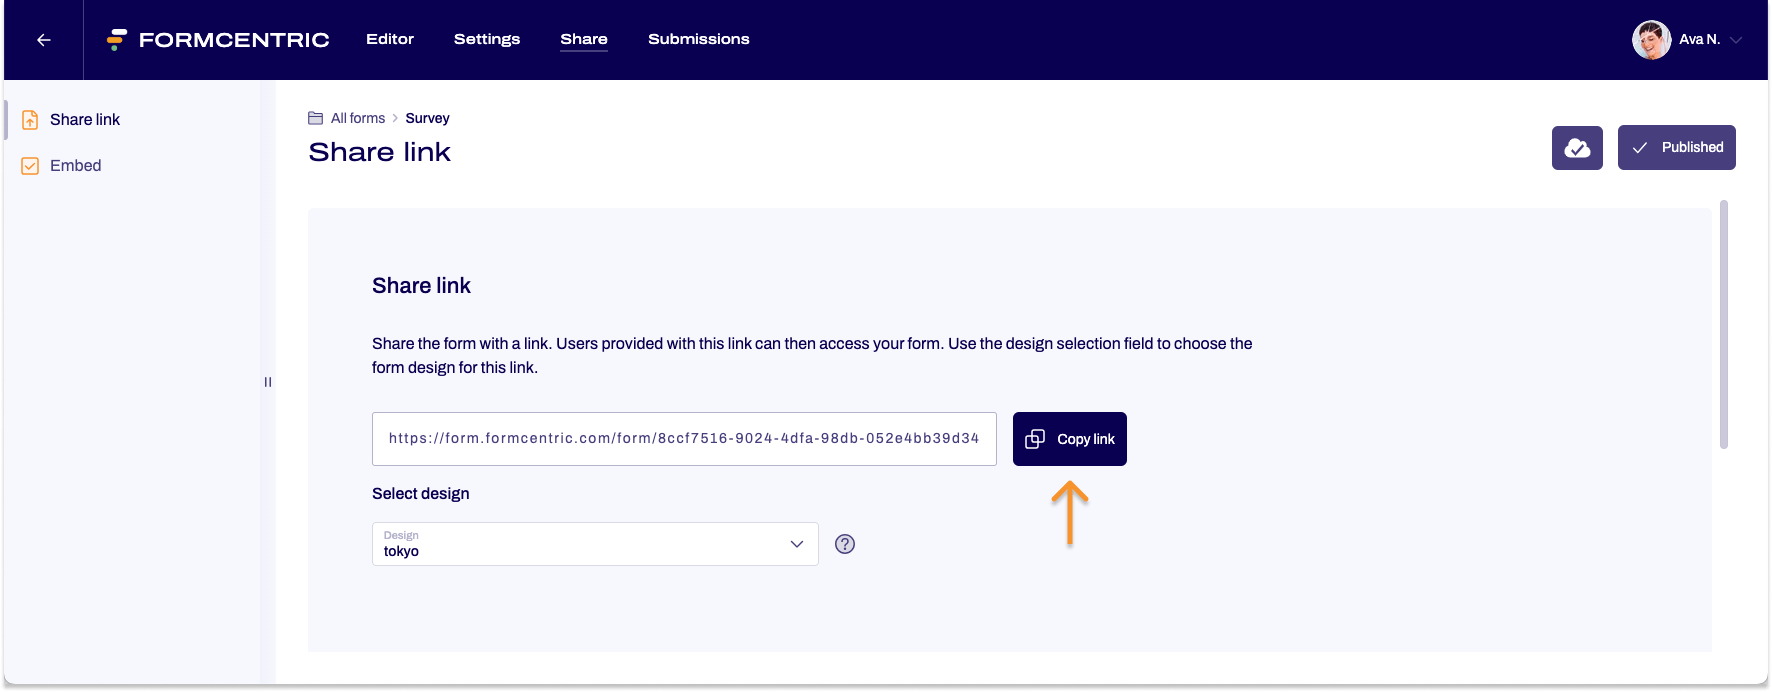
Step 6: Sharing the form
After publication, you can now share the form.
- Click Share at the top of the screen.
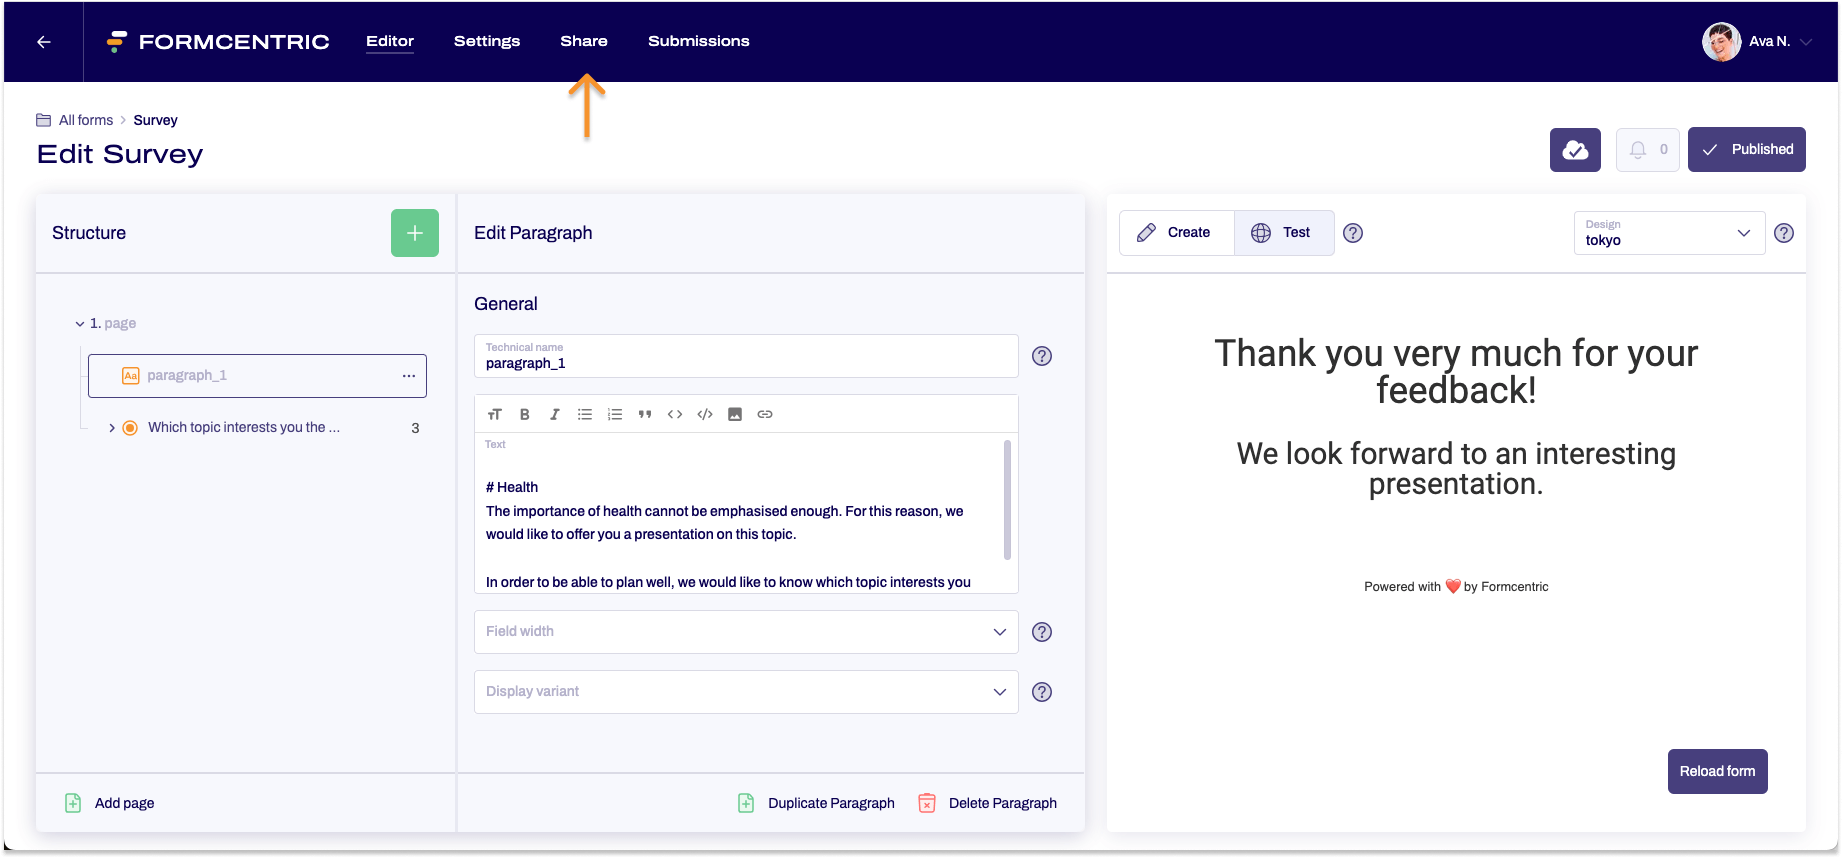
- Click Copy link to copy the link for sending to your team members.
Step 7: View your submissions
Once you have shared the form with the link, you can see the replies to your survey in the Forms area.
- In this example, we have already received five submissions.
Click the number to view the submissions in more detail.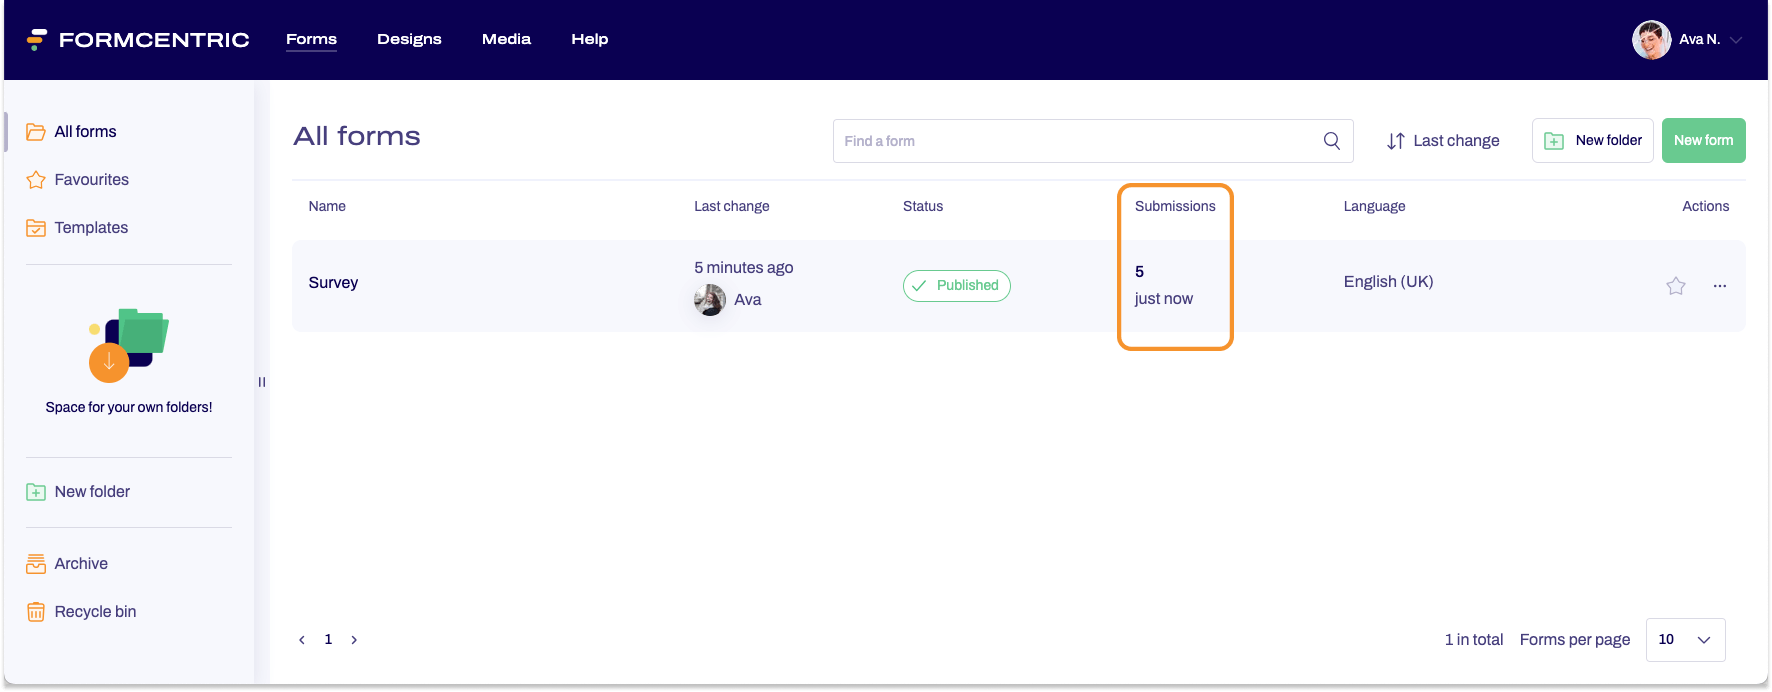
This takes you to the Submissions area of your form, where you can view the replies that you have received for your survey.


