Forms area – an overview
You use the Forms area to create and manage your forms. Depending on your requirements, you can have all of your forms displayed or just the forms from individual folders, the archive or the recycle bin. A clearly structured list of your forms is shown, which includes the name of the form as well as other important items of information. You can also create new folders in this area and therefore set up your own filing system.
Forms and folders overview
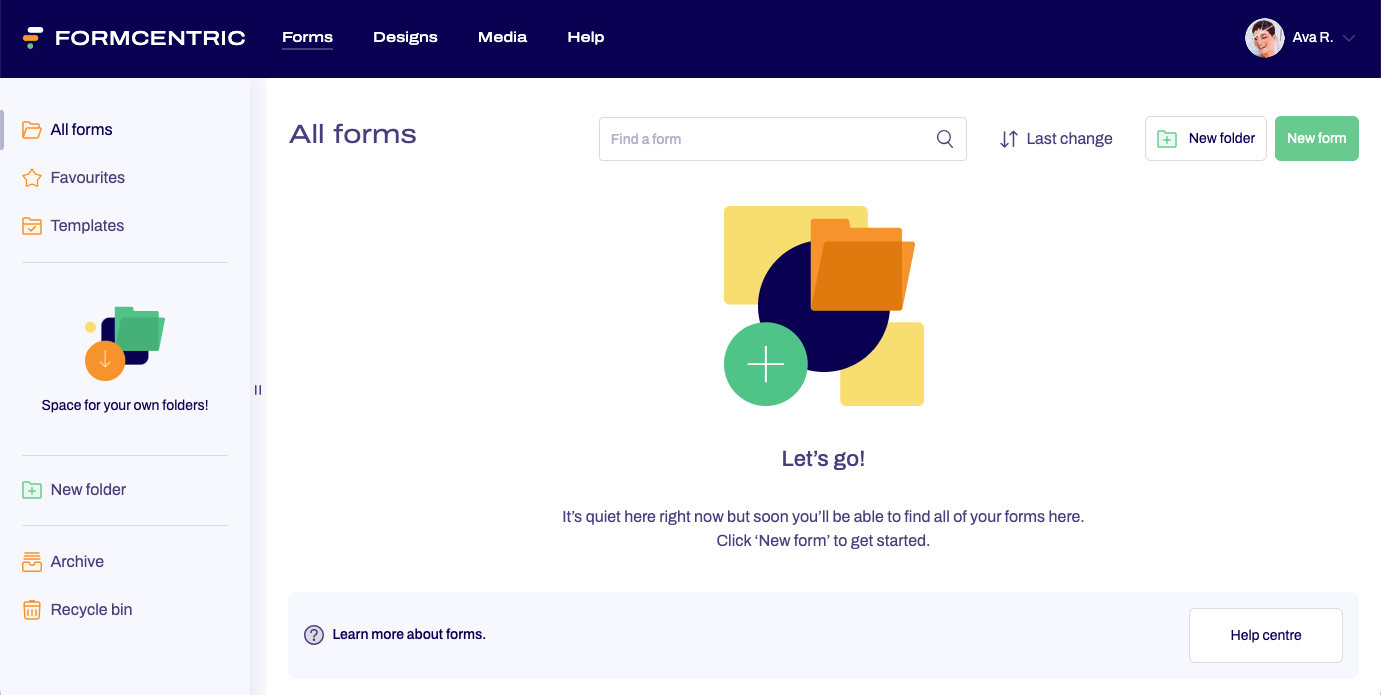
This is the default view when you open Formcentric for the first time. No forms or individual folders have been created as yet:
The next screenshot illustrates how the Forms area can look when forms and folders are present:
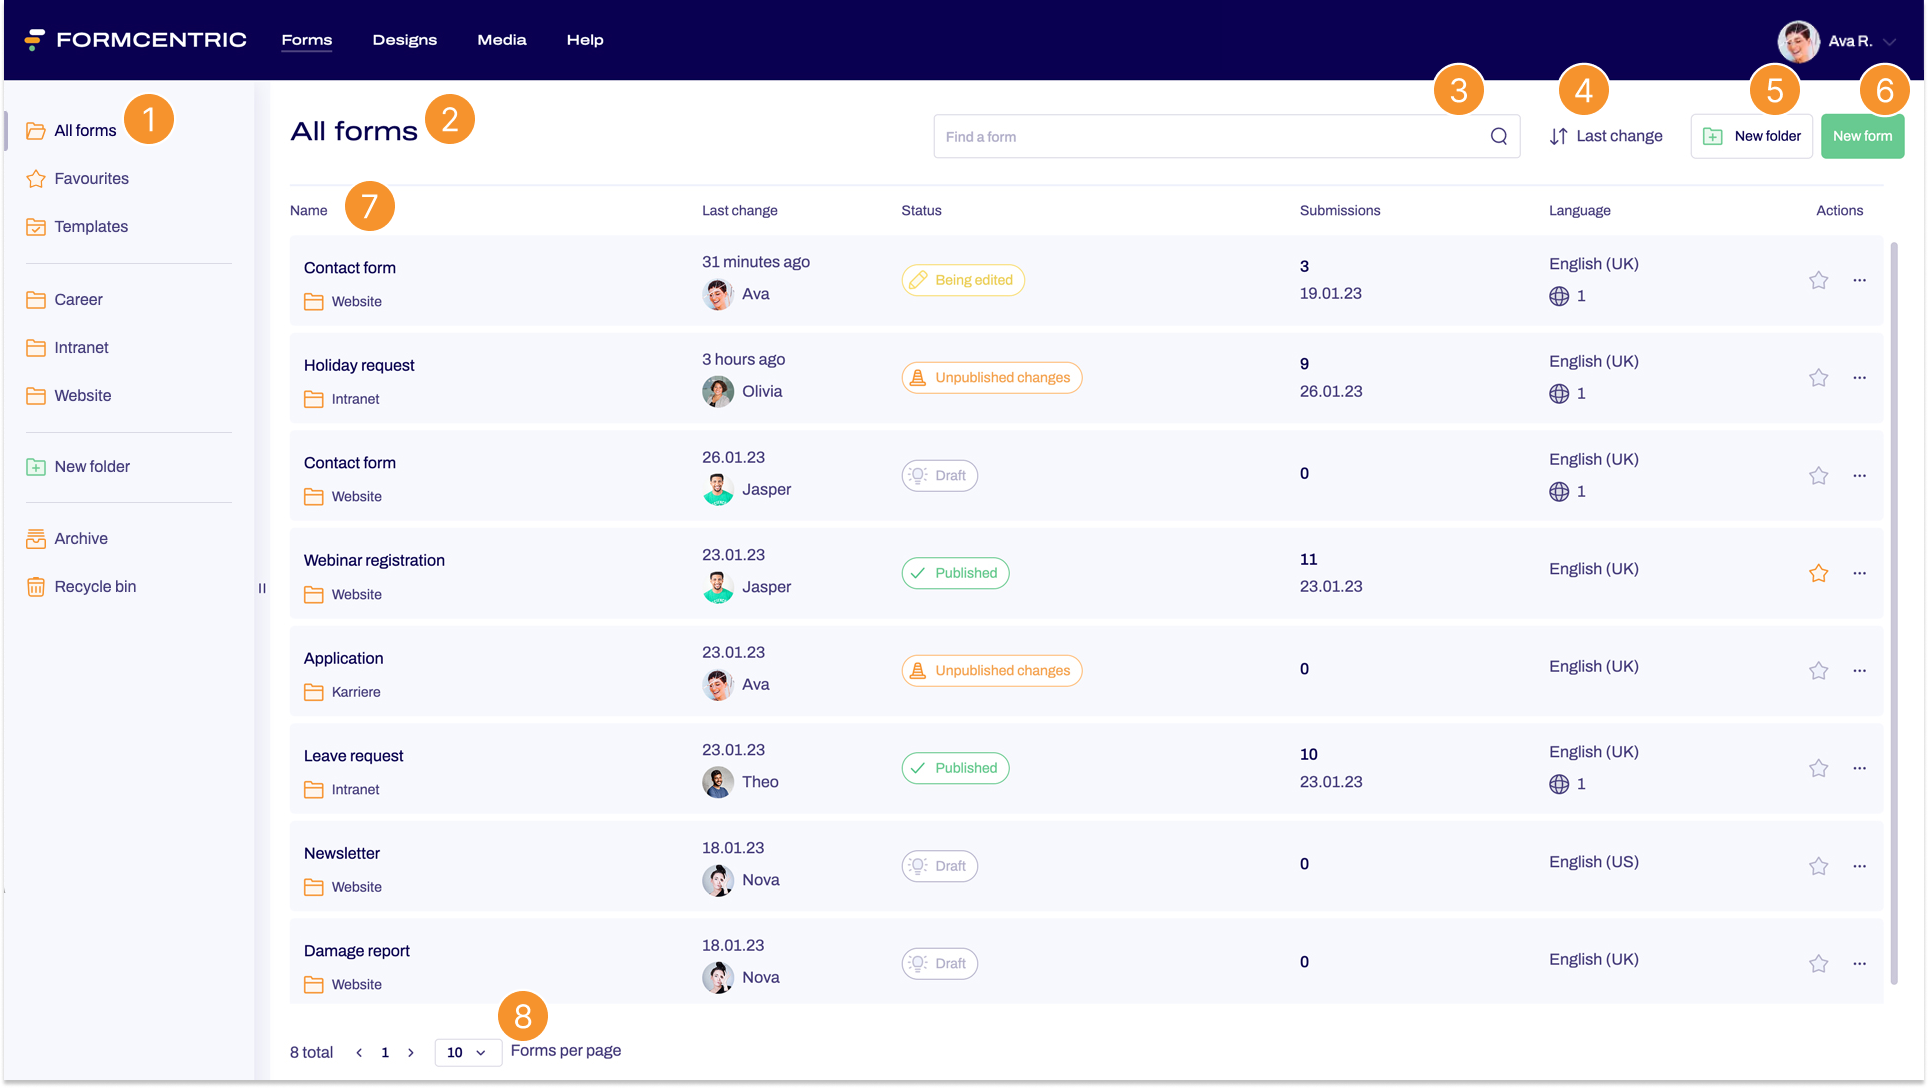

The left-hand navigation area has links to the standard folders All forms, Favourites, Templates, Archive and Recycle bin. The New folder button gives you the option of creating additional folders, which are then also listed in the navigation area.
.png)
This shows you the parent folders for the forms shown in this view. If you only want to see forms from a specific folder, then click the folder as shown in the left-hand navigation area.
.png)
You can use the search function to search for a specific form among all of your forms.
.png)
You can change the sort order of your forms here. You can sort according to when forms were changed (Last change), by form name in ascending or descending order (Name: A-Z or Name: Z-A), or by listing your Favourites first.
.png)
Click New folder if you want to create a new folder.
.png)
Click New form if you want to create a new form.
.png)
Here, you can navigate between the form overview pages and also set how many forms you want displayed per page. The default is to display 10 forms per page.
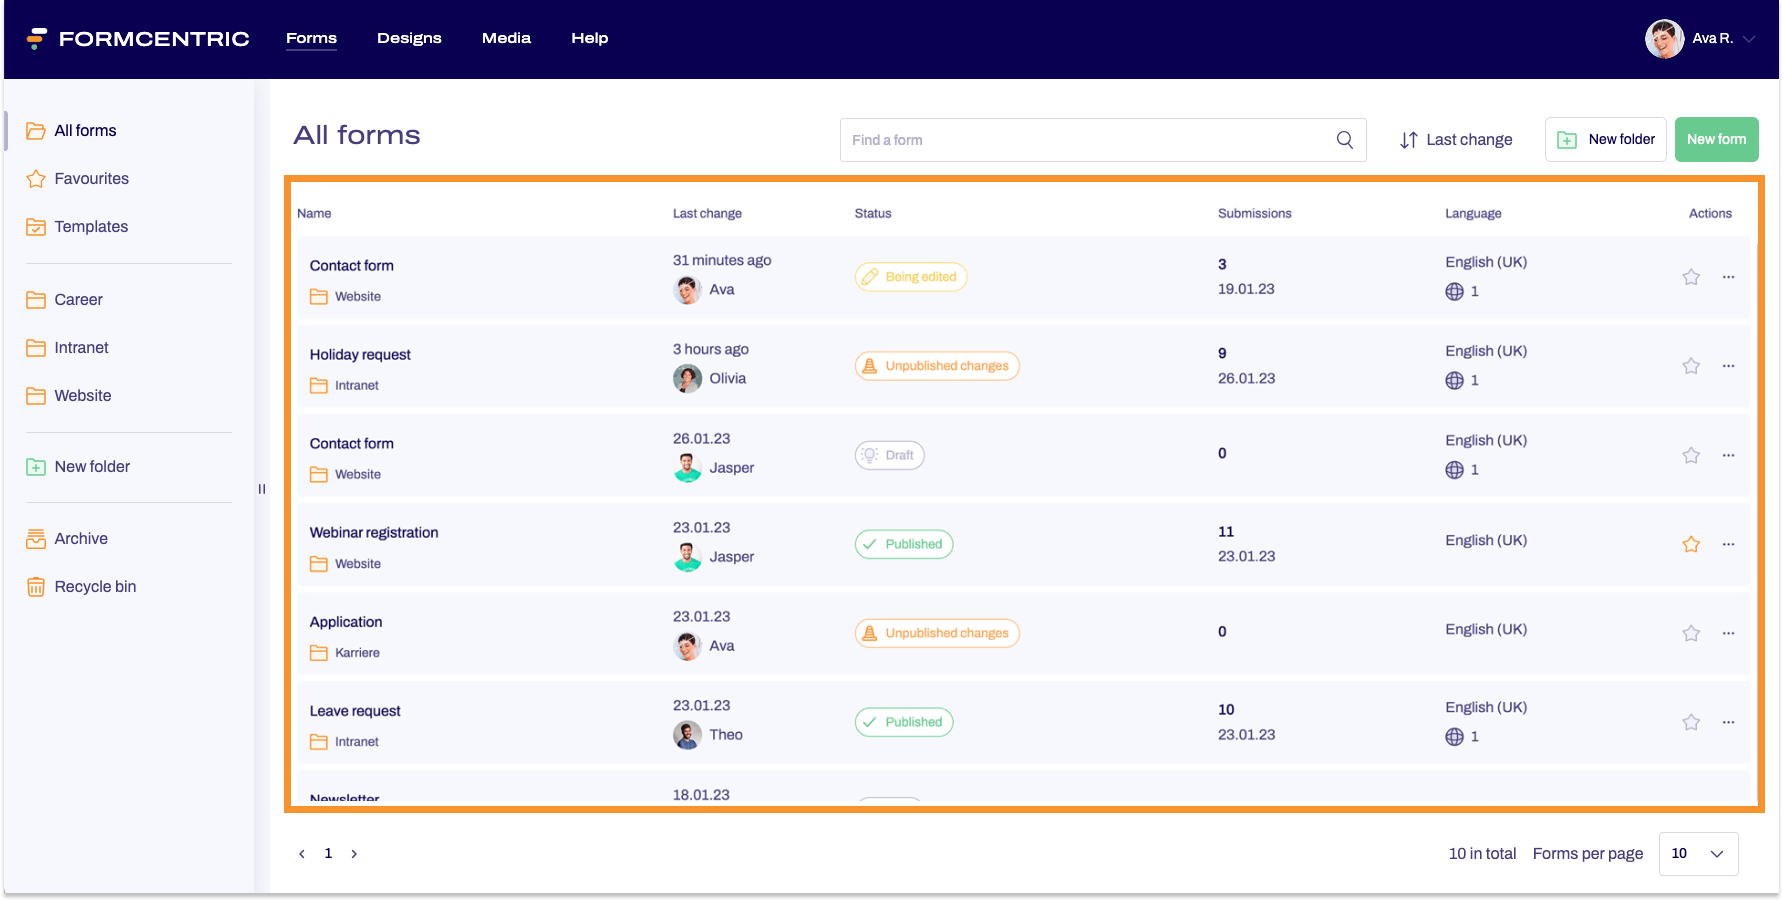
Forms overview
The middle area shows you all the forms from the folder you selected in the left sidebar.
This list gives you the following form details:
| Name | This displays the name of the form that you gave the form when you created it. If you click the name, this takes you to the Editor,where you can edit your form. If the form is located in a folder, then this name is displayed immediately under the name of the form. If you click the name of the folder, you are shown the forms that have been stored in this folder. |
||||
| Last change | The Last change column gives you details of when the form was last edited and by whom. | ||||
| Status | The status column displays the current status of the form. This status will be one of Draft, Being edited, Published or Unpublished changes. To find out more about statuses, see the article Possible statuses for a form. | ||||
| Submissions | The submissions column shows you how many times the form has been completed and submitted by your users. The date shown is the date of the last form submission. Click the submissions number to go to a view of all of the submissions. Learn more about submissions in the article Submissions area - an overview. | ||||
| Language |
This column shows you the language that the form was created in. If translations of the form are available, a globe icon with a number is also shown here. This digit indicates the number of available translations. If you move the mouse cursor over the globe icon, you will see which other languages are available and the names of these translated forms. To find out more about form translations, see our article Providing a form in several languages. |
||||
| Star | The star indicates whether the form is one of your favourites. If the form is a favourite form, this star will be coloured orange. Simply click the star to add the form to your favourites. If the star is coloured orange, click the star again to remove the form from your favourites. | ||||
| Actions | You can use the context menu link in the column Actions to access various actions for your form. Find out more about context menu link actions. | ||||
Context menu link - column Actions
You can use the context menu link to access various actions for your form.
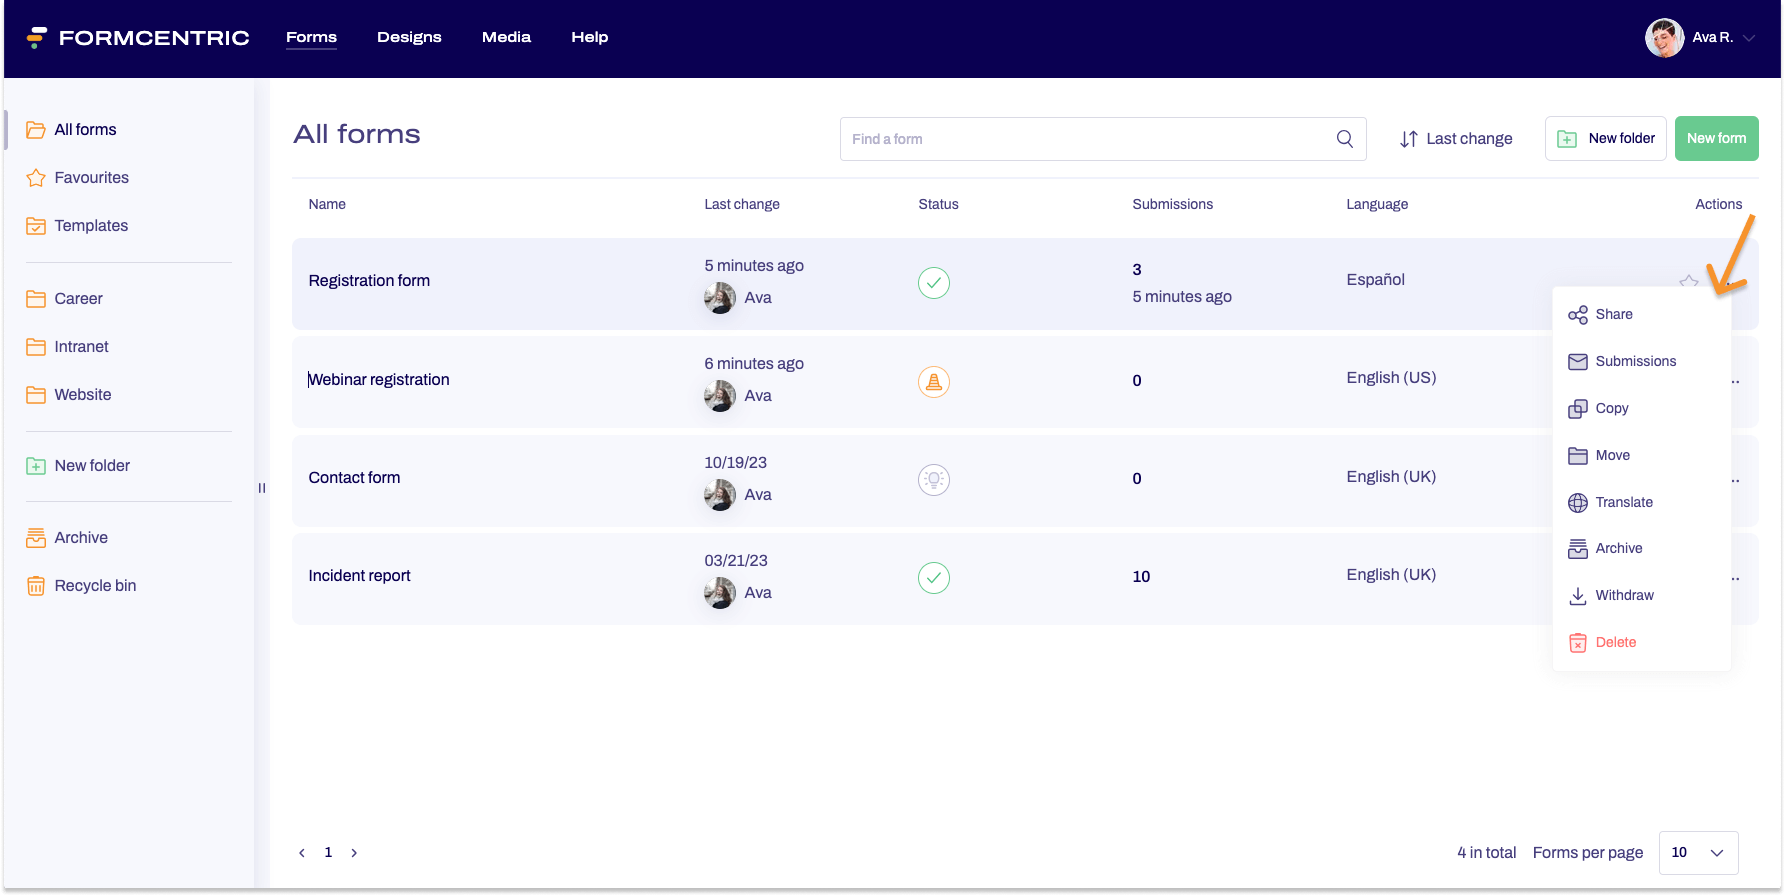
The following actions are available when clicking the context menu link:
| Share | When your form is finished and ready to be shown to the world, click Share to access the Share area. This area provides you with the link that you need in order to share the form or to embed it in a web page, for example. | ||||
| Submissions | Clicking submissions takes you to the Submissions area, where you can view the form input that your customers have submitted. | ||||
| Copy | The copy command lets you copy an existing form if you need a new form that is very similar to an old one. To copy the form, simply click Copy to create a duplicate, and so save yourself time and effort. Find out more by reading our article on Creating a new form. | ||||
| Move | If you need to store your form in a different folder – or perhaps a new one – click Move to move your form. | ||||
| Translate | Sometimes, you will want to store a form as a translation of an existing form. Or you might have a form that you want to assign to this form as its translation. To do either of these things, click Translate. | ||||
| Archive | If you have a form that you don’t need right now but do not want to delete, then you can archive the form and restore it later if you need to. To archive your form, click Archive. The form is now stored in the standard system folder Archive. Find out more by reading our article on Archiving forms. |
||||
| Publish | To send someone your form or embed it into a web page, you first need a link. To generate this link, the first step is to publish your form. To do this, click Publish. Find out more by reading our article on Publishing a form. |
||||
| Withdraw | Click Withdraw to deactivate a form that is currently live. | ||||
| Delete | If you have a form that you no longer need, you can delete it – which puts it in the recycle bin. To do this, click Delete. To find out more, see Deleting a form. |
||||


