Providing forms in several languages
Last updated:
If you’re looking to add more languages to an existing form, Formcentric makes this easy to do.
In Formcentric, you can create translations of forms so that users are automatically provided with the form in the language set by their browser.
If you add a translation, then a copy of the form is created. Unlike normal copies, however, Formcentric links the translations together. The translations of a form go hand-in-hand and make up a single unit. When the form is accessed, Formcentric provides the translation that matches the configured browser language.
If no translation is available for a particular browser language, then users are provided with the form in the language that you have set as the default language for the form.
Creating translations
There are various ways you can create translations: either directly when you are creating a new form or afterwards, in the Forms and Settings areas.
Creating a new form as a translation
When you are creating a new form, you can create it as a translation of another form.
To do this, proceed as follows:
- Click Forms on the top menu bar.
- Then click New form at the top right of the screen.
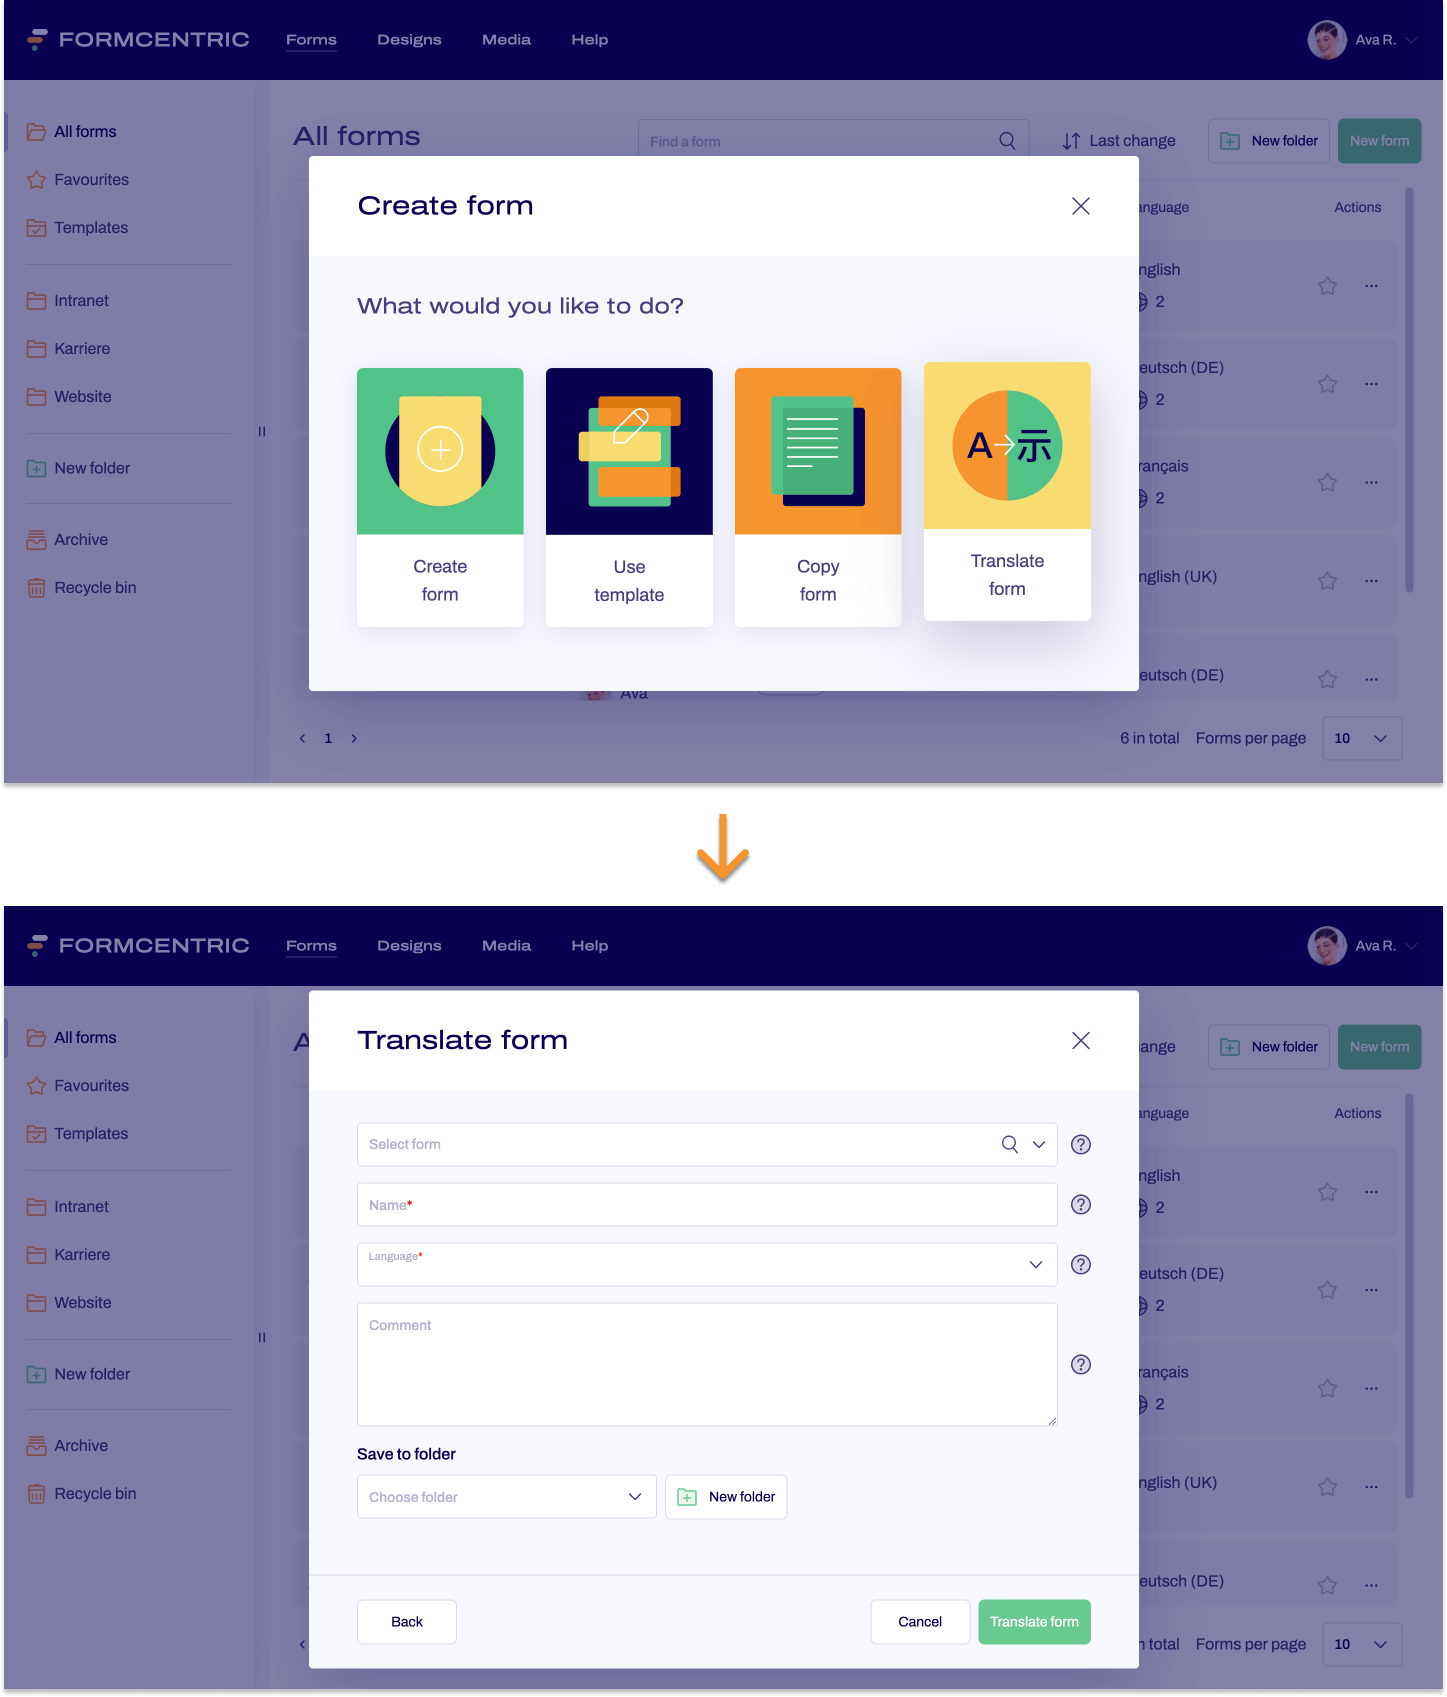
The Create form dialog window appears. - Click Translate form.
The Translate form dialog window appears. - In the field Select form, select the form for which you want to create a translation.
- Enter the name for the translation in Name and select the new language under Language.
- Optional: You can also include a comment for the translation in the Comment field. This is used only internally. This gives you a single point of storage for notes for form editors, for example, which are then always accessible.
Comments are shown in the General section of the Settings for the form. - Optional: Select the folder to save the form into. You can also create a new folder, as required. For instructions, please see this link.
Whether or not you save the form to a specific folder, you can always find your new form by following the menu path Forms -> All forms. - To finish creating your form, click Translate form.
You have now created a translation for your selected form. This form is now opened in the Editor, so that you can start editing straight away. Translate the form as required, and make the necessary changes for your target language, such as adjustments to phone and address fields, for example. The form is not publicly accessible until you publish your form.
Creating translations in the ‘Forms’ area
You can also create translations in the Forms area.
You have the following options here:
- You have the option of linking together forms that you want to use as a translation of each other and storing these in the system as translated forms.
- You can create a new translation for any form in this area.
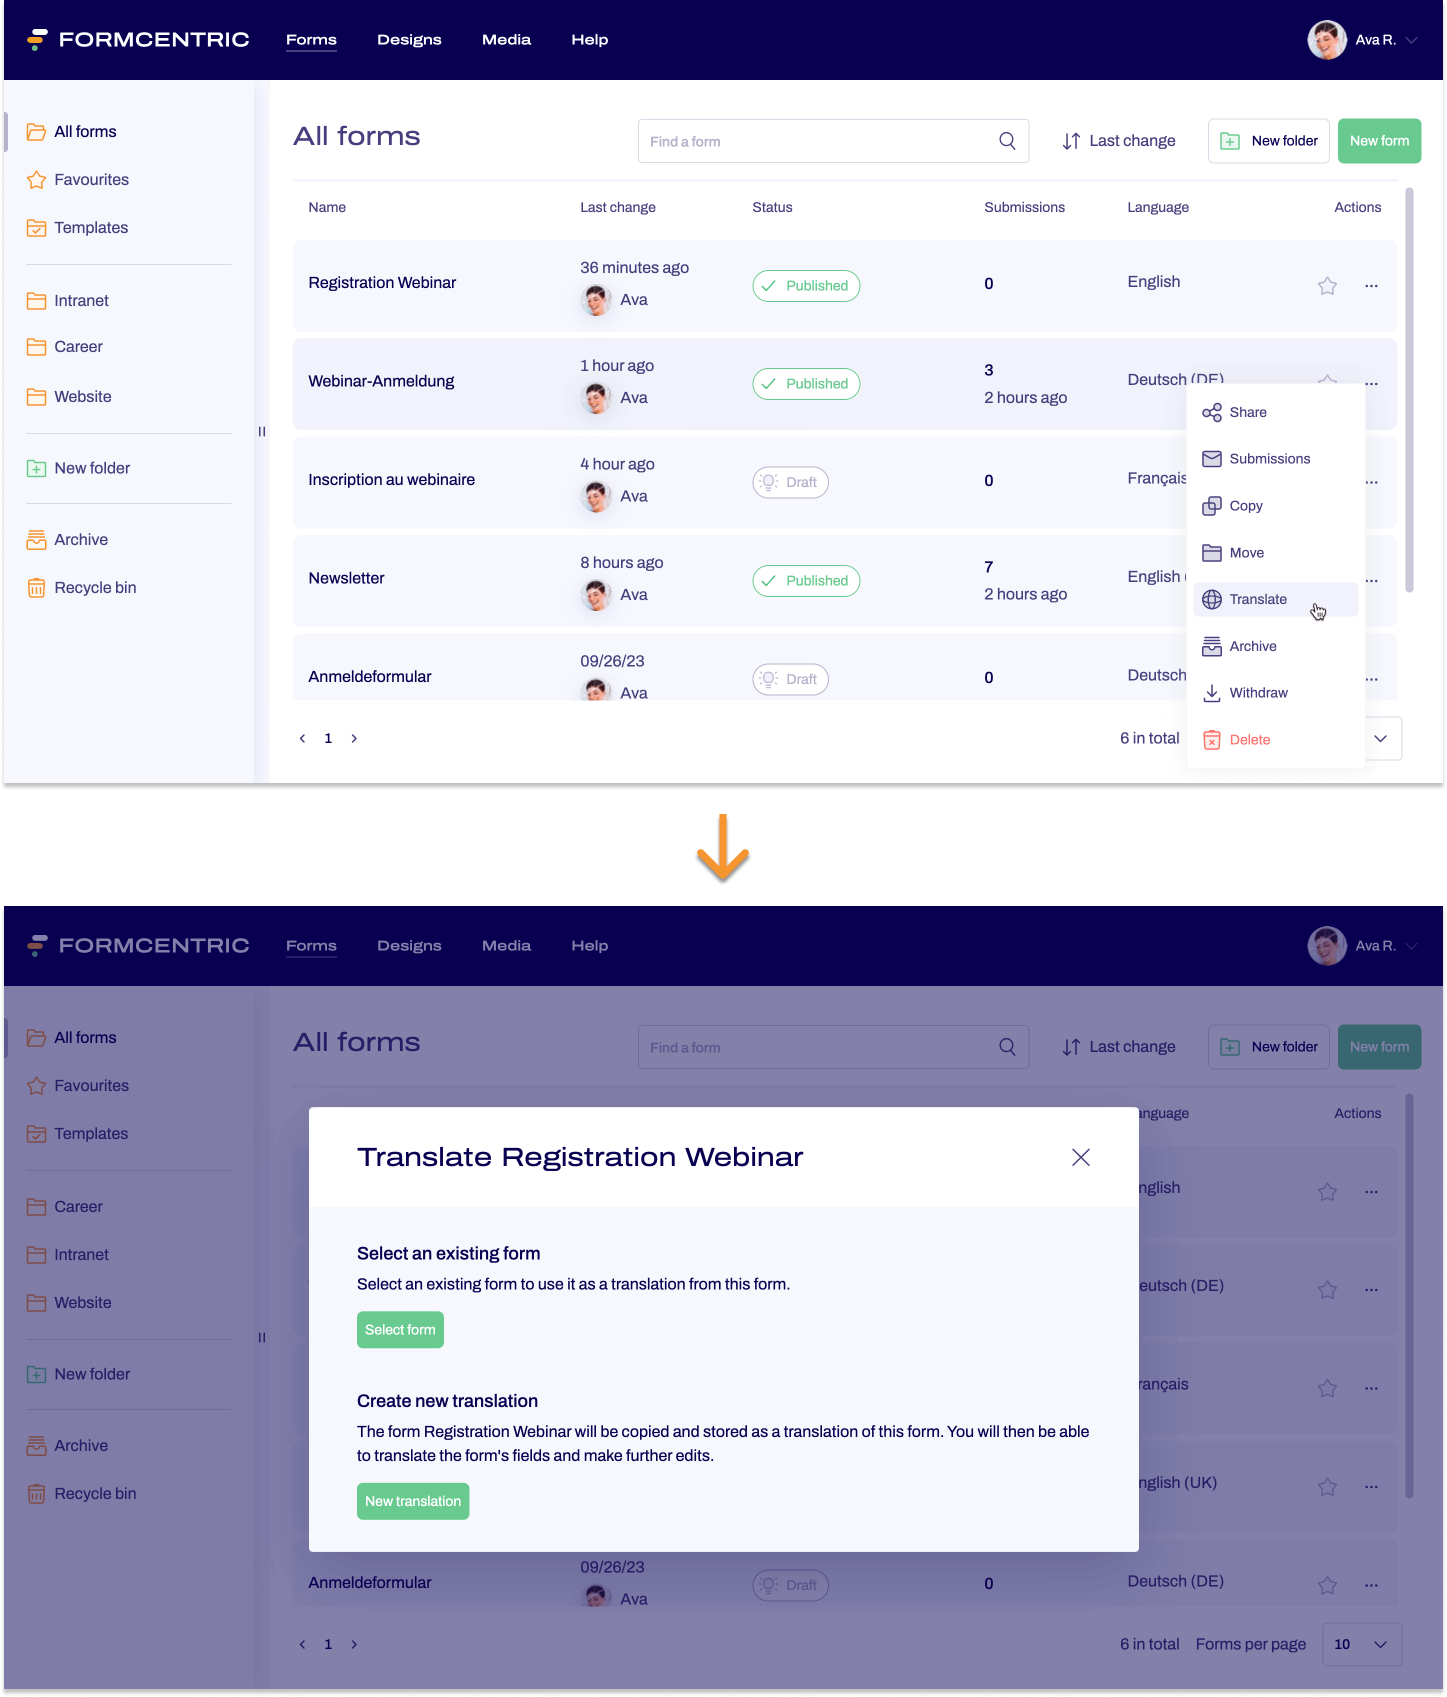
- Click Forms on the top menu bar.
- Find the form that you want to link as a translation of another form or which you want to translate.
- Click the context menu link under Actions.
A context menu appears. - Click Translate.
A dialog box appears. - Make your selection:
Select an existing form:
The form will be stored as a translation of another, already existing form. In the next step, you select the corresponding form and confirm your selection.
Create new translation:
A new translation of the form will be created.
In the next step, you fill out all of the necessary information and then click Translate form to confirm.
Creating translations in the ‘Settings’ area
You also have the option of creating translations in the Settings area.
You have the following options here:
- You have the option of linking together forms that you want to use as a translation of each other and storing these in the system as translated forms.
- You can create a new translation for any form in this area.
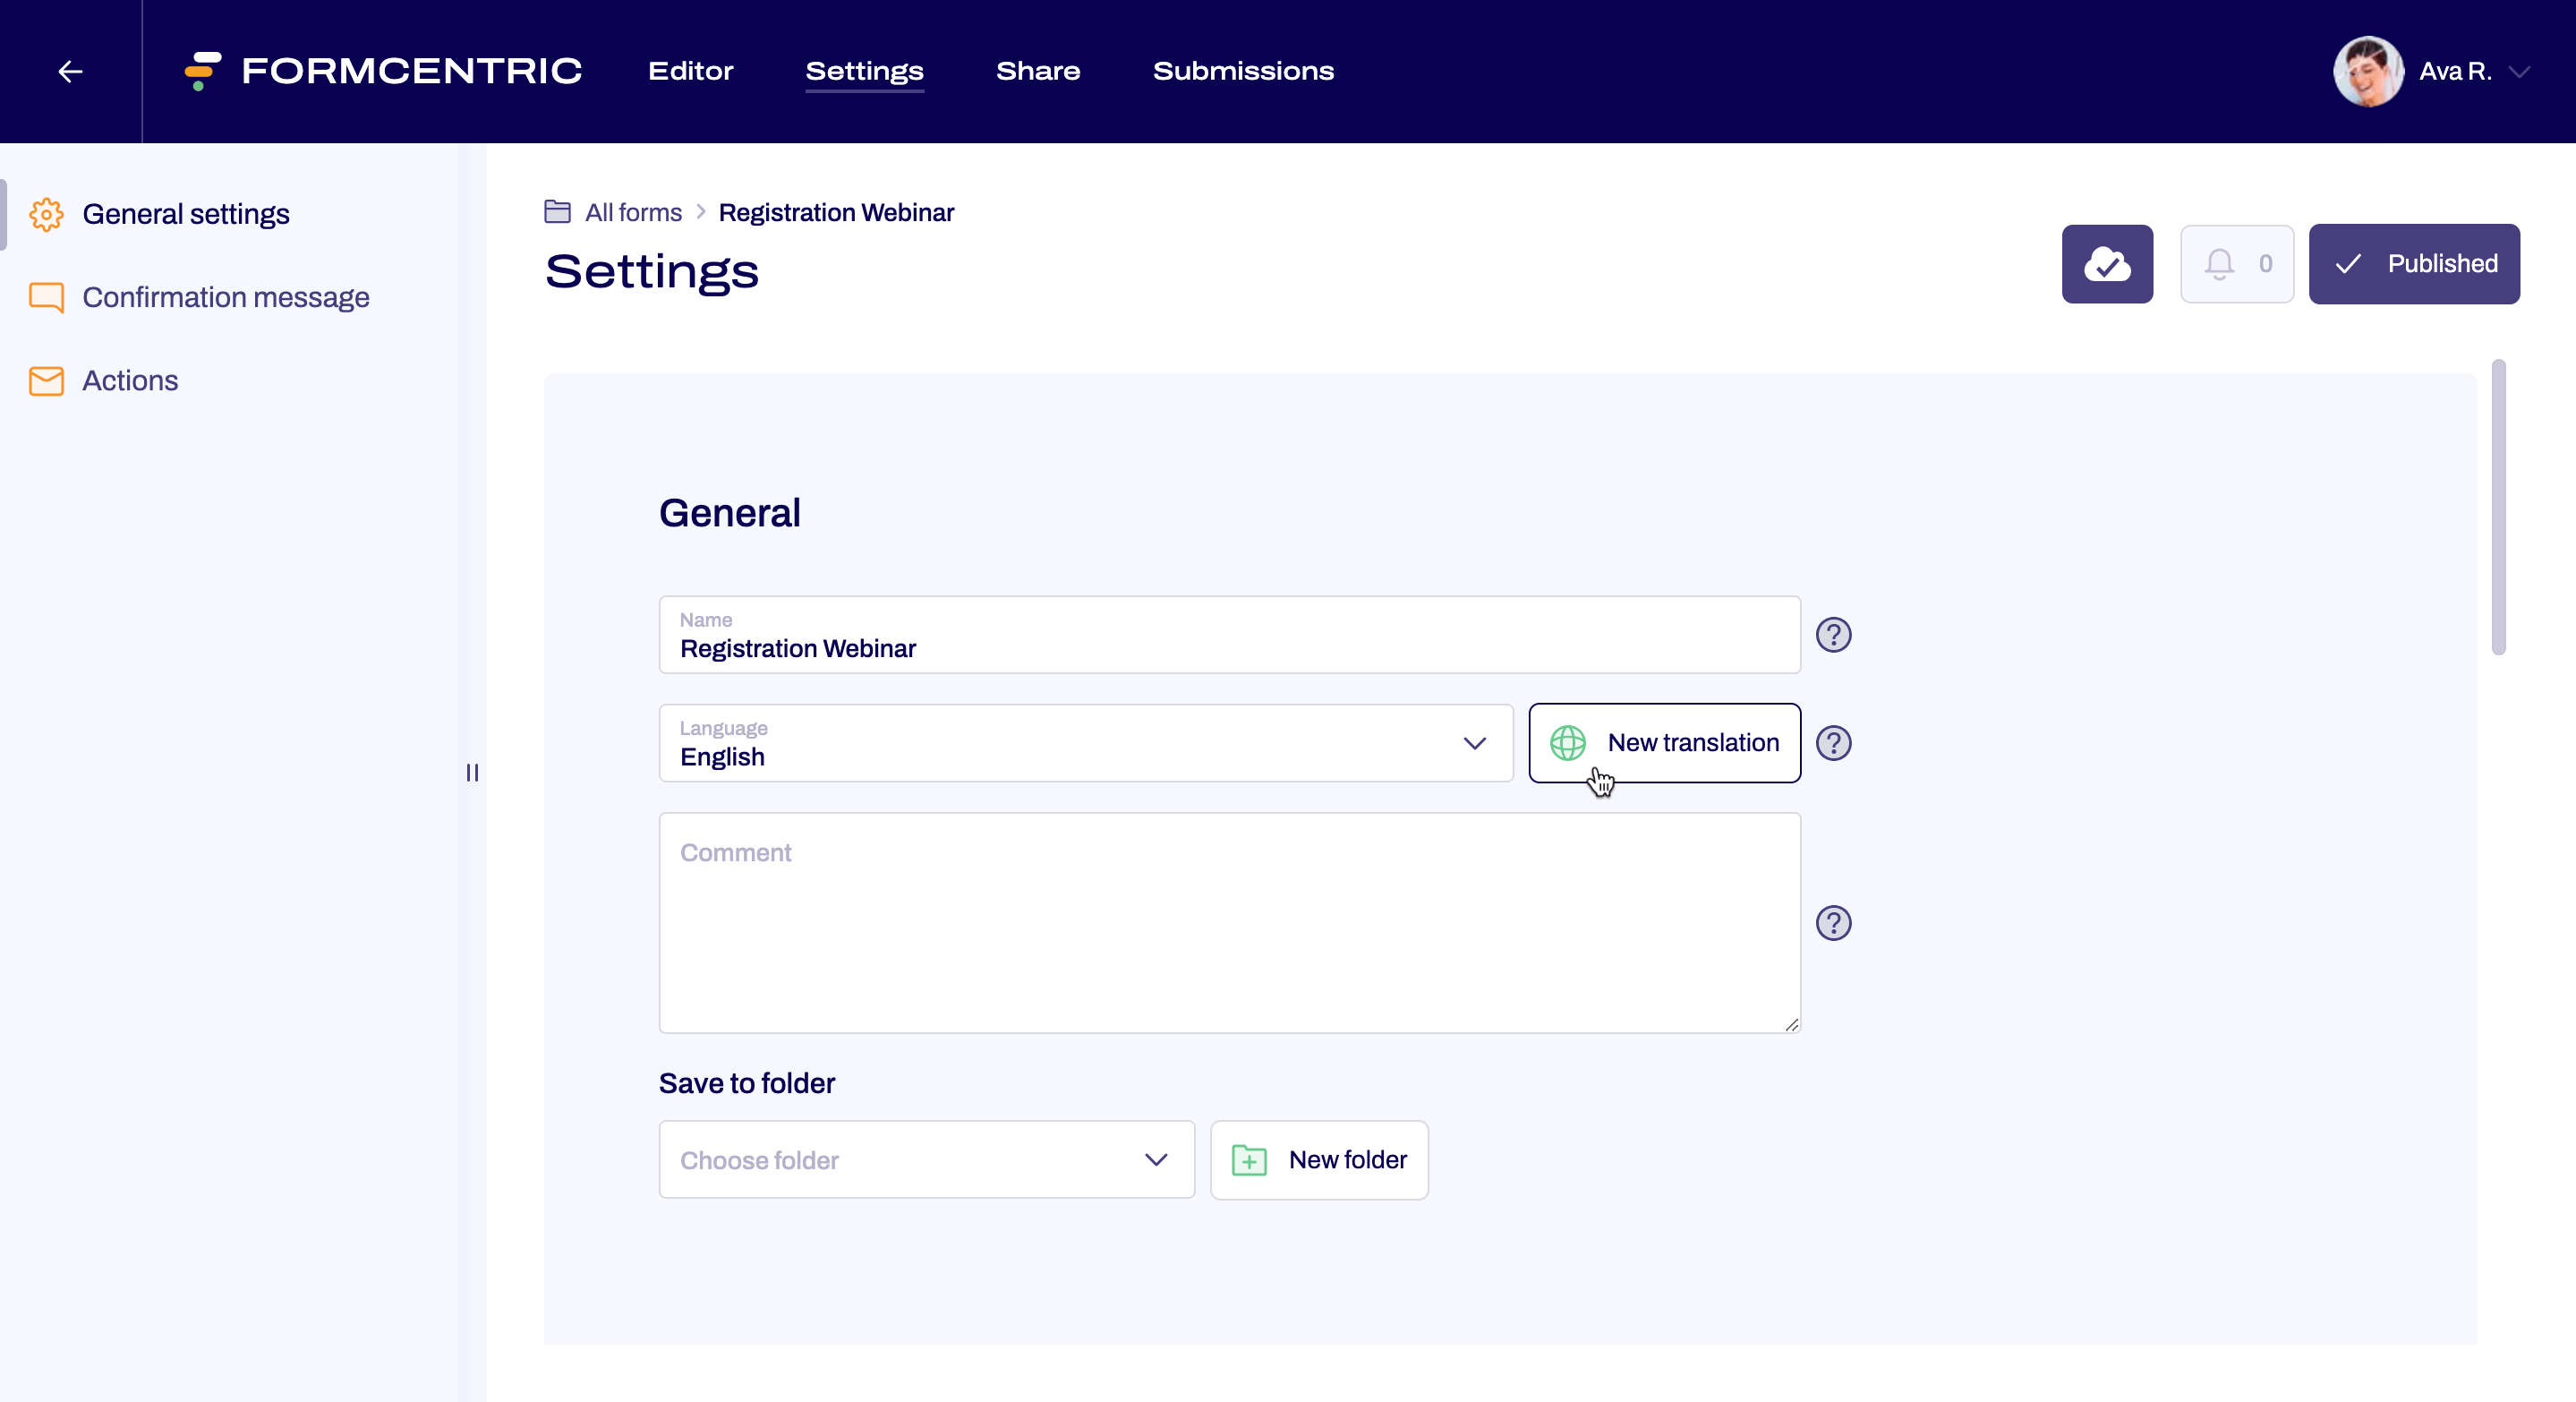
- Click Forms on the top menu bar.
- Find and open the form that you want to define as a translation of another form.
- Click Settings on the top menu bar.
- In General, click New translation.
A context menu appears. - Click Translate.
A dialog box appears. - Make your selection:
Select an existing form:
The form will be stored as a translation of another form. In the next step, you select the corresponding form and confirm your selection.
Create new translation:
A new translation of the form will be created.
In the next step, you fill out all of the necessary information and then click Translate form to confirm.
Forms with translations
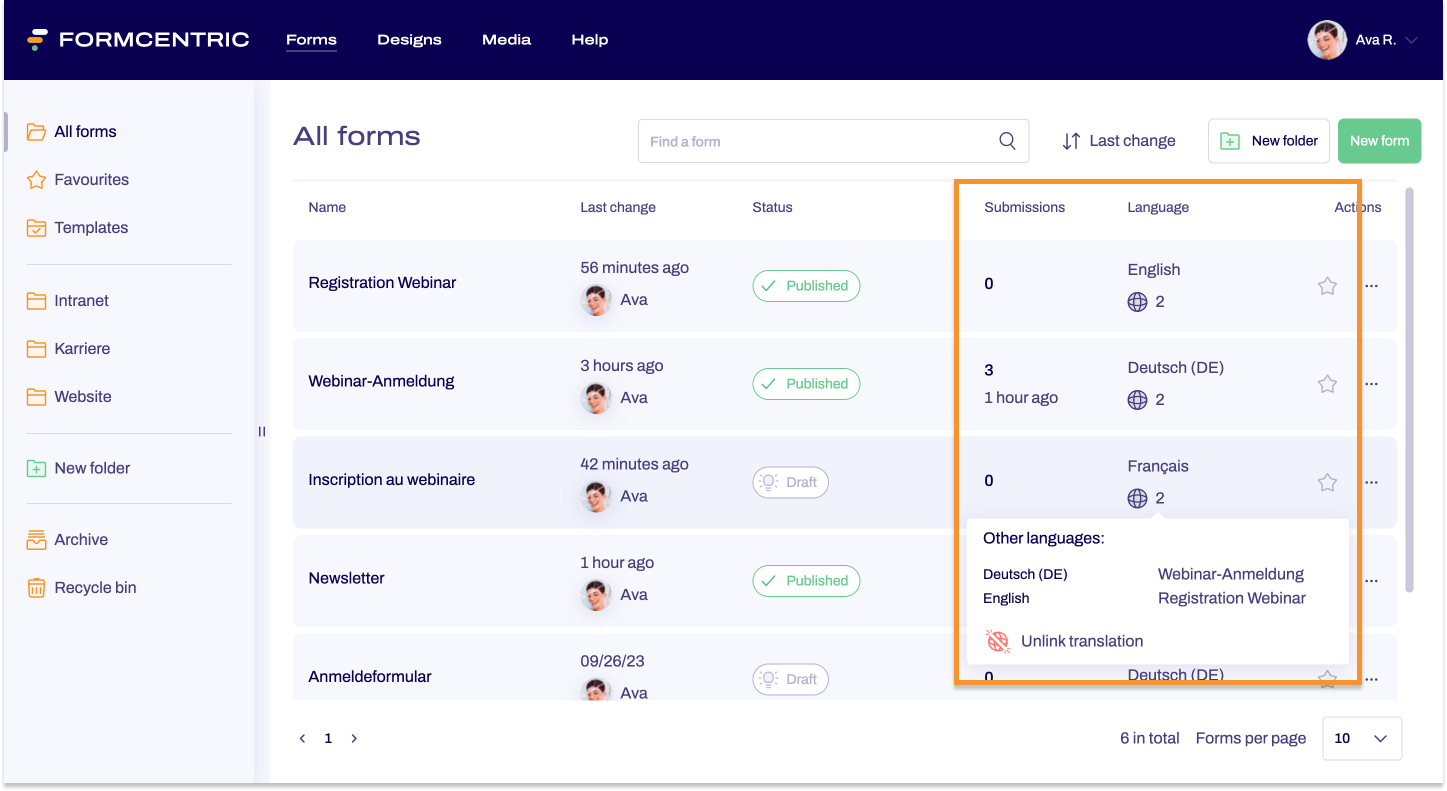
Once you have created a translation of a form, the form will be shown as a form in the Forms overview area. As with all forms that are not in the recycle bin or the archive, you can find the form in the standard All forms folder and also in the folder that you selected or created when creating the translation (if applicable).
So how can you find out whether or not a form has translations available?
Once a form has at least one translation, a globe icon with a number is then shown under Language in the overview. This number lets you know how many translations are available for the form.
If you move the mouse cursor over the globe icon, you will see the names and languages for these translations. Click the name of a translation to open this translation in the Editor.
Editing translations
Although translations of a form are linked together, they are still independent forms. If form content changes, this means that you will need to edit and change each translation individually.


