Condition
Last updated:
You use the Condition form element to create a form that responds to user input. This turns your form into a dynamic form. As a result, you can have the form show form elements to the user only if these are relevant, for example, while form elements that are not relevant are hidden.
You can also control other states of form elements with conditions: optional fields can become required, active elements can be disabled or set to read-only.
If a certain condition is fulfilled, you can also specify that entire form pages should be skipped or that an input field becomes a required field. By using conditions, you can ensure that the forms you create remain clearly structured and adapt dynamically to the needs of your users.
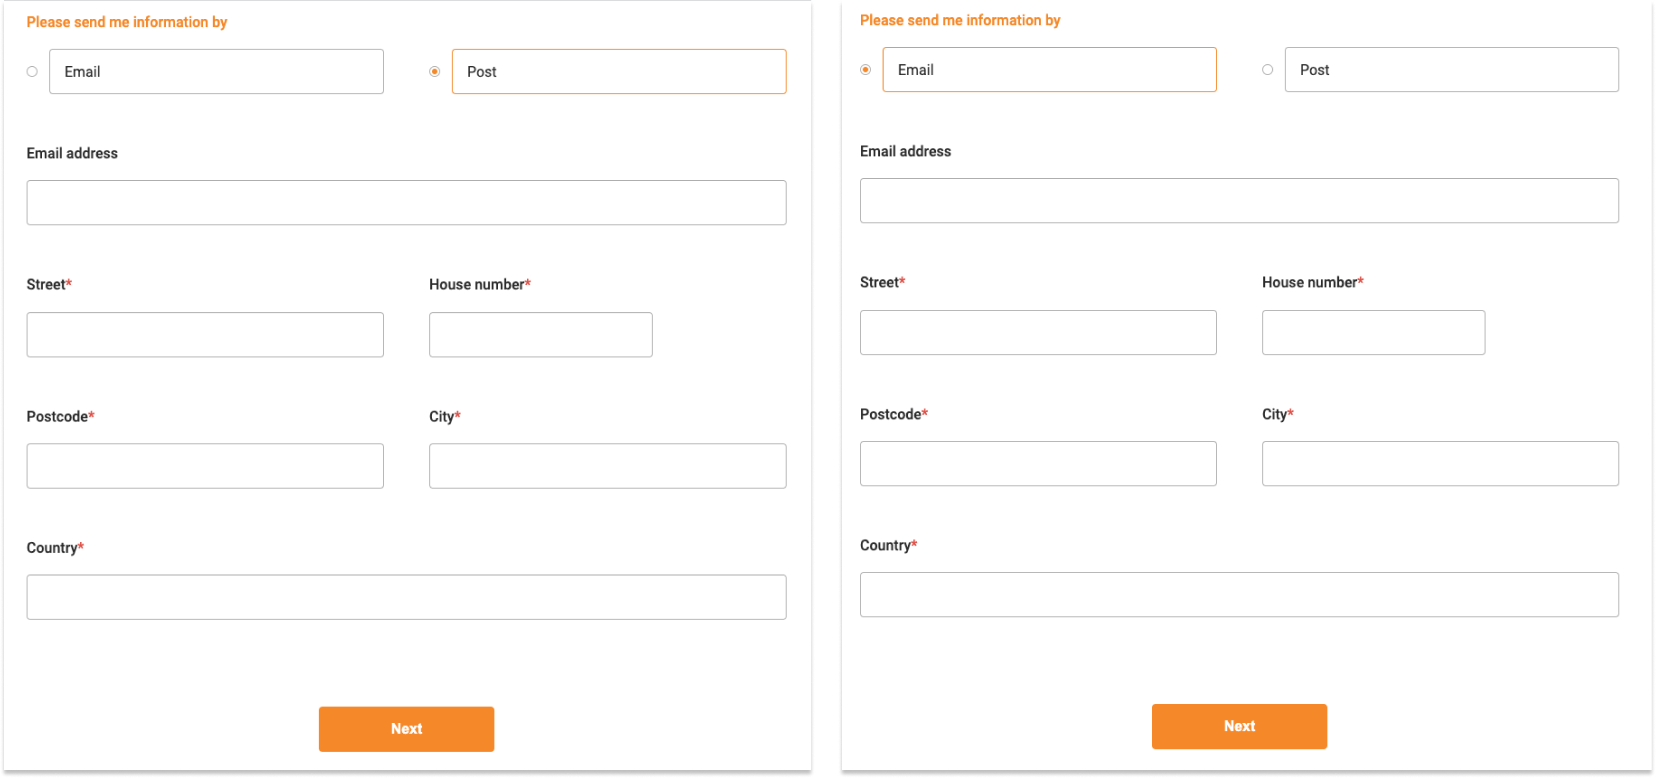
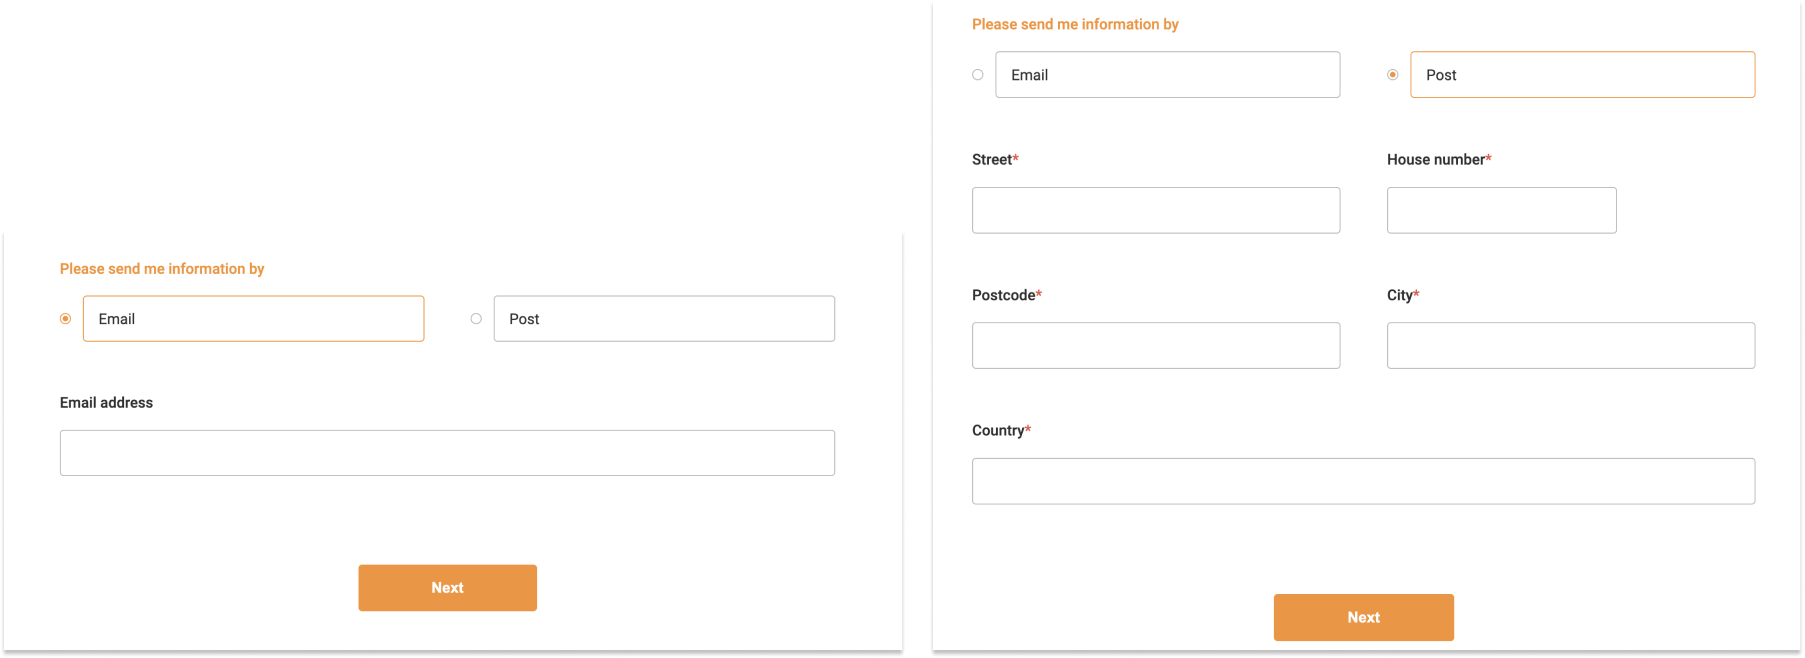
For example, you might be creating a form that asks users whether they want to receive more information about your product by email or post. If they want to receive this information by email, you do not need to ask them for their address details. If a user chooses ‘post’, however, form elements are then shown for entering the details of their postal address. How these address elements behave therefore depends on the input made in other form elements.
Without conditions, the form would simply show all of its form fields all the time. Whether or not your users select the email or post option, this would not affect what is shown in the form.
In the screenshots that follow, you can see the same form with conditions. Here, users are only shown what is relevant for them.
How it works
- First, create the complete form, with all of the fields and options that you may need – even if these will not be relevant for all your users.
- You then create the conditions.
Adding Condition
- In the Structure area, click the green plus sign.
- Navigate to General →Page elements and click Condition.
You can now see the form element you’ve just added in the form tree. - On the right, under Edit Condition, you can now adjust the settings for your new form element as required.
Setting the trigger and outcome
This section shows you how to specify the criteria that need to be fulfilled to trigger a condition and the action or outcome that should then result.
Specifying an If trigger for conditions
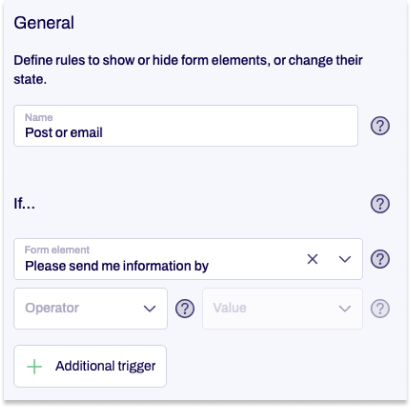
Under the If section, select the form element and the criterion that needs to be met so that the action in the next section under Then is accordingly triggered.
- Give the condition a name.
- In the Form element drop-down field, select the form element that will be used as the trigger for the condition.
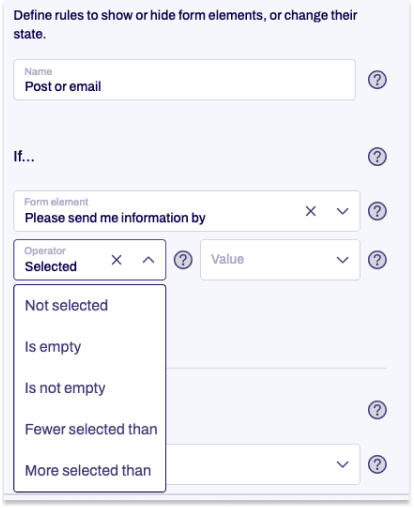
- In the Operator drop-down field, select the operator for the trigger. Which operators are available here depends on whether you selected a text field (e.g. an input field) or a selection field (e.g. a single choice field) in the If section.
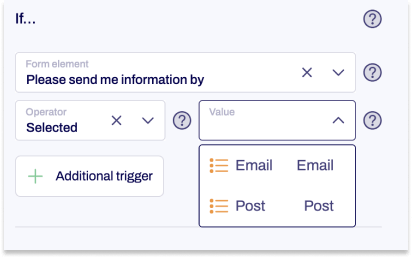
- For Value, you can either enter values or select options, depending on whether you picked a text field or a selection field under Form element. Enter a value or pick an option that will be used as a reference by the selected Operator.
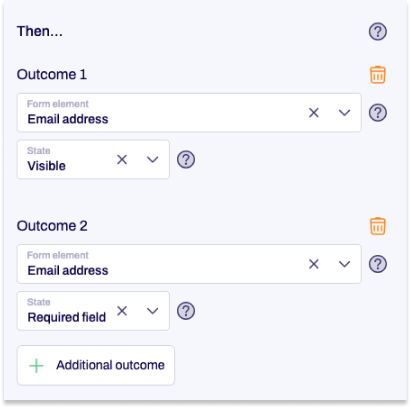
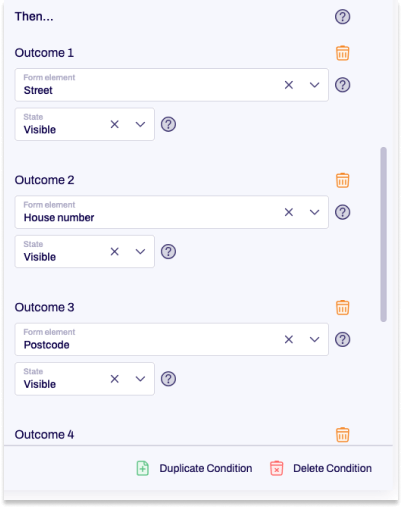
Specifying a Then action for conditions
Under Then, you specify which action is carried out when the criterion specified under If has been met.
- In the Form element drop-down field, select the form element that will be referenced by the state that you have specified in the If step. Then click State and select the action that should be carried out when the condition is fulfilled. If necessary, you can also specify another Outcome for your condition.