Calculated value
Last updated:
You use the Calculated value form element to calculate a value from the input that the user enters into a form.
Adding Calculated value
- In the Structure area, click the green plus sign.
- Navigate to General →Advanced and click Calculated value.
You can now see the form element you’ve just added in the form tree. - On the right, under Edit Calculated value, you can now adjust the settings for your new form element as required.
Property |
Description |
||||
| Label | Enter a label, which is shown in parts of the form like the Summary, for example. | ||||
| Technical name | Each form element that is added to a form is automatically assigned a unique name – known as the ‘technical name’ – by Formcentric. This name is based on the designator for the form element. Alternatively, you can generate the technical name from the label. To do this, click New from label. Find out more about the technical name. |
||||
| JavaScript | Inside the JavaScript function brackets calculate(), enter the JavaScript code for calculating the value. This JavaScript function calculate() is executed every time that users switch pages in the form or click the submit button. | ||||
| Display variant | You can use this to add a CSS class from the website that you will be embedding the form into. The CSS class chosen here will be applied to the form element. Or you can pick one or more display variants to be applied to the form element. The article Custom display variants explains how to define your own display variants. |
||||
| Show value in form | Check Show value in form to have the result of executing the JavaScript code, i.e. the calculated value, displayed in the form. | ||||
| Recalculate value in browser immediately | Check Recalculate value browser immediately to have the value recalculated as soon as users have entered all of the relevant input that the JavaScript code requires in order to perform its calculation. Do not check this box if the value should only be calculated once users switch to the next page in the form or submit the form. |
||||
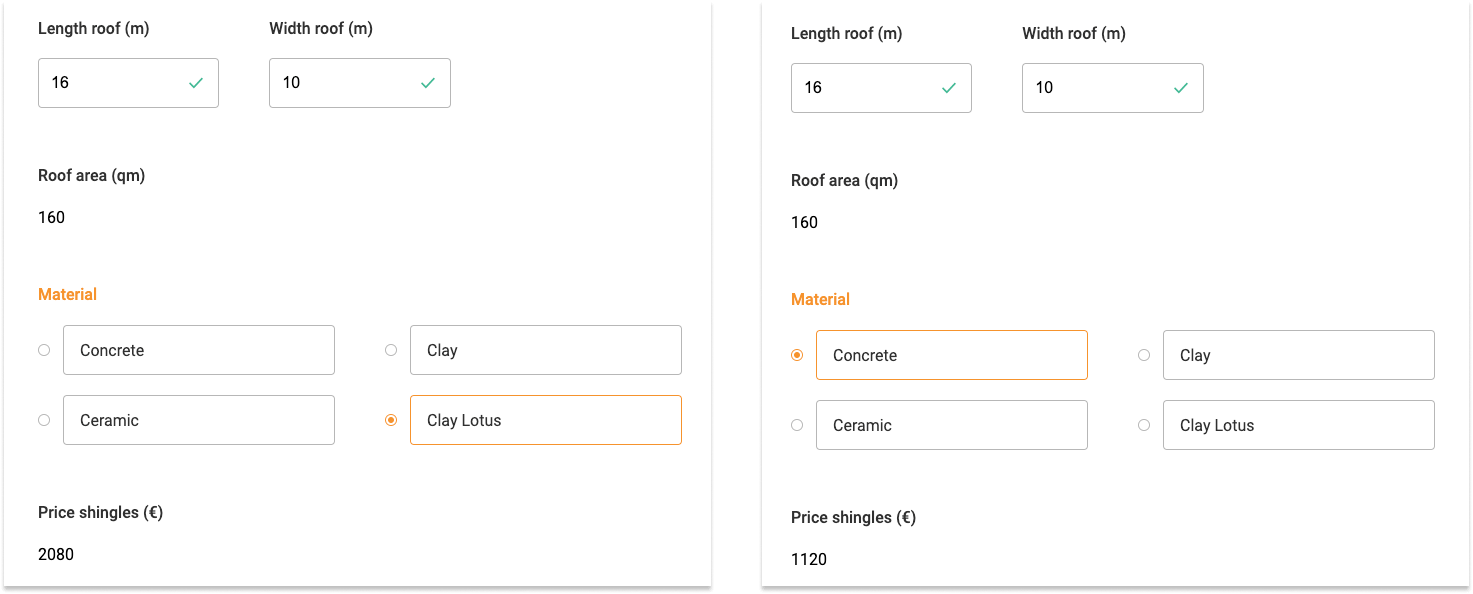
Using calculated values to produce a cost estimate for roofing shingles
Let’s now return to the example we described at the outset. The idea is to calculate the price for the roofing shingles. This price depends on the roof area and the material selected. In our example, the user has a single-pitched (shed) roof. Only the shingles for the roof area itself are calculated: special tiles like ridge and bargeboard tiles are not considered here.
- The first step is to calculate the roof area (technical name: roofarea). To do this, two form elements are required, in which users will enter numbers for the length (technical name: length) and width (technical name: width) of their roof. Suitable fields here include the Input field as well as the predefined form element Number.
- In a second step, we add the calculated value form element.
The following JavaScript snippet is used to calculate the roof area (roofarea) automatically once users have entered values for the length and width of their roof: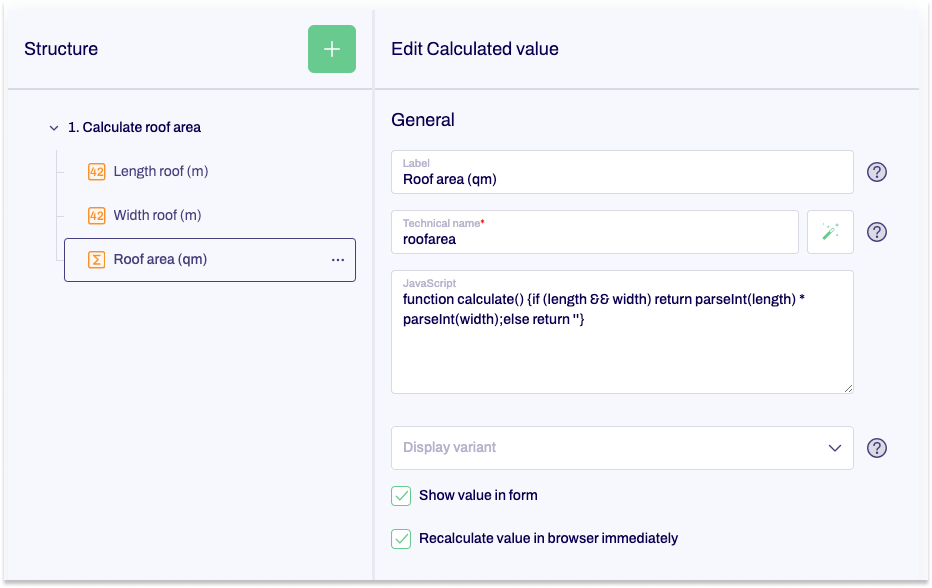
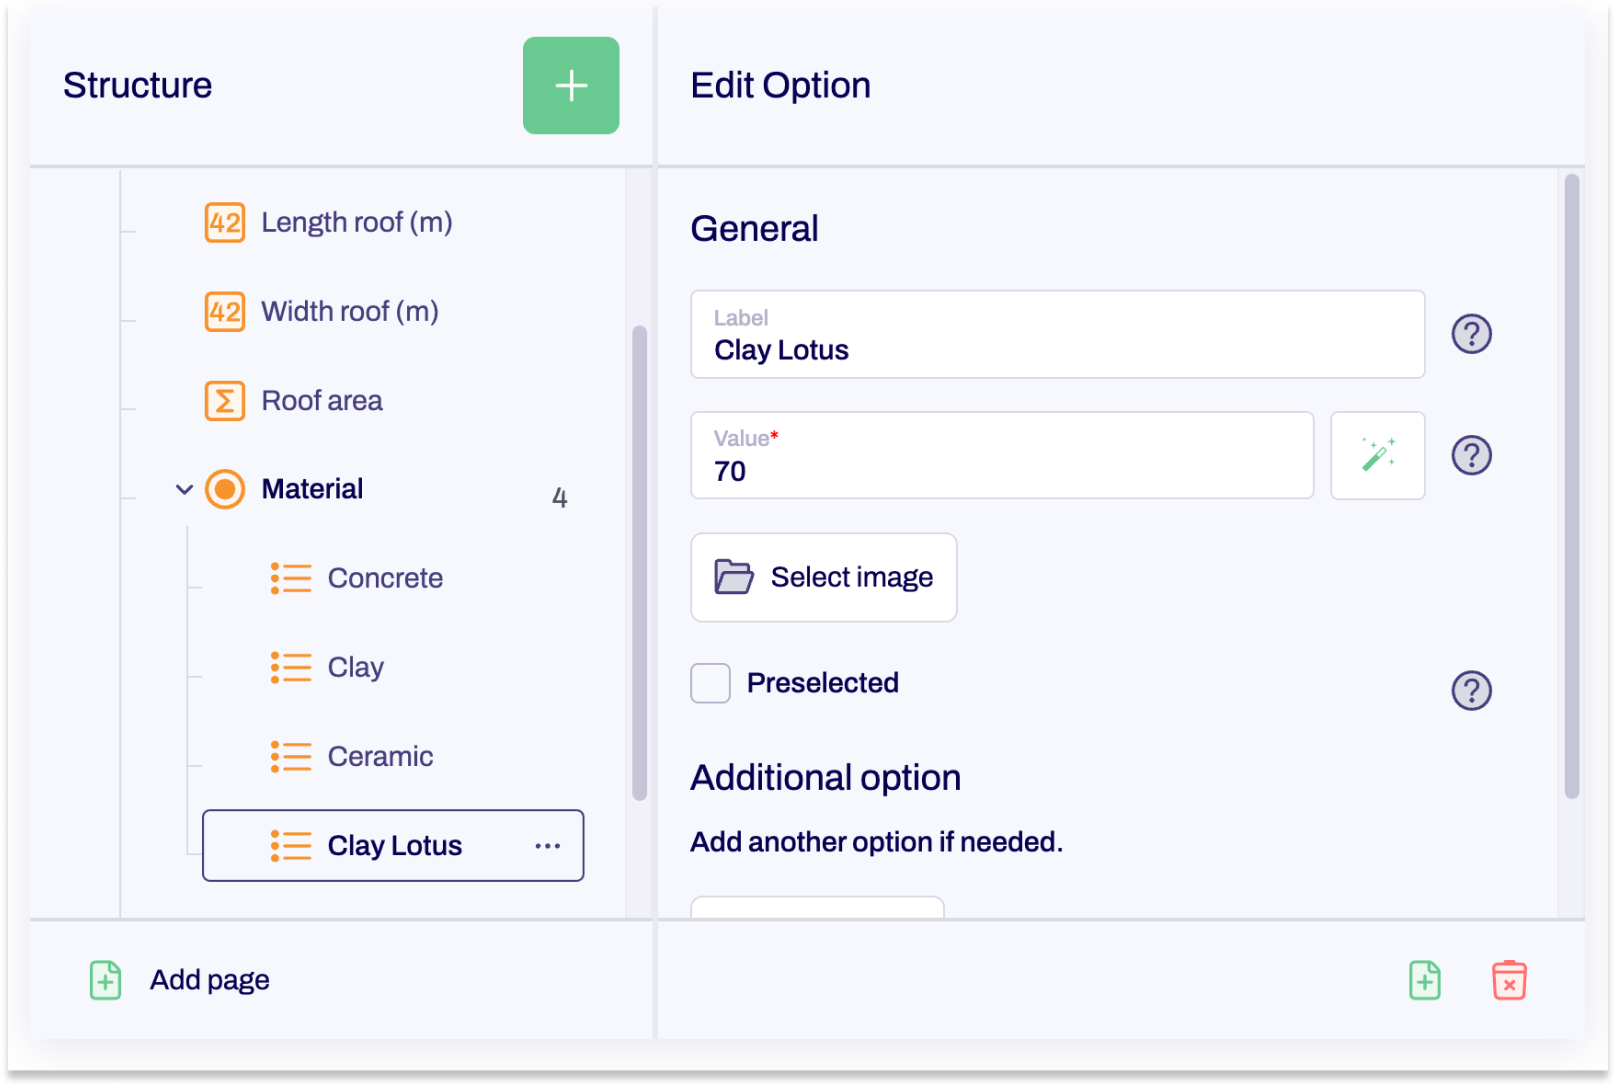
- For the next step, we need a single choice field (technical name: material). The various prices are stored as values for the options here.
- Next we add another Calculated value element. The following JavaScript code is used to calculate the price, as soon as users have entered the length and width and selected a material:
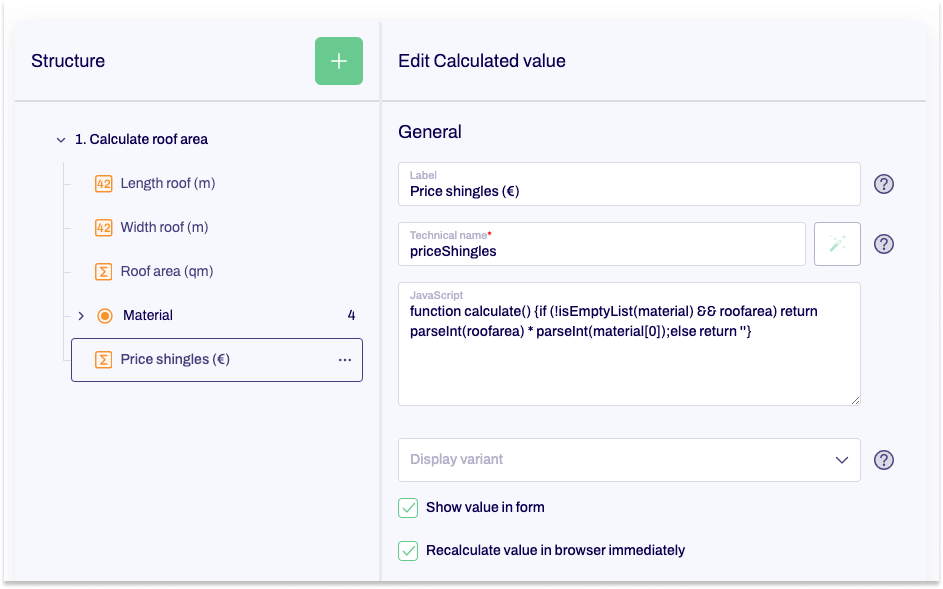
The price updates automatically when users change a value or select a different material.